Homemade Crescent Rolls
54 Comments
Posted: 12/10/18
This post may contain affiliate links. Please read our disclosure policy.

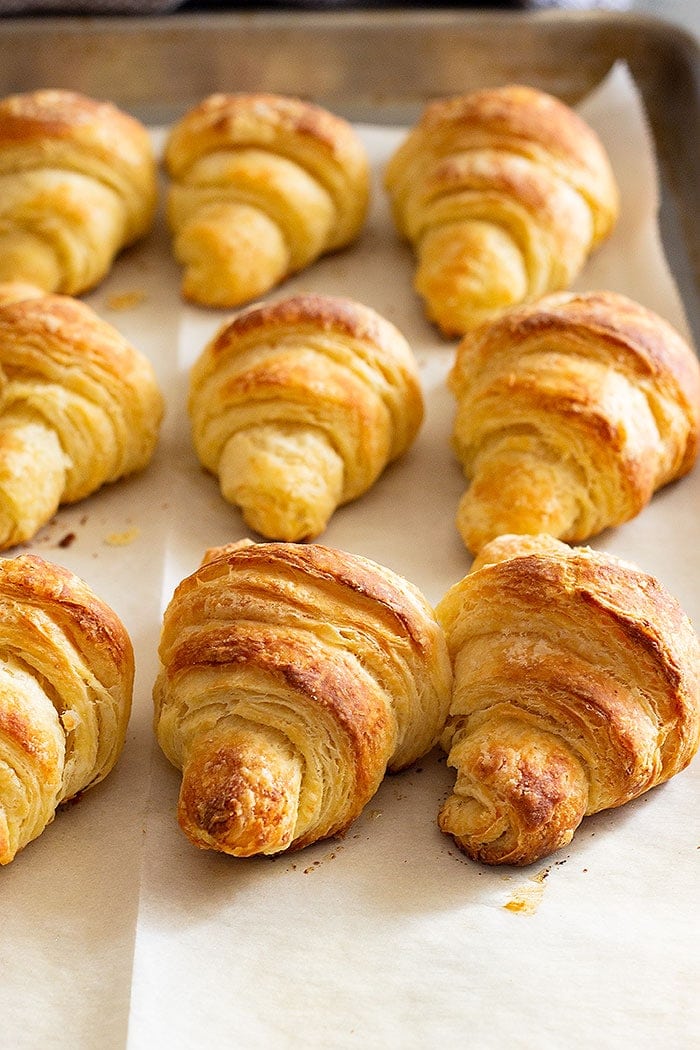
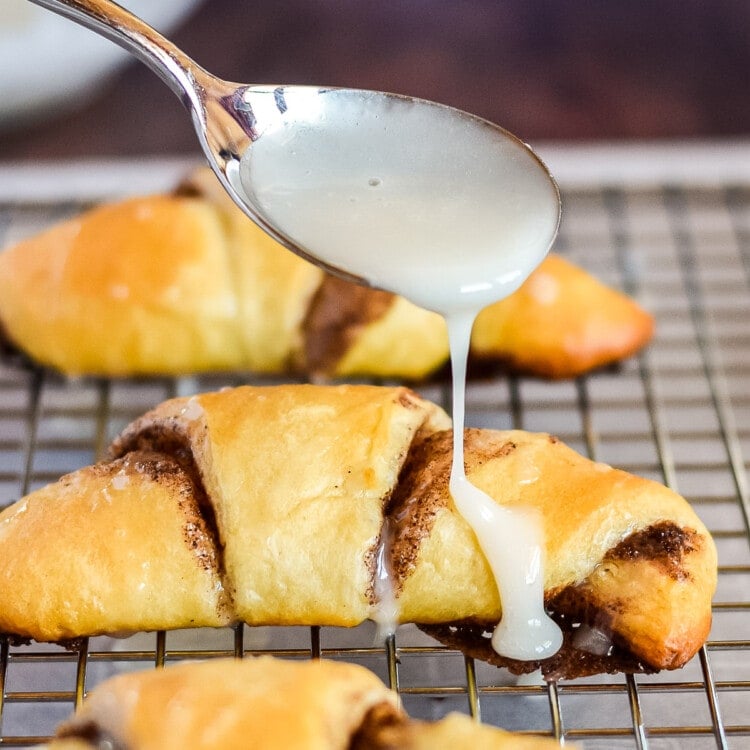
These Homemade Crescent Rolls will become a staple at your dinner table. They are easy to make, flaky, tender, and take much less time to make than croissants! Plus, they aren’t as hard or as labor intensive as one might think. They are the perfect side dish recipe to your holiday dinners. Don’t forget to buttery these warm rolls with butter!
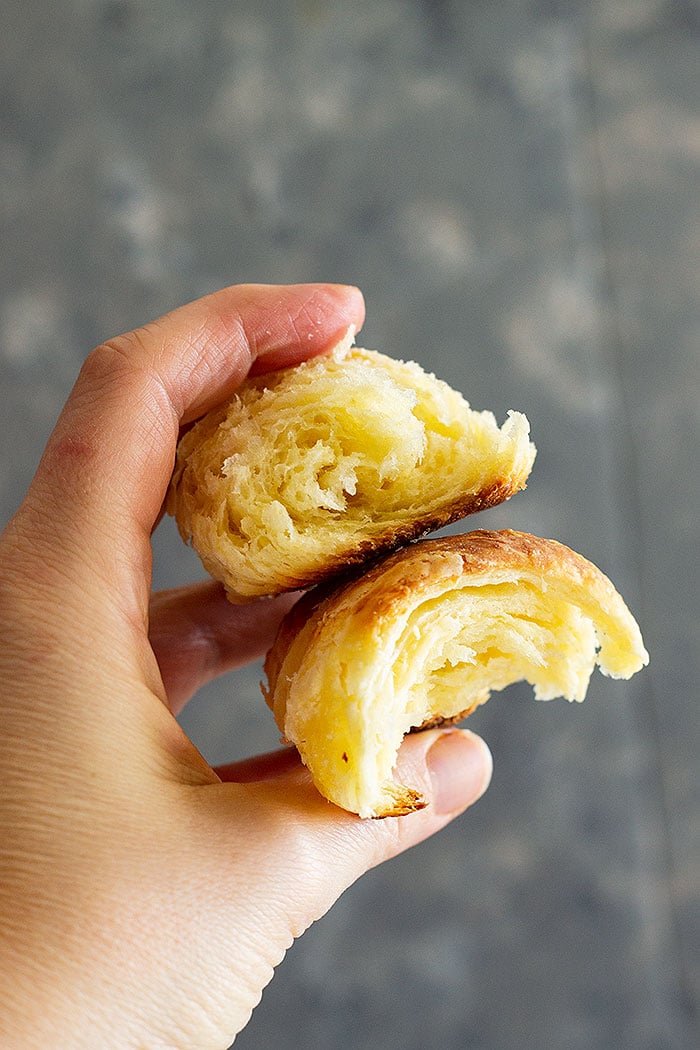
Are you looking for a flaky crescent roll that’s easy to make?? Then this recipe is for you! Most crescent roll recipes produce what I call a regular roll in crescent shape. There aren’t any flaky layers like what you get from that can of crescent roll dough from the store. So I used my regular dinner roll recipe and put my biscuit technique to use. It gives lots of flaky layers so why not with yeast dough.
I grew up on the store-bought crescent rolls as a side dish at many dinners during my childhood, but after I made this recipe I will never go back to the store-bought variety! I feel these same about pizza dough too. After trying my homemade pizza dough, I can never go back to store-bought!
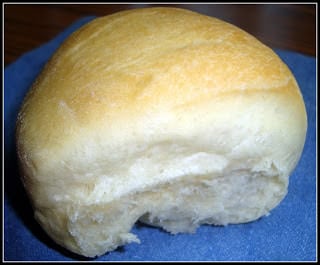
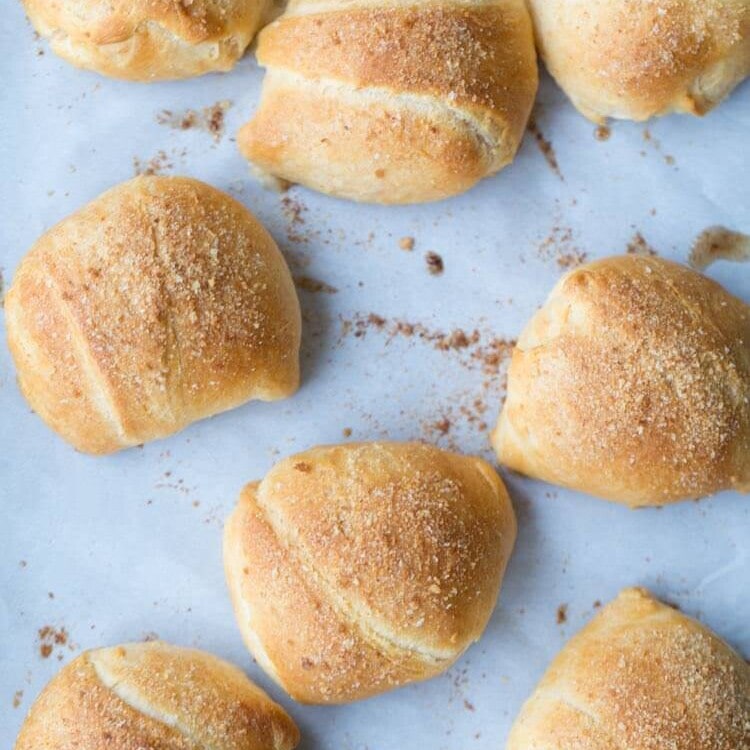
These homemade rolls are what dreams are made of. Of course, I like to lather the butter on these warm, flaky rolls!
Contents
show
Ingredients Needed
- All-purpose flour
- Sugar
- Yeast
- Salt
- Milk
- eggs
- butter
How do you make flaky crescent rolls from scratch?
First of all, remember it’s easier than you think! You are not making croissants.

- Mix Dry Ingredients – You will start by mixing all the dry ingredients in a large bowl. (Photo 1) Then cut in COLD butter (I like to put mine in the freezer for a little while to make sure it’s extra cold). (Photo 2) As I mentioned earlier use a pastry cutter to do this so the chunks of butter don’t get too small. Just look for chunks a little larger than peas.
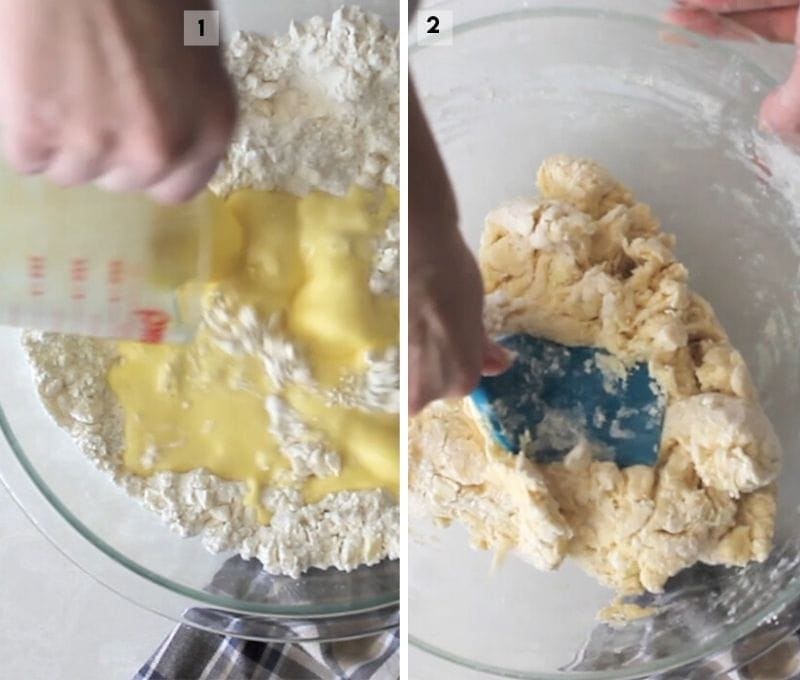
- Knead – Stir in the milk and eggs. (Photo 1) You may need a little more milk to bring the dough together and if needed knead the dough a few times to help bring it all together. Sometimes I do this and sometimes I don’t it just depends on how the dough is acting. If there isn’t much flour left in the bowl and the dough is still a little wet I will just knead it a little but if it’s rather dry and not coming together in a ball very well I will add a little more milk. (Photo 2)
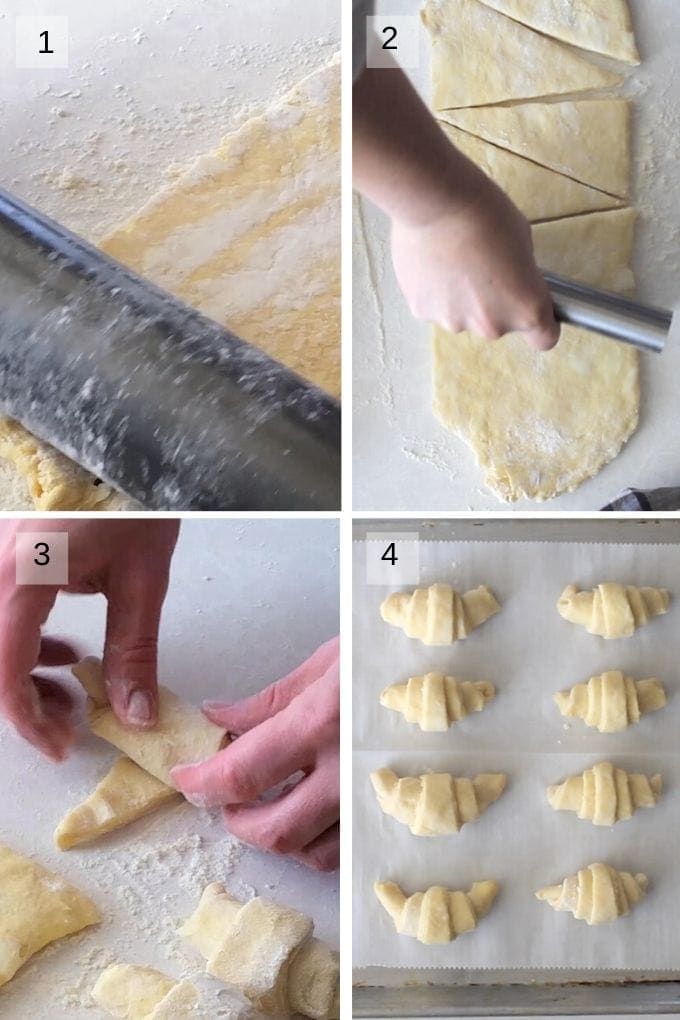
- Chill Dough – Now I chill the dough. I found this necessary after working with the dough to give it a little rest and to let the butter get cold again. After 30ish minutes remove the dough and divide into 3 equal portions. (Photos 1 & 2)
- Roll & Raise – Next, Roll each portion into a long rectangle and fold over envelope style. Do this 3 times then roll into a long rectangle and cut into triangles. To roll start at the wide end and roll up to the end then place on a baking sheet to rise until doubled. (Photos 3 & 4)
- Bake – Lastly bake for 10-12 minutes or until golden.
Once again these aren’t hard to make!
So much better than the ones in the tube and just a little bit more work, so don’t be afraid to give them a try!
Tips to make flaky crescent rolls
So, to make those flaky layers we need butter. When butter bakes it melts and releases steam making layers. It’s also what makes them crispy on the outside.
The butter also needs to be cold. I wanted to make these rolls with the minimum amount of chilling time and found I could get away with chilling the dough only once.
Also, I find using when cutting the butter into the flour mixture leave chunks that are a little larger than peas. Don’t use a cheese grater or food processor because the butter will just disappear into the dough when you work with it. Then you won’t get those nice flaky layers. It works with biscuits because the dough is being handled very little but with this dough, we are working it a little more and allowing it to rise.
Make Ahead Tips
Follow the steps through making the crescent rolls and place them on the baking sheet. Then cover them loosely with plastic wrap and put the tray into the fridge. You can keep them in there up to 24 hours.
A few hours before you are ready to serve them, remove from the fridge and place on the counter so they come to room temperature. Let them rise until doubled in size and then bake according to directions.
How long will they keep?
- Room Temperature – If you place the rolls into a resealable bag and store them at room temperature they will last for a few days.
- Refrigerator – If you place them in the refrigerator they will last around a week.
- Freezer – You can also freeze them and will last up to a month. When ready to serve we recommend warming them a little in the oven on lowest setting for about 10 minutes.
Are crescent rolls and croissants the same thing?
In my opinion, they are not the same. For one croissants are a labor of love and take a lot longer to make and the technique is much different. With croissants, you make what is called laminated dough which is the process of folding butter into the dough MANY times.
While these rolls require folding butter into the dough it’s done in a much easier way and takes much less time! Now that’s my kind of roll!!
Somebody said to pass the rolls! More delicious recipes to enjoy!
These aren’t hard to make and I know you’re going to love these tasty, flaky biscuits! When you have a moment please leave a five-star comment below!
Bake up some rolls for the holidays and be sure to snap a photo and tag me on Instagram at @julieseatsandtreats or #julieseatsandtreats – I want to see pictures of your delicious meal!
WATCH THE STEP BY STEP VIDEO FOR THIS RECIPE BELOW:
If you enjoy watching these videos make sure you subscribe to my YouTube Channel to be notified each time a post a new video!
Did you make this? If you snap a photo, please be sure tag me on Instagram at @julieseatsandtreats or #julieseatsandtreats so I can see your yummy treat!

Crescent Rolls Recipe
These rolls are easy to make, flaky, tender, and take much less time to make than croissants! They are the perfect side dish recipe to your holiday dinners.
Ingredients
- 3 3/4 cups all purpose flour
- 1/4 cup sugar
- 1 tablespoon active dry yeast
- 1 1/4 teaspoon salt
- 1 cup cold butter, cubed
- 1-1 1/2 cups milk
- 2 large eggs
Instructions
- In a large bowl combine the flour, sugar, yeast, and salt. Using a pastry cutter cut in the butter until you have chunks a little larger than peas.
- In a small bowl combine the milk and eggs then stir into the flour mixture until it forms a ball. Start with 1 cup of milk and add more if necessary. If there is only a little flour left in the bowl I like to briefly knead the dough to finish bringing it together. If the dough is still pretty dry and having trouble coming together add in more milk. Wrap the dough in plastic wrap and chill for 30ish minutes.
- Dust a work surface with flour and divide the dough into 3 equal portions. Roll one portion into a long rectangle then fold into thirds. Turn dough a quarter turn and roll into another long rectangle and fold into thirds. Repeat once more. Roll into a rectangle about 1/4" thick (sometimes mine is a little thicker).
- Cut into 8 triangles. Starting at the wide end roll up each triangle and place on a baking sheet. Repeat with remaining 2 dough portions to make a total of 24 rolls. Cover rolls loosely and place in a warm area to rise until double in size.
- Preheat oven to 400 degrees F and bake for 10-12 minutes or until golden brown.
Tips
Tips to make flaky crescent rolls
To make those flaky layers we need butter. When butter bakes it melts and releases steam making layers. It's also what makes them crispy on the outside.
The butter also needs to be cold. I wanted to make these rolls with the minimum amount of chilling time and found I could get away with chilling the dough only once.
Also, I find using when cutting the butter into the flour mixture leave chunks that are a little larger than peas. Don't use a cheese grater or food processor because the butter will just disappear into the dough when you work with it. Then you won't get those nice flaky layers. It works with biscuits because the dough is being handled very little but with this dough, we are working it a little more and allowing it to rise.
Make Ahead Tips
Follow the steps through making the crescent rolls and place them on the baking sheet. Then cover them loosely with plastic wrap and put the tray into the fridge. You can keep them in there up to 24 hours.
A few hours before you are ready to serve them, remove from the fridge and place on the counter so they come to room temperature. Let them rise until doubled in size and then bake according to directions.
How long will they keep?
- Room Temperature - If you place the rolls into a resealable bag and store them at room temperature they will last for a few days.
- Refrigerator - If you place them in the refrigerator they will last around a week.
- Freezer - You can also freeze them and will last up to a month. When ready to serve we recommend warming them a little in the oven on lowest setting for about 10 minutes.
Video
Nutrition Information
Serving: 1roll, Calories: 162kcal (8%), Carbohydrates: 17g (6%), Protein: 3g (6%), Fat: 8g (12%), Saturated Fat: 5g (31%), Cholesterol: 35mg (12%), Sodium: 200mg (9%), Potassium: 49mg (1%), Sugar: 2g (2%), Vitamin A: 280IU (6%), Calcium: 24mg (2%), Iron: 1mg (6%)
Lubna Naveed says
Tried it once and it’s awesome ..
Julie says
Glad to hear it! Thanks for the review!
Roberta says
what temperature was your milk?
Julie says
It was cold, from the fridge.
Sabrina says
If I wanted to make this for pigs in a blanket, would I let the dough rise while wrapped around the hot dogs or don’t section it off, let it rise, and then section it off for the hot dogs? Thanks!
Julie says
In step 4, I would cut them into the triangles and let the dough rise. Then add the hot dogs after it rises and finish with step 5.
Walkene says
The rolls are delicious!!
Julie says
I’m glad you loved them!
AC says
In the video you seem to be brushing the rolls with something: butter?
But this is not in the printed recipe?
Can you please clarify because rolls loo so delicious I would like to try to make them?
Thank you!
Julie Evink says
You can brush them with melted butter before baking. I’d start with 2 Tbsp.
Jill says
How long should it take for the rolls to double in size.
Julie Evink says
I would guess 1-2 hours depending on how warm it is where they are sitting. The warmer it is the faster they rise!
Beth says
Beyondthat amazing , huge hit ! Making them again for Thanksgiving 🙂
Julie says
Perfect! I’m glad you enjoyed them!
Maggie says
These are the fastest ,easiest and most delicious crescent rolls I ever made. I just made them for the third time and I added Nutella filing in some of them. Family Loves them Thank you sharing this great recipe 😀
Julie says
You’re welcome! I’m so happy they were a hit!
Lorraine says
I needed crescent rolls to make pigs in a blanket for a friends get together. I reached for the Pillsbury crescent rolls but once I read the label of ingredients, I could not bring myself to buy them. I found your fabulous recipe on Pinterest (my go to app for recipes). They came out great. In fact, four of us women get together monthly at each other’s house to bake. This month we are making your crescent rolls. Thank you for whatever alterations you made to this recipe to make it quick & still so delicious.
Julie says
Thank you for the rating and review, Lorraine! I’m so happy you found my recipe and enjoyed them!
Beth says
All’s I can say is , OMG
Julie says
LOL! Sounds like you enjoyed them!
Edward says
Made these crescent rolls, came out so wonderful, we all love it! Thank you.
Julie Evink says
So glad you enjoyed them!
Em says
Can i use instant yeast?
Julie Evink says
Yes that should work.
Mikayla says
Can you leave the dough in the fridge overnight?
Julie Evink says
We think this would work but we haven’t tested it like that yet!
Melissa Howell says
Are you using instant yeast, or just regular yeast? Do you need to proof it first? I really want to give this recipe a try! The rolls look perfect!
Julie Evink says
It’s active dry yeast and would say that on the jar!
Danielle Green says
They look so flaky and delicious!
Julie Evink says
They are! Makes them the best!
Malinda Linnebur says
These are a family favorite and they are so easy to make!!
Julie Evink says
I can see why! YUM!
Noona says
Hi there..can i use i stant yeast for this? That’s all i have on hands right now. If so, how many minutes do i need to adjust for chilling time? I really want to try your recipe ?. TIA
Julie Evink says
Hi Noona! I haven’t tested it like this, but I think it will work 🙂