Sugar Cookies {Cut Outs}
2 Comments
Posted: 03/01/22
Updated: 03/02/22
This post may contain affiliate links. Please read our disclosure policy.


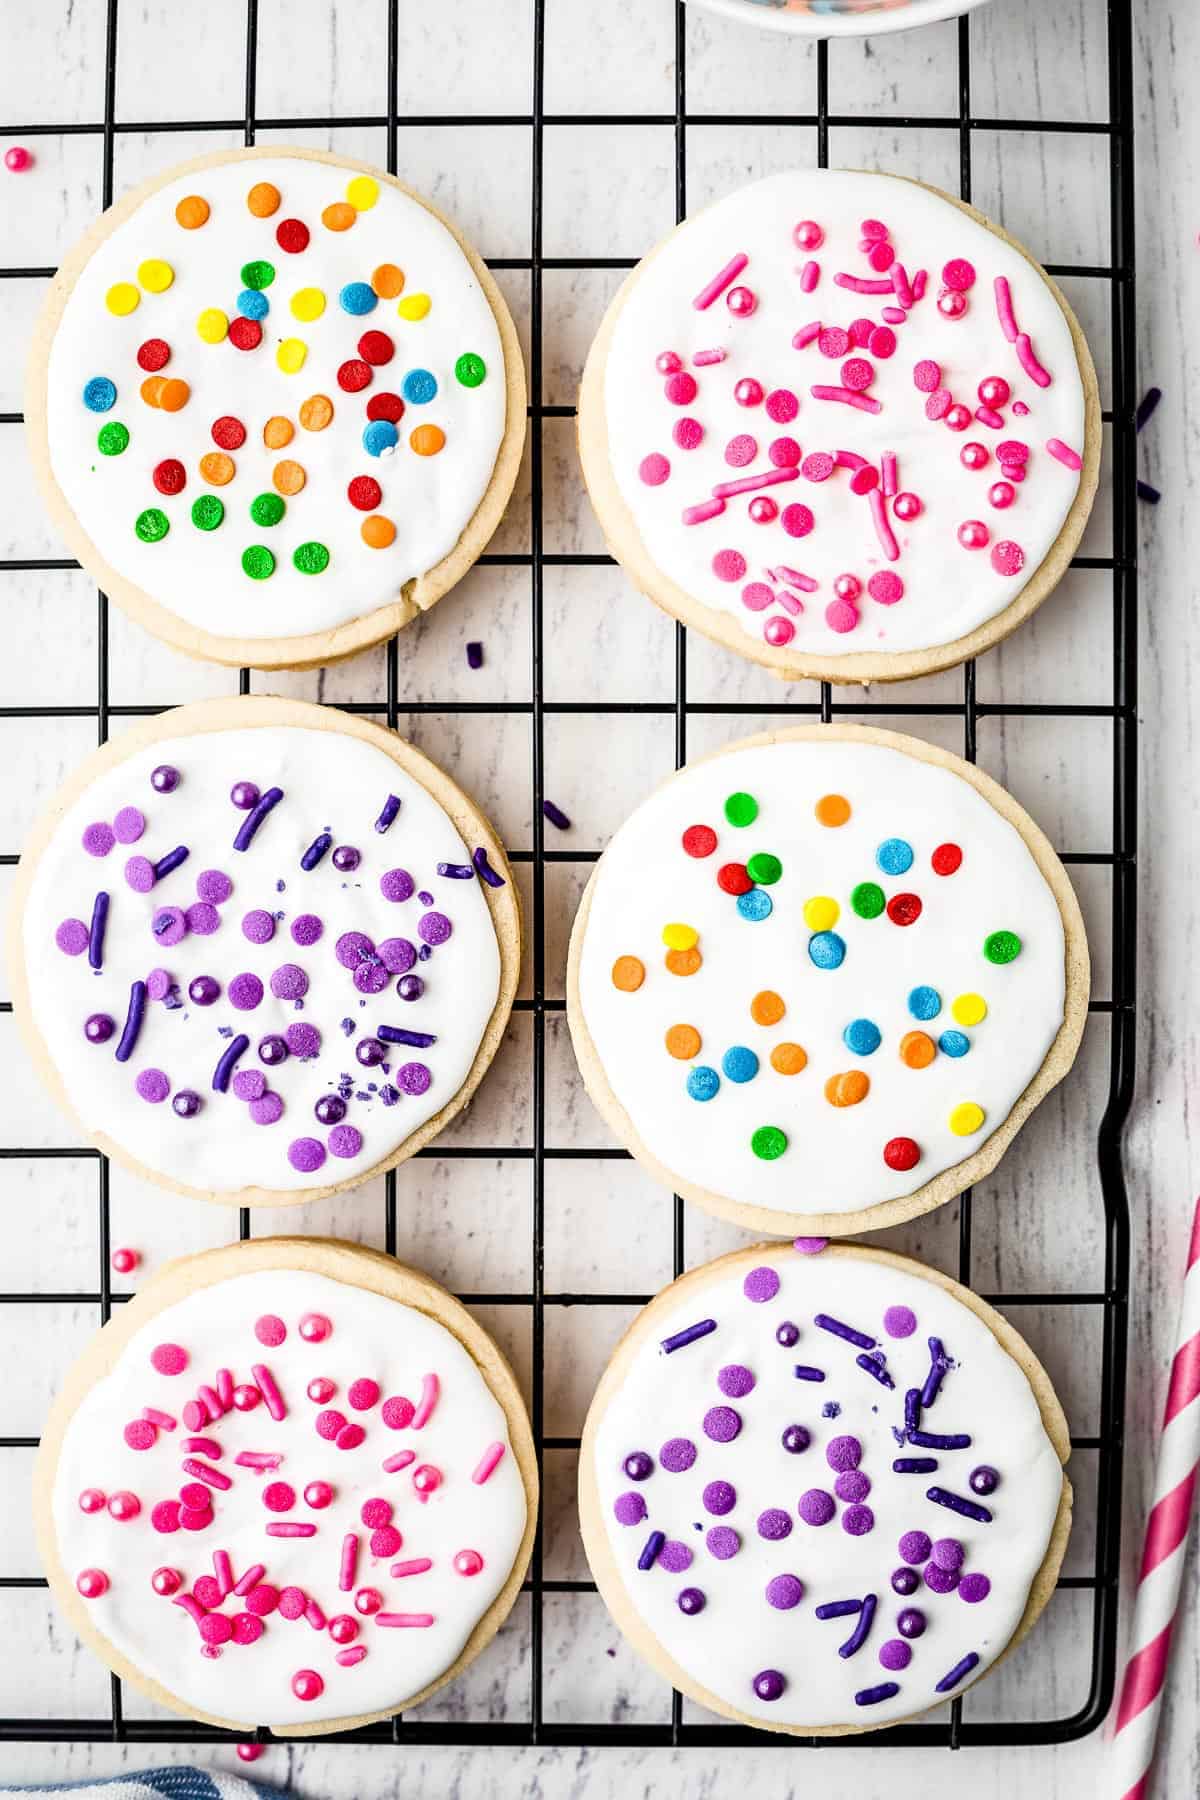
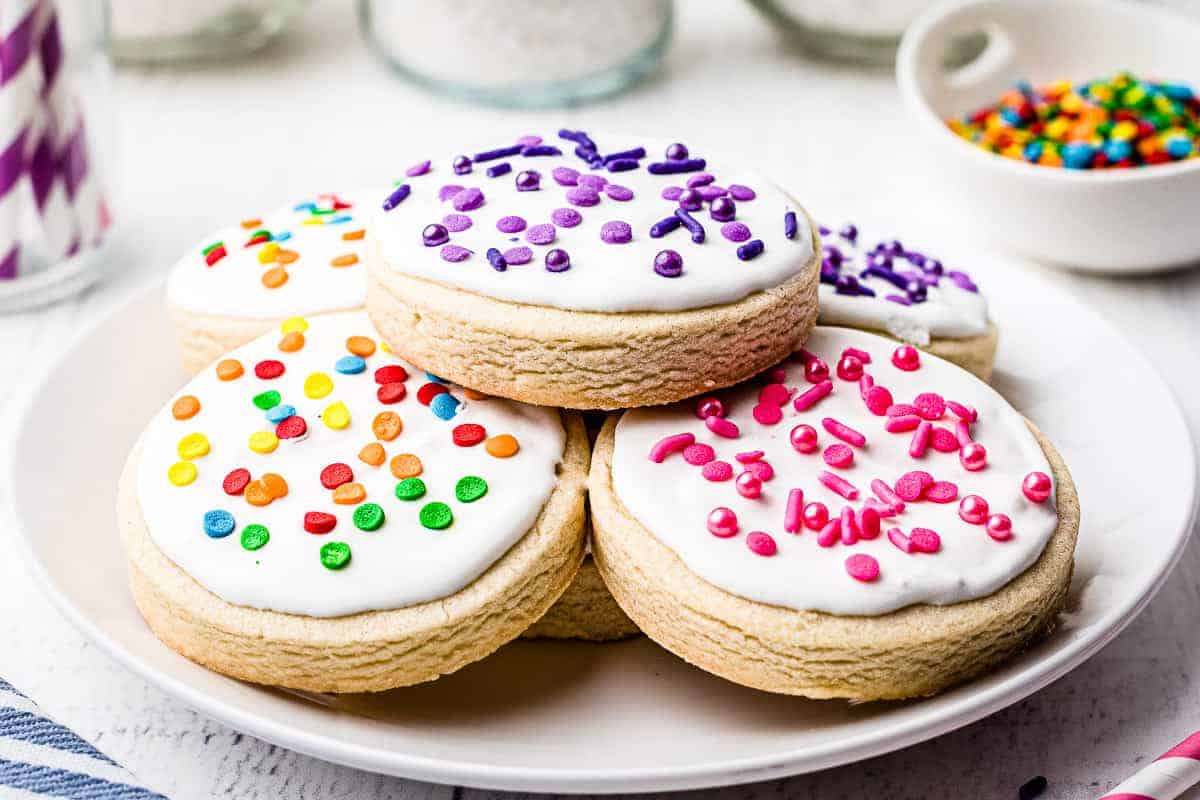
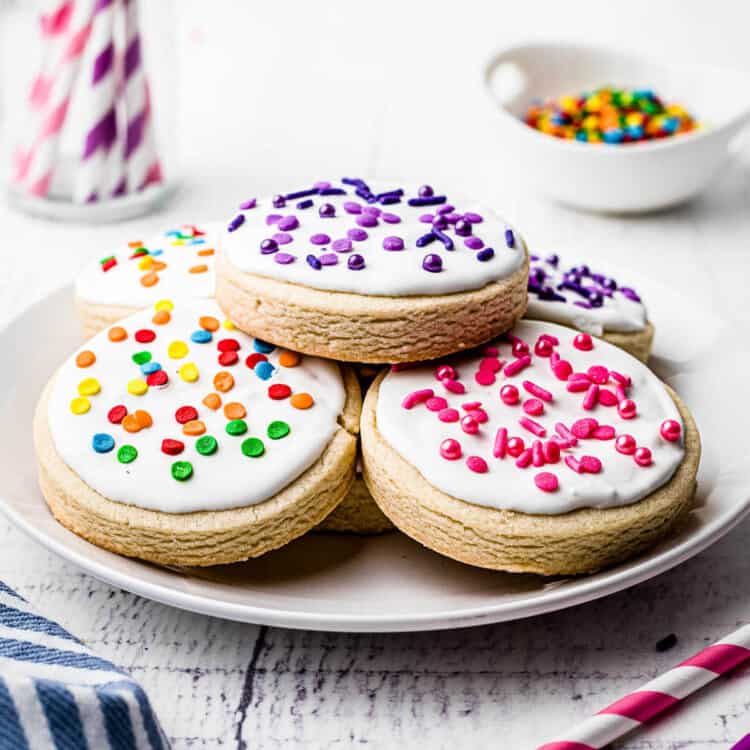
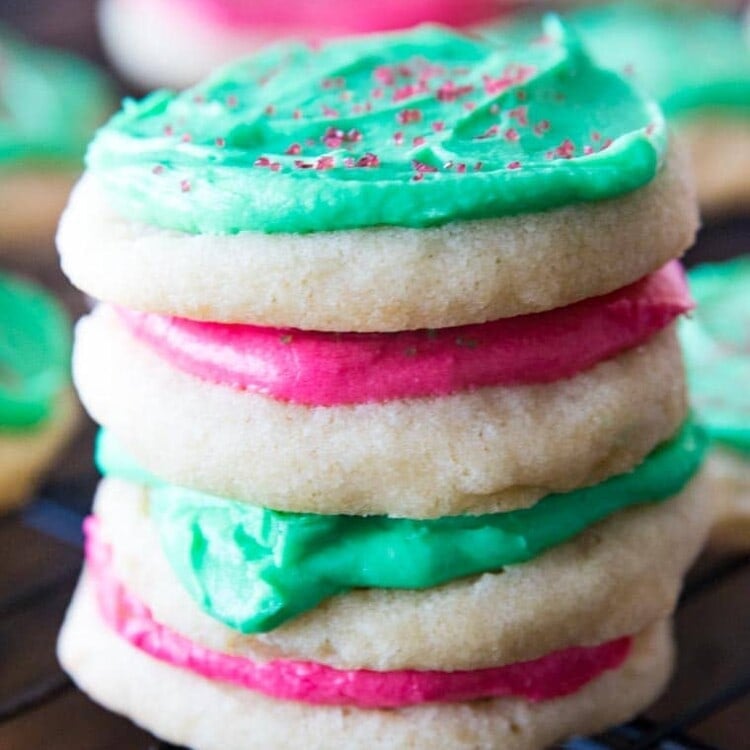
These thick and delicious Sugar Cookies are easy to make, hold their shape and have plenty of room to frost! They are great for sugar cookie cut outs. You can use your favorite cookie cutters or a cup, mason jar or ramekin to cut them out in a pinch! Then top them with our royal icing recipe or sprinkles. These will be your new go-to cookie for decorating.
I’m sharing all of my secrets for the best cut-out cookies! If you want a go-to recipe for sturdy sugar cookies that are delicious and perfect for icing this is the post for you.
Contents
show
The Best Sugar Cut-Out Cookie Recipe
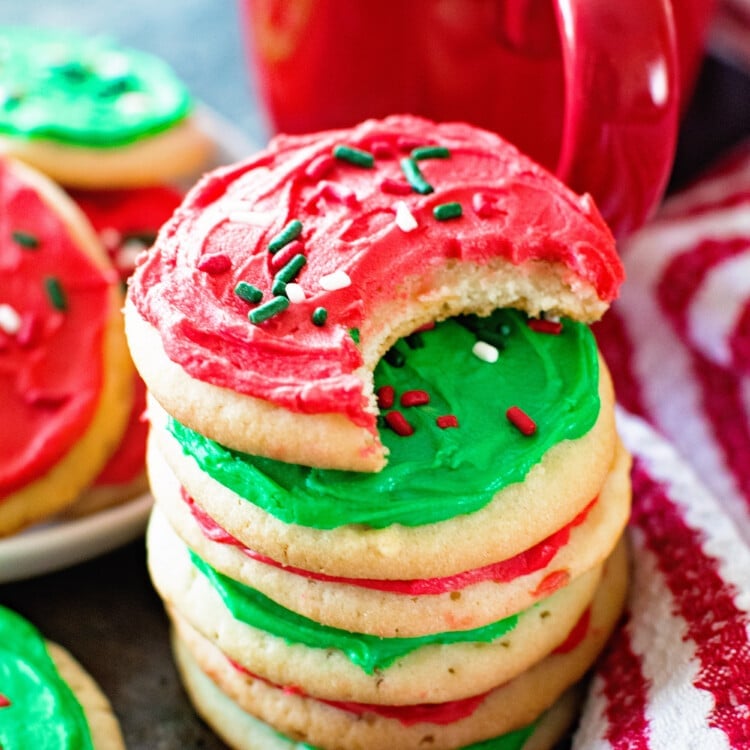
This recipe is perfect for any season – just switch up the decorations! I make them all year and I’ve used this recipe to make adorable Halloween cut-outs and 4th of July cookies. Not to mention Christmas – these cookies are always hit at the cookie exchange!
What makes them so great is that they are the perfect thickness for icing and hold their shape when baked. The recipe is tried and true!
They are easy to decorate! I’m showing you how to decorate them with royal icing or you can use other sugar cookie frostings.
What Makes These So Amazing
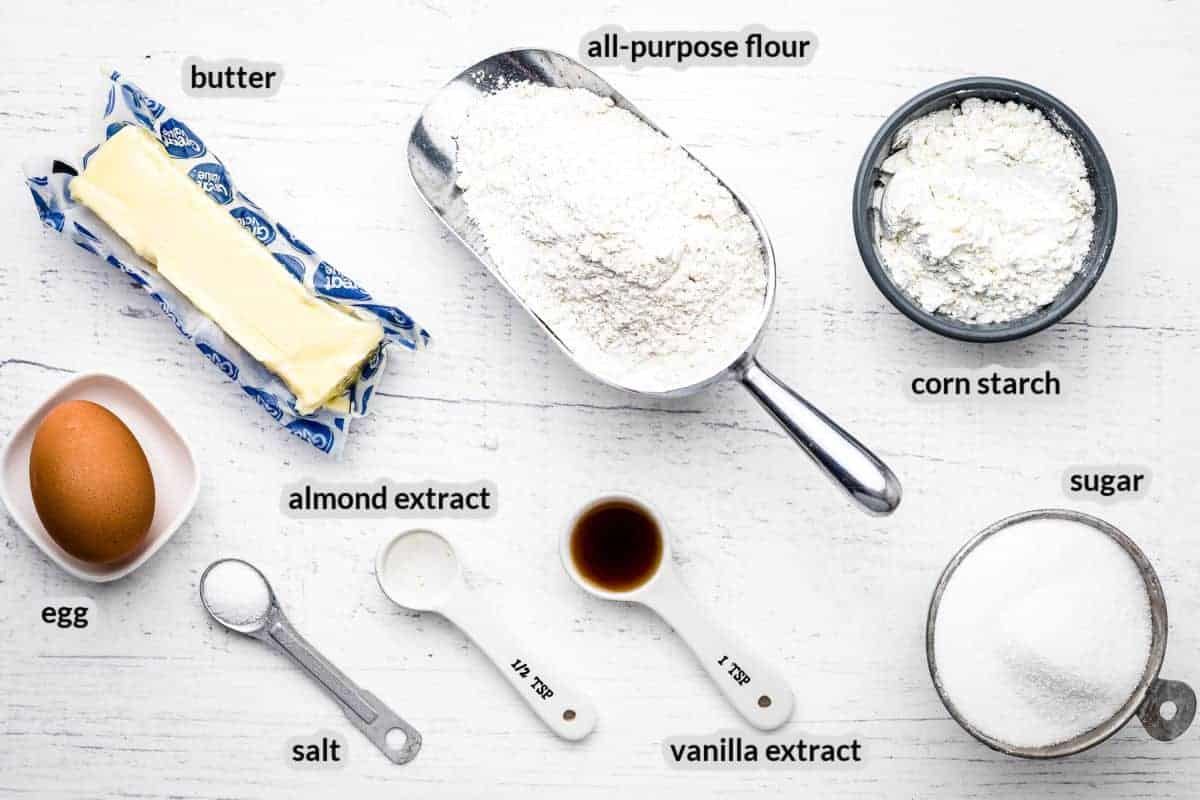
For the ingredients, you’ll need the basics like flour, butter, sugar, an egg, and granulated sugar.
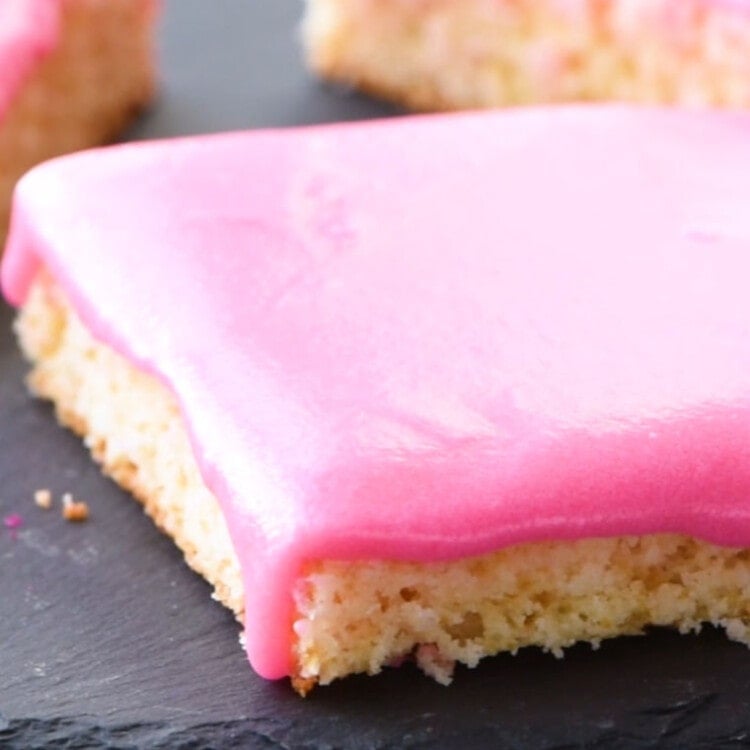
What makes them so great is the cornstarch. This ingredient helps create thick sugar cookies that are still soft and tender. So you get the sturdy cookie for decorating, but it doesn’t taste sturdy (i.e. tough) – instead, it’s tender and melts in your mouth!
We’re also using two kinds of extracts to give them a delicious flavor – almond extract and vanilla extract. They are so good together in this cookie.
How to Make Them
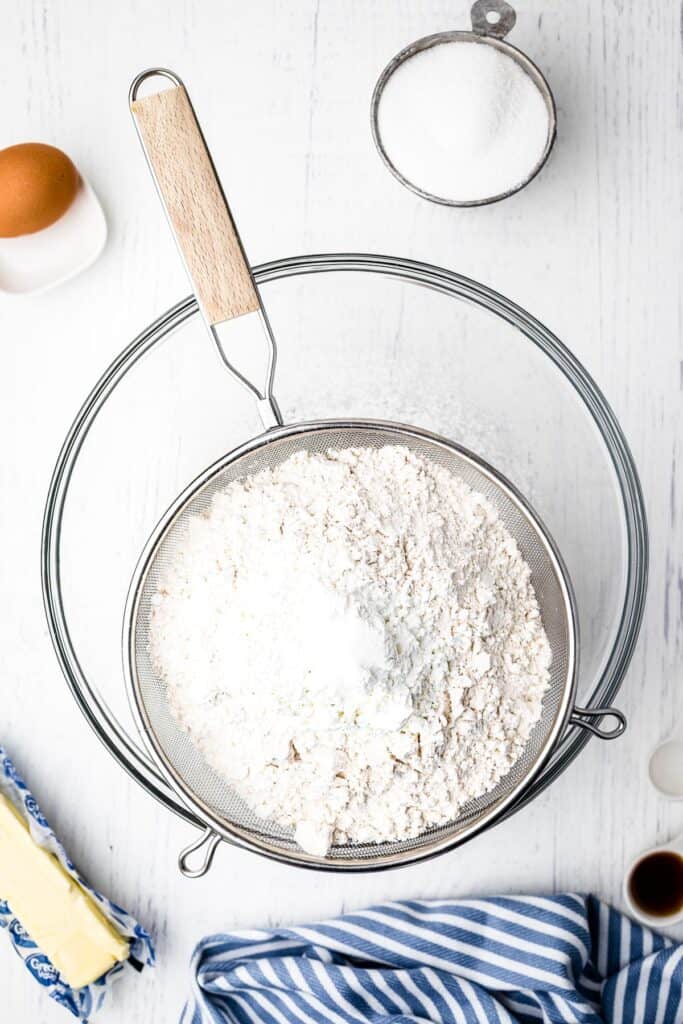
Sift the flour, corn starch, and salt in a mixing bowl and then whisk a few times to combine.

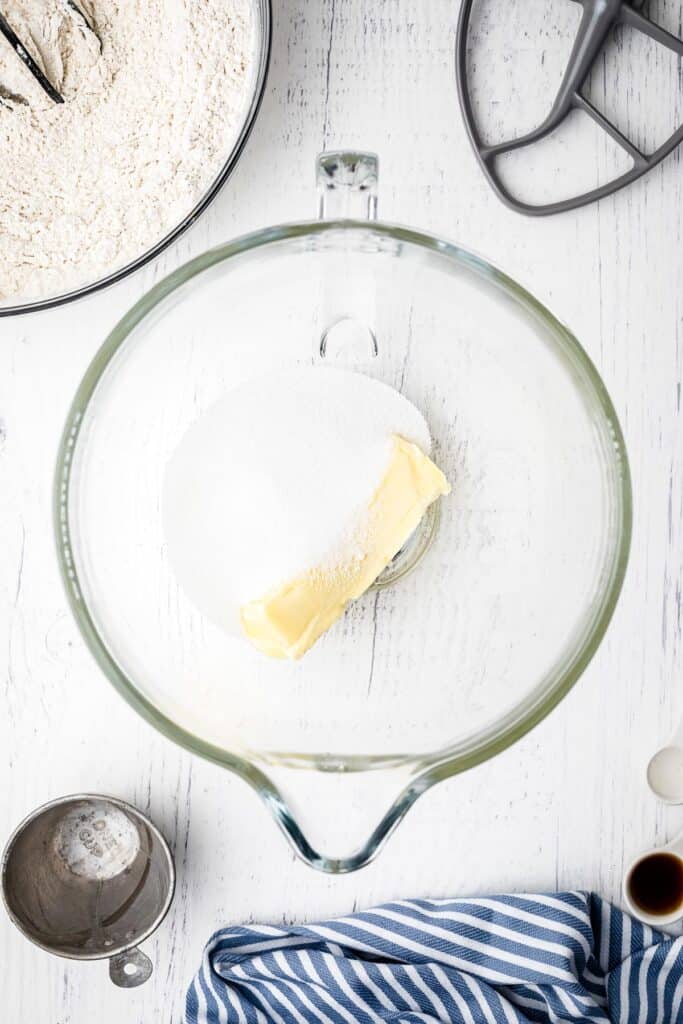
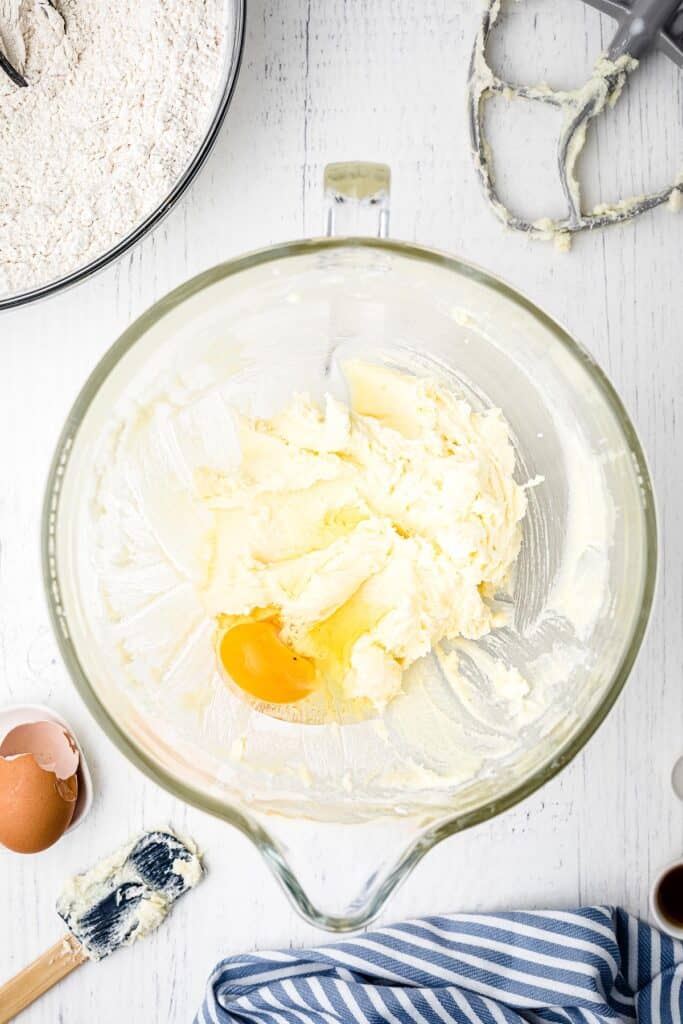
Beat the butter and sugar on medium speed in a stand mixer for five minutes or until the mixture is creamy.
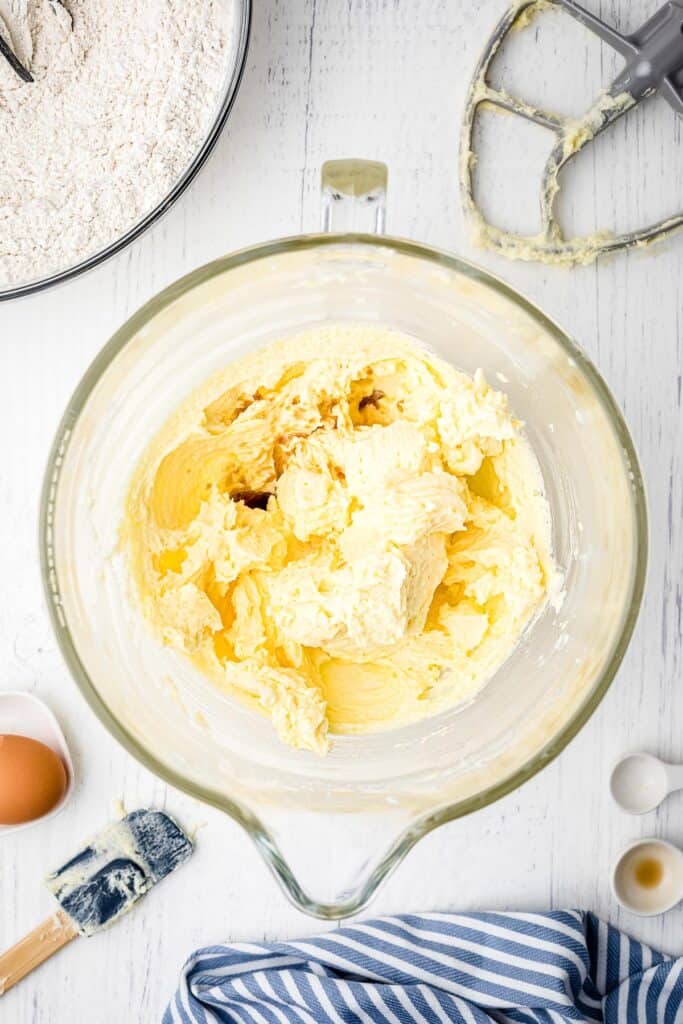
Adjust the speed to low and, while mixing, add the egg and then add the vanilla and almond extract.
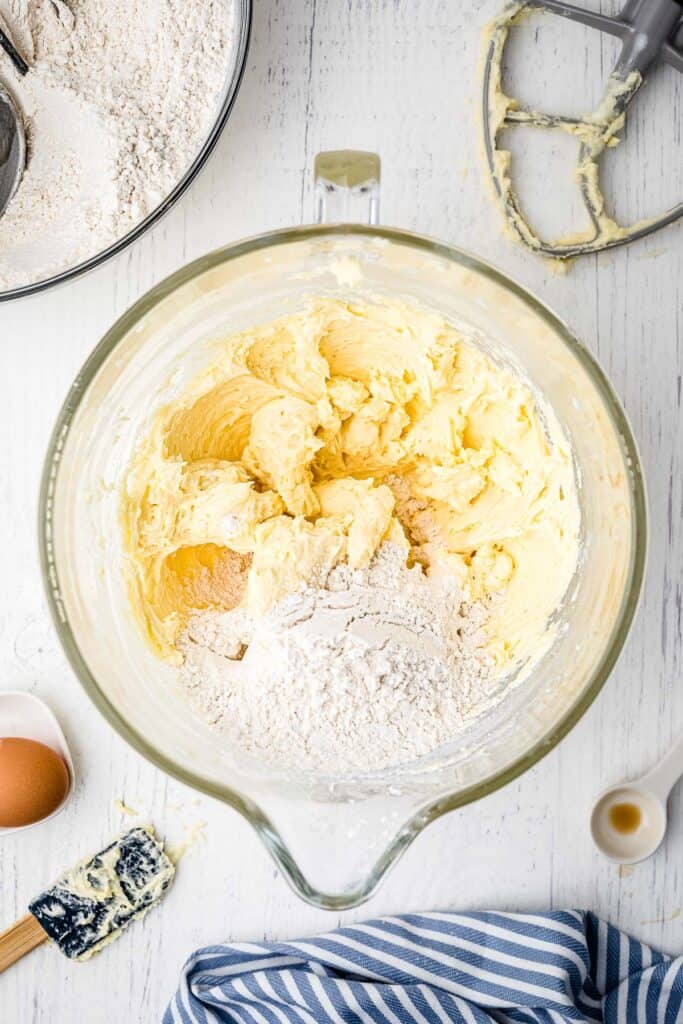
Add the dry ingredients one cup at a time to the wet ingredients. Once the dough is formed and pulling away from the sides of the bowl, it’s ready.
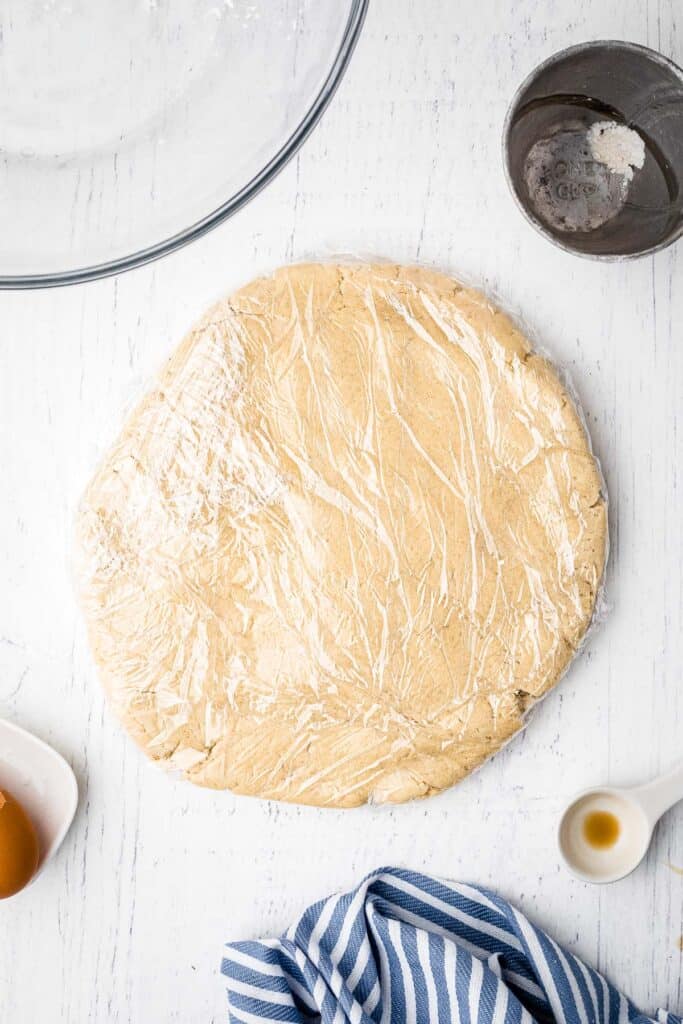
Form the dough into a disc, wrap it with plastic, and chill it for at least 30 minutes.
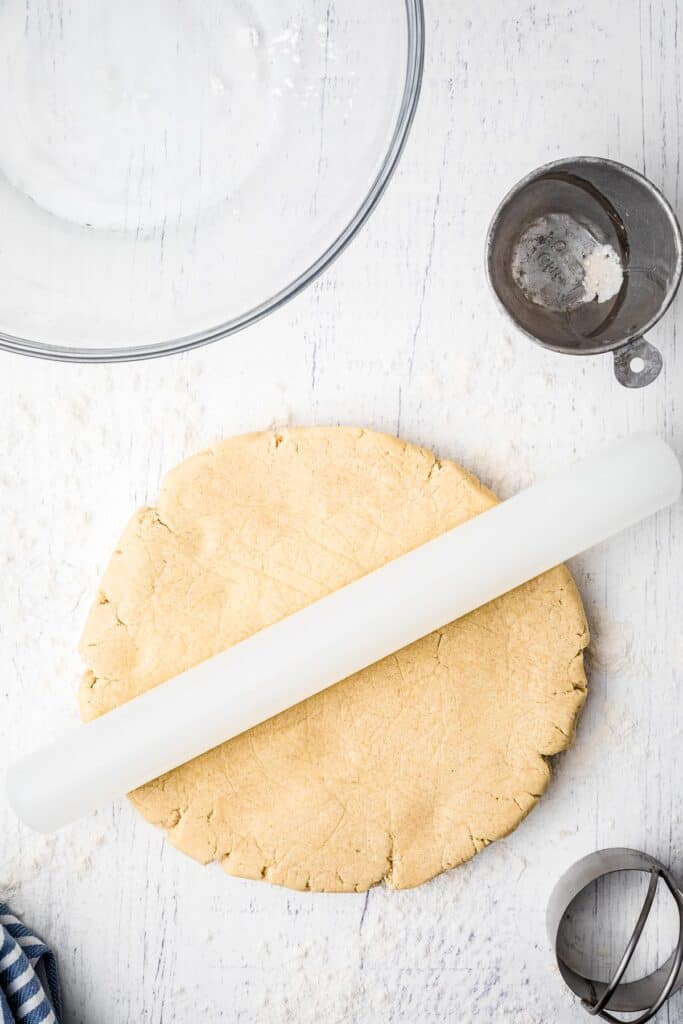
Unwrapped the chilled dough and roll it out on a lightly floured surface. Roll it until it’s 1/4″ to 1/2″ thick.
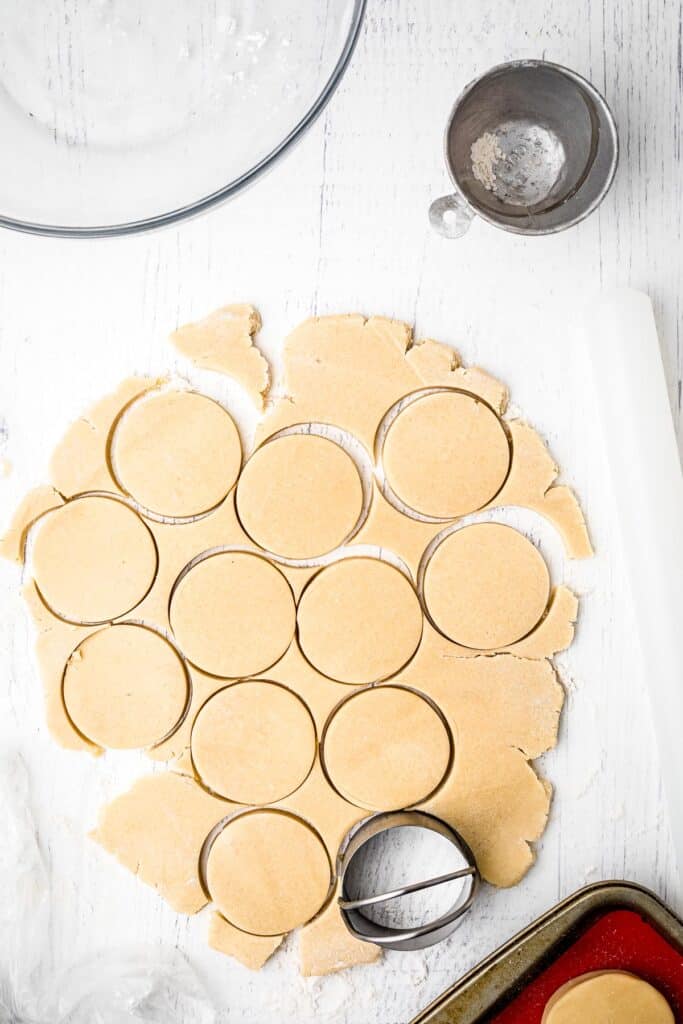
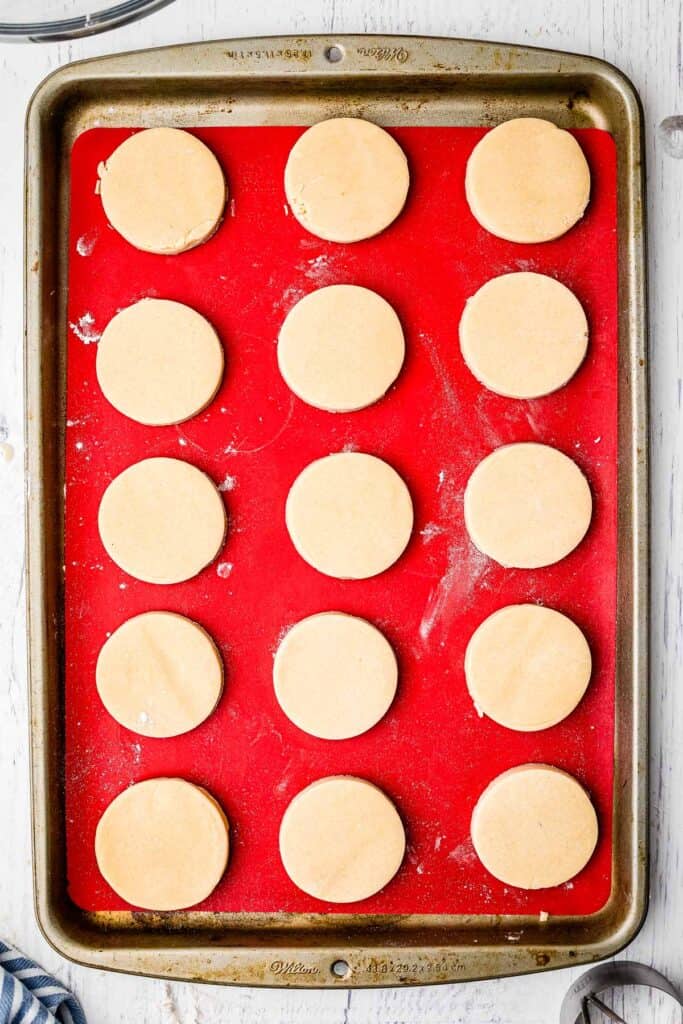
Take your 2-1/2” round cookie cutter and cut as many rounds out of the dough as possible. Place them on a prepared baking sheet. Reroll the extra dough and cut out more rounds until you’ve used up the dough.
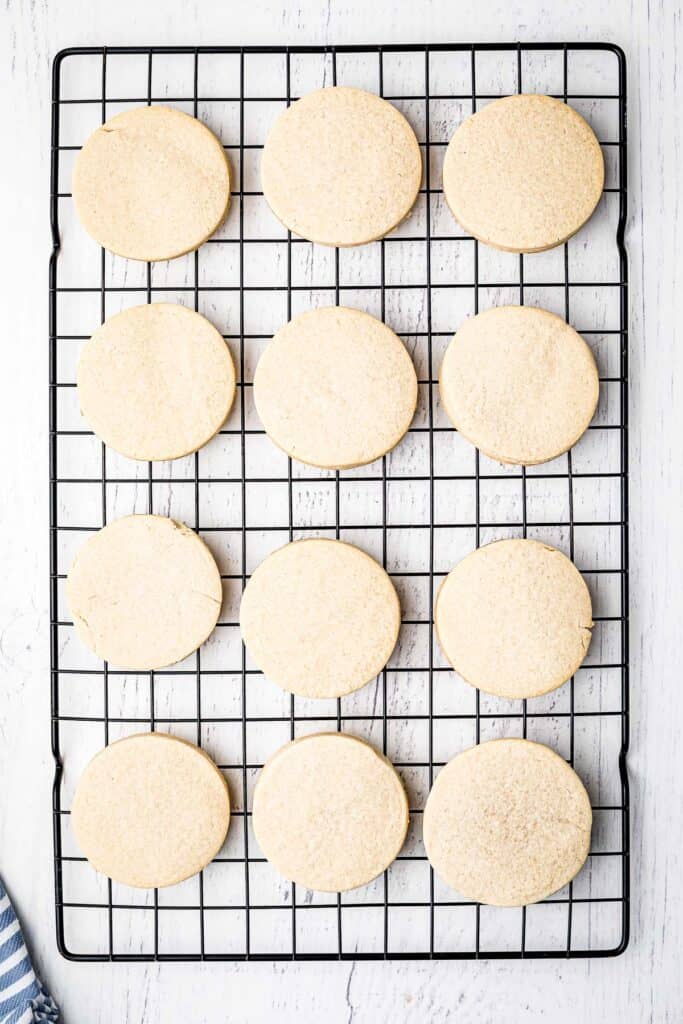
Bake the cookies for 12 minutes at 375°F. Turn the tray halfway through the baking time so the cookies bake evenly.
Cool them on the baking sheet for a few minutes before transferring them to a wire rack. Wait until they are completely cooled before decorating.
How to Make the Icing
Royal icing is easy to make and great if you want a sugar cookie icing that hardens when it dries.
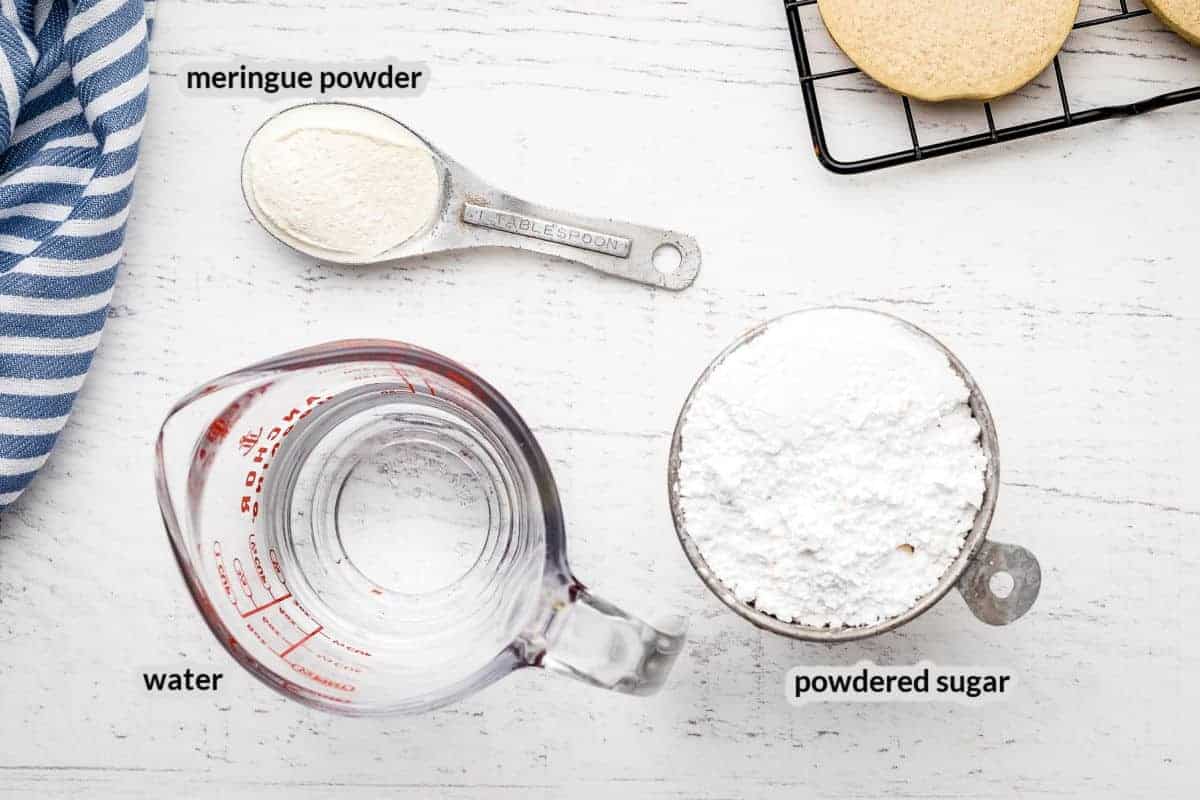
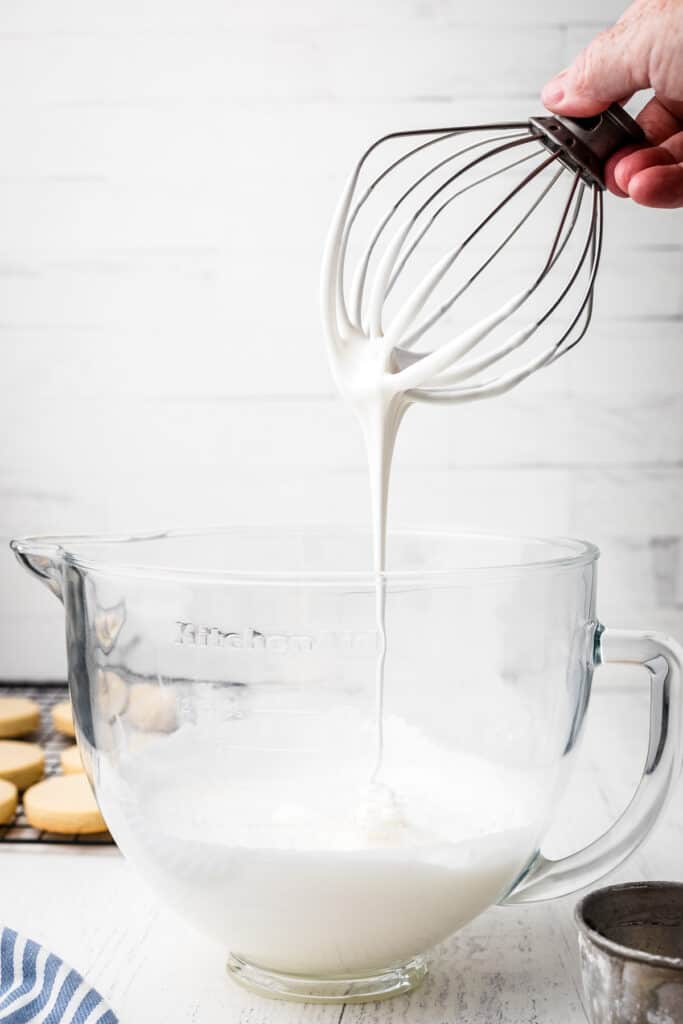
All you do is combine powdered sugar with meringue powder in a stand mixer. Use the whisk attachment and, with the mixer running on low speed, slowly add water.
Once you’ve added all of the water, increase the speed to medium and whip the mixture for seven to ten minutes. It’s ready once it starts to hold small tips.
Test the consistency by lifting the whisk. If the icing falls off and sinks back into the rest of the icing within 10 to 15 seconds, it’s ready to use.
Decorating Tips and Tricks
Once you have your icing you can keep it white or tint it. If you want different colors, divide the icing among bowls and tint them your desired colors.
The easiest way to fill a piping bag is to fit the tip first and then place the bag in a tall drinking glass with the tip down. Fold the pastry bag over the edge of the glass and then add the icing. Use a rubber band to secure the bag and make it easy to squeeze.
I also like to place a wet piece of paper towel in the bottom of the glass and set the piping bag on it when I’m not using it. The damp paper towel will keep the piping tip moist so the frosting doesn’t harden and plug the tip.
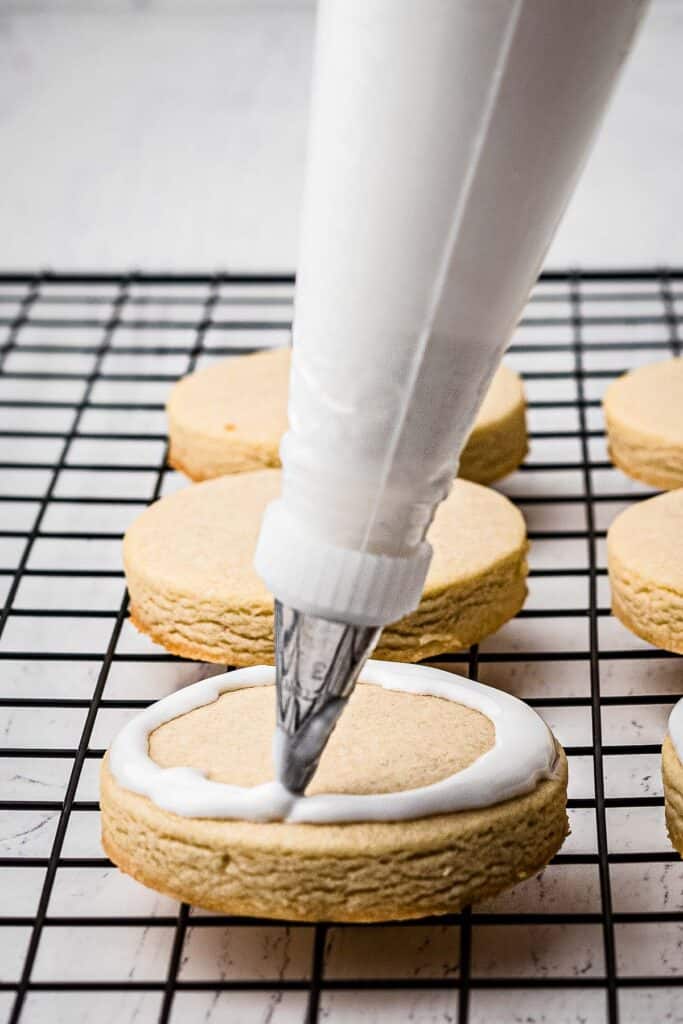
For the cookies in this post, I used white icing and sprinkles to make a simple (and very cute!) design.
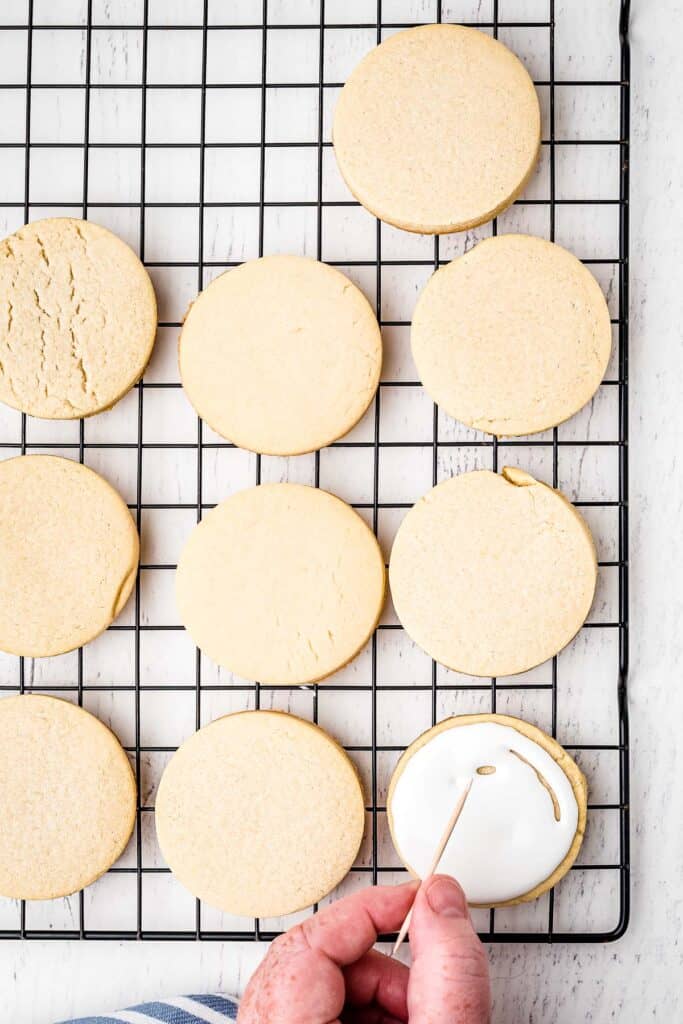
First, pipe a circle around the edge of the cookies. Let it set and then flood the center of the cookie with more icing. Use a toothpick to spread it into an even layer.
While the icing is wet, add the sprinkles and then let them set. If you want to pipe a design onto your cookies, let the background icing set first, and then add your design.
Once they are dry they are ready to eat or store for later.
FAQ
Why do my cut-out cookies lose their shape?
Did you chill the dough? It’s important to chill the dough for at least 30 minutes before cutting out the cookies. It allows the butter to firm up. If the butter is too soft when the cookies go in the oven they will spread.
How thick should they be?
I like my cookies either 1/4″ thick or 1/2″ thick. Be sure to roll the dough to an even thickness otherwise they won’t bake evenly.
How long do they last?
These cookies will keep well at room temperature for up to three to four days. Keep them in an airtight container.
Can you freeze sugar cookies?
Yes, they freeze well. Bake the (undecorated) cookies and let them cool. Store them in a freezer bag or container and they will keep well for up to a month. Thaw them at room temperature and then decorate them.
Pro Tips
Chilling Tip: Don’t skip chilling the dough. I know it’s tempting to speed up the process, but the dough needs to be cold, so the butter is firm. This ensures your cookies won’t spread when they bake.
Rolling Tip: When you roll and cut out the dough, try to cut as many cookies out as you can before rolling up the scraps and rolling them out again. The more you roll the dough, the more you will work the gluten in the flour. So if you roll it a lot, those last cookies you cut out could be less tender and soft than the first ones.
Cookie Cutter Tip: You can use a round cutter or a glass, ramekin, or biscuit cutter that is the same size. You can also use different shapes, but this will change the number of cookies you get in the batch. Depending on the size, you may need to adjust the baking time, too.
Decorating Tip: Short on time? You can use other kinds of frostings – try my chocolate buttercream or cinnamon cream cheese frosting. They don’t harden like royal icing, but they are great options if you want to do something simple. Or make it really easy and use store-bought frosting.
You are going to love these homemade sugar cut out cookies! They are seriously the best for decorating and are always a hit when I make them. Have fun decorating them and enjoy!
More Cookie Recipes
- Love Lofthouse cookies? My Copycat Lofthouse Sugar Cookie Recipe is just like the store-bought but made from scratch!
- Cinnamon Frosted Cookies are soft and spiced with pumpkin spices. Perfect for the fall season!
- Gingerdoodles are a mash-up of two favorite cookies!
I’d love it you would rate this recipe!! A five-star rating will make my day!
Don’t forget to tag me on Instagram @julieseatsandtreats or #julieseatsandtreats that way I’m sure to see how you decorated your cookies!!
Did you make this? If you snap a photo, please be sure tag me on Instagram at @julieseatsandtreats or #julieseatsandtreats so I can see your yummy treat!
Cut Out Sugar Cookies
Thick sugar cookies that hold their shape which make them perfect for cut out cookies that are frosted with royal icing!
Ingredients
Sugar Cookies
- 2-1/2 c All Purpose Flour
- ¼ c. Corn starch
- ¼ tsp Salt
- ¾ c. Butter Unsalted room temperature
- ¾ c. Granulated Sugar
- 1 Large Egg room temperature
- 1 tsp Vanilla Extract
- ½ tsp Almond Extract
Royal Icing
- 4 c. powdered sugar
- 3 Tbsp Meringue powder
- 9-10 Tbsp water room temperature
- Gel Food Coloring optional
Instructions
Sugar Cookies
- Sift the flour, corn starch and salt into a medium sized mixing bowl.
- Run a whisk through it to mix well and set aside.
- With a stand mixer, In a large mixing bowl beat the butter and the sugar together, on medium speed, until creamy, about 5 minutes.
- Turn the mixer to low and add the egg while beating, then add the vanilla and almond extract.
- One cup at a time add the flour mixture until it is well incorporated. The sugar cookie dough will pull away from the mixing bowl at this point.
- Take the dough and form a ball, then flatten out into a disc. Wrap in plastic wrap and place into the refrigerator for a minimum of 30 minutes.
- Preheat the oven to 375°F.
- Take the dough out of the refrigerator and turn out onto a lightly floured surface.
- Take a rolling pin and roll out to about ¼” – ½” thick.
- Using a 2-1/2” round cookie cutter, cut as many discs out of the dough as possible and place onto a baking sheet lined with a silicone mat (or parchment paper).
- Take the remaining dough and mold into a ball again and roll out again. Cut out more cookies until all the dough has been used.
- Place the baking sheet into the oven and cook for 12 minutes. Turn the tray around half way.
- Remove from the oven and allow to cool a little on the baking sheet before transporting to a wire rack.
- Once cooled completely decorate as desired.
Royal Icing
- Add the powdered sugar to a large mixing bowl attached to your stand mixer, as well as the meringue powder and stir a little to mix.
- Using your wire whip, turn on your stand mixer on a low speed and slowly add the water. As the powder subsides you can turn up the speed to medium.
- Whip the mixture well for about 7-10 minutes, until you start to see tips forming.
- Check the consistency of the icing. If it falls off the wire whip and melts back into the bowl of icing within 5-10 seconds then it’s perfect.
- Cover the bowl tightly with plastic wrap until you are ready to use it.
- Take a piping bag and a number three tip and place into a tall glass, folding the edges over the outside of the glass. This is the easiest way to fill up an icing bag with less mess.
- Use a rubber band to tie the top of the icing bag. Place a piece of wet paper towel in the bottom of the glass, this will help the tip stay moist while you are working.
- If you are using other colors, pour a little of the remaining icing into a small bowl and mix in a little of the food color until you reach the desired color.
- If your cookies have a white background, which most of mine did (in the images), use the piping bag to pipe the icing around the outside edges, and then fill the middle. Use a toothpick to spread the icing evenly.
- Leave cookie to set while you move onto the next, or if you are using sprinkles on your cookies sprinkle them on at this point, while the icing is still wet.
- Use the colors you have mixed and a toothpick to create the designs on the cookies. If you are putting a design on the white background let the white set first before you start with your next color.
Tips
DECORATING TIPS AND TRICKS
Once you have your icing you can keep it white or tint it. If you want different colors, divide the icing among bowls and tint them your desired colors. The easiest way to fill a piping bag is to fit the tip first and then place the bag in a tall drinking glass with the tip down. Fold the pastry bag over the edge of the glass and then add the icing. Use a rubber band to secure the bag and make it easy to squeeze. I also like to place a wet piece of paper towel in the bottom of the glass and set the piping bag on it when I’m not using it. The damp paper towel will keep the piping tip moist so the frosting doesn’t harden and plug the tip. For the cookies in this post, I used white icing and sprinkles to make a simple (and very cute!) design. First, pipe a circle around the edge of the cookies. Let it set and then flood the center of the cookie with more icing. Use a toothpick to spread it into an even layer. FAQS Why do my cut-out cookies lose their shape? Did you chill the dough? It’s important to chill the dough for at least 30 minutes before cutting out the cookies. It allows the butter to firm up. If the butter is too soft when the cookies go in the oven they will spread. How thick should they be? I like my cookies either 1/4″ thick or 1/2″ thick. Be sure to roll the dough to an even thickness otherwise they won’t bake evenly. How long do they last? These cookies will keep well at room temperature for up to three to four days. Keep them in an airtight container. Can you freeze sugar cookies? Yes, they freeze well. Bake the (undecorated) cookies and let them cool. Store them in a freezer bag or container and they will keep well for up to a month. Thaw them at room temperature and then decorate them. Chilling Tip: Don’t skip chilling the dough. I know it’s tempting to speed up the process, but the dough needs to be cold, so the butter is firm. This ensures your cookies won’t spread when they bake. Rolling Tip: When you roll and cut out the dough, try to cut as many cookies out as you can before rolling up the scraps and rolling them out again. The more you roll the dough, the more you will work the gluten in the flour. So if you roll it a lot, those last cookies you cut out could be less tender and soft than the first ones. Cookie Cutter Tip: You can use a round cutter or a glass, ramekin, or biscuit cutter that is the same size. You can also use different shapes, but this will change the number of cookies you get in the batch. Depending on the size, you may need to adjust the baking time, too. Decorating Tip: Short on time? You can use other kinds of frostings – try my chocolate buttercream or cinnamon cream cheese frosting. They don’t harden like royal icing, but they are great options if you want to do something simple. Or make it really easy and use store-bought frosting.
Once you have your icing you can keep it white or tint it. If you want different colors, divide the icing among bowls and tint them your desired colors. The easiest way to fill a piping bag is to fit the tip first and then place the bag in a tall drinking glass with the tip down. Fold the pastry bag over the edge of the glass and then add the icing. Use a rubber band to secure the bag and make it easy to squeeze. I also like to place a wet piece of paper towel in the bottom of the glass and set the piping bag on it when I’m not using it. The damp paper towel will keep the piping tip moist so the frosting doesn’t harden and plug the tip. For the cookies in this post, I used white icing and sprinkles to make a simple (and very cute!) design. First, pipe a circle around the edge of the cookies. Let it set and then flood the center of the cookie with more icing. Use a toothpick to spread it into an even layer. FAQS Why do my cut-out cookies lose their shape? Did you chill the dough? It’s important to chill the dough for at least 30 minutes before cutting out the cookies. It allows the butter to firm up. If the butter is too soft when the cookies go in the oven they will spread. How thick should they be? I like my cookies either 1/4″ thick or 1/2″ thick. Be sure to roll the dough to an even thickness otherwise they won’t bake evenly. How long do they last? These cookies will keep well at room temperature for up to three to four days. Keep them in an airtight container. Can you freeze sugar cookies? Yes, they freeze well. Bake the (undecorated) cookies and let them cool. Store them in a freezer bag or container and they will keep well for up to a month. Thaw them at room temperature and then decorate them. Chilling Tip: Don’t skip chilling the dough. I know it’s tempting to speed up the process, but the dough needs to be cold, so the butter is firm. This ensures your cookies won’t spread when they bake. Rolling Tip: When you roll and cut out the dough, try to cut as many cookies out as you can before rolling up the scraps and rolling them out again. The more you roll the dough, the more you will work the gluten in the flour. So if you roll it a lot, those last cookies you cut out could be less tender and soft than the first ones. Cookie Cutter Tip: You can use a round cutter or a glass, ramekin, or biscuit cutter that is the same size. You can also use different shapes, but this will change the number of cookies you get in the batch. Depending on the size, you may need to adjust the baking time, too. Decorating Tip: Short on time? You can use other kinds of frostings – try my chocolate buttercream or cinnamon cream cheese frosting. They don’t harden like royal icing, but they are great options if you want to do something simple. Or make it really easy and use store-bought frosting.
Nutrition Information
Serving: 1cookie, Calories: 331kcal (17%), Carbohydrates: 65g (22%), Protein: 1g (2%), Fat: 8g (12%), Saturated Fat: 5g (31%), Polyunsaturated Fat: 1g, Monounsaturated Fat: 2g, Trans Fat: 1g, Cholesterol: 30mg (10%), Sodium: 38mg (2%), Potassium: 8mg, Fiber: 1g (4%), Sugar: 61g (68%), Vitamin A: 260IU (5%), Calcium: 4mg, Iron: 1mg (6%)
Danielle says
These were so delicious! We had so much fun making these!
Alison says
Fabulous tips! My kids loved decorating these cookies.