Bunny Face Cookies
Leave a Comment
Posted: 03/08/24
This post may contain affiliate links. Please read our disclosure policy.
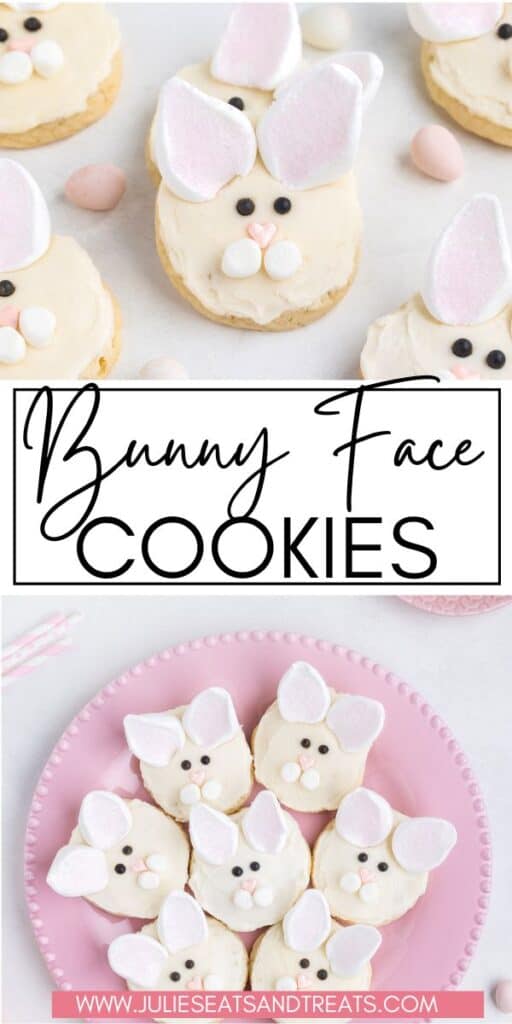
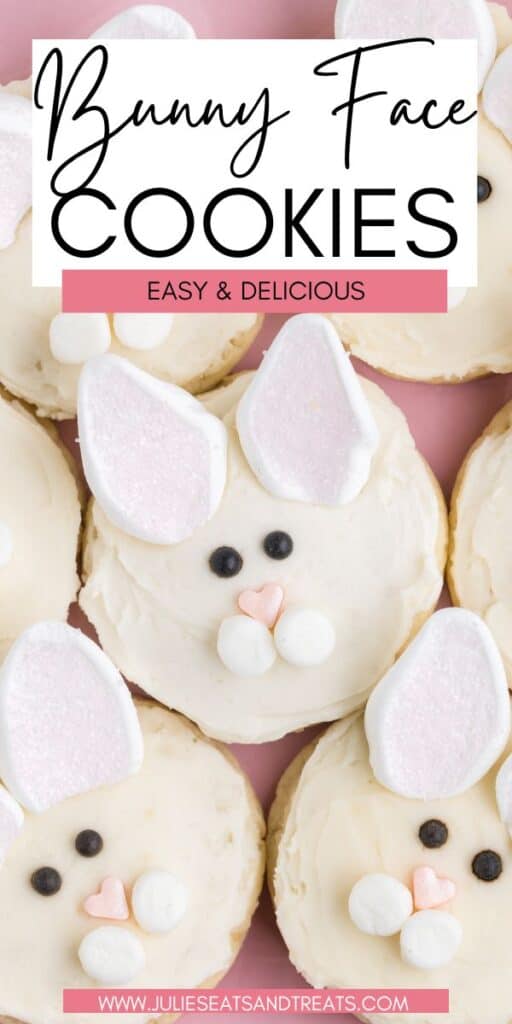
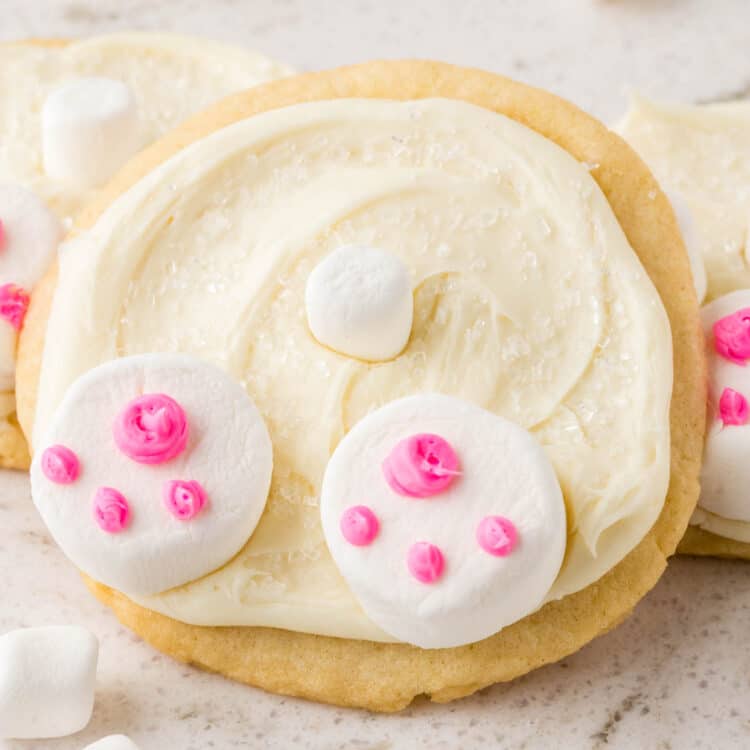
Easy homemade sugar cookies decorated with a cute bunny face! These delicious Bunny Face Cookies are the perfect treat or dessert for Easter that everyone will rave about. Cute and delicious, how can you say no?
Easter is right around the corner, and with it comes a whole menu of favorite recipes for the holiday. Our Easter brunch is always full of delicious food like cinnamon roll waffles and sheet pan breakfast, but we can’t forget dessert. That’s when I make super fun themed treats like these bunny face cookies!
Made from boxed cake mix, these simple Easter bunny cookies are soft, chewy, and decorated with the most adorable bunny face. I love this recipe because it’s kid-friendly and doesn’t require a ton of effort. So if you’re looking for some new Easter desserts, you’re going to love this easy cookie recipe!
Contents
show
Why You’ll Love Bunny Face Cookies
- Bunny face cookies are absolutely perfect for parties, cookie swaps, and gifts. They are unique and decorated just the most adorable way! Who wouldn’t want one of these cookies?
- This recipe is not from scratch and is super easy to make. It’s a great cookie recipe for novice bakers or those who just need something that they can throw together easily.
- Bunny face sugar cookies are a bakery quality dessert! Save some money this Easter and make the cute desserts right in your own kitchen instead.
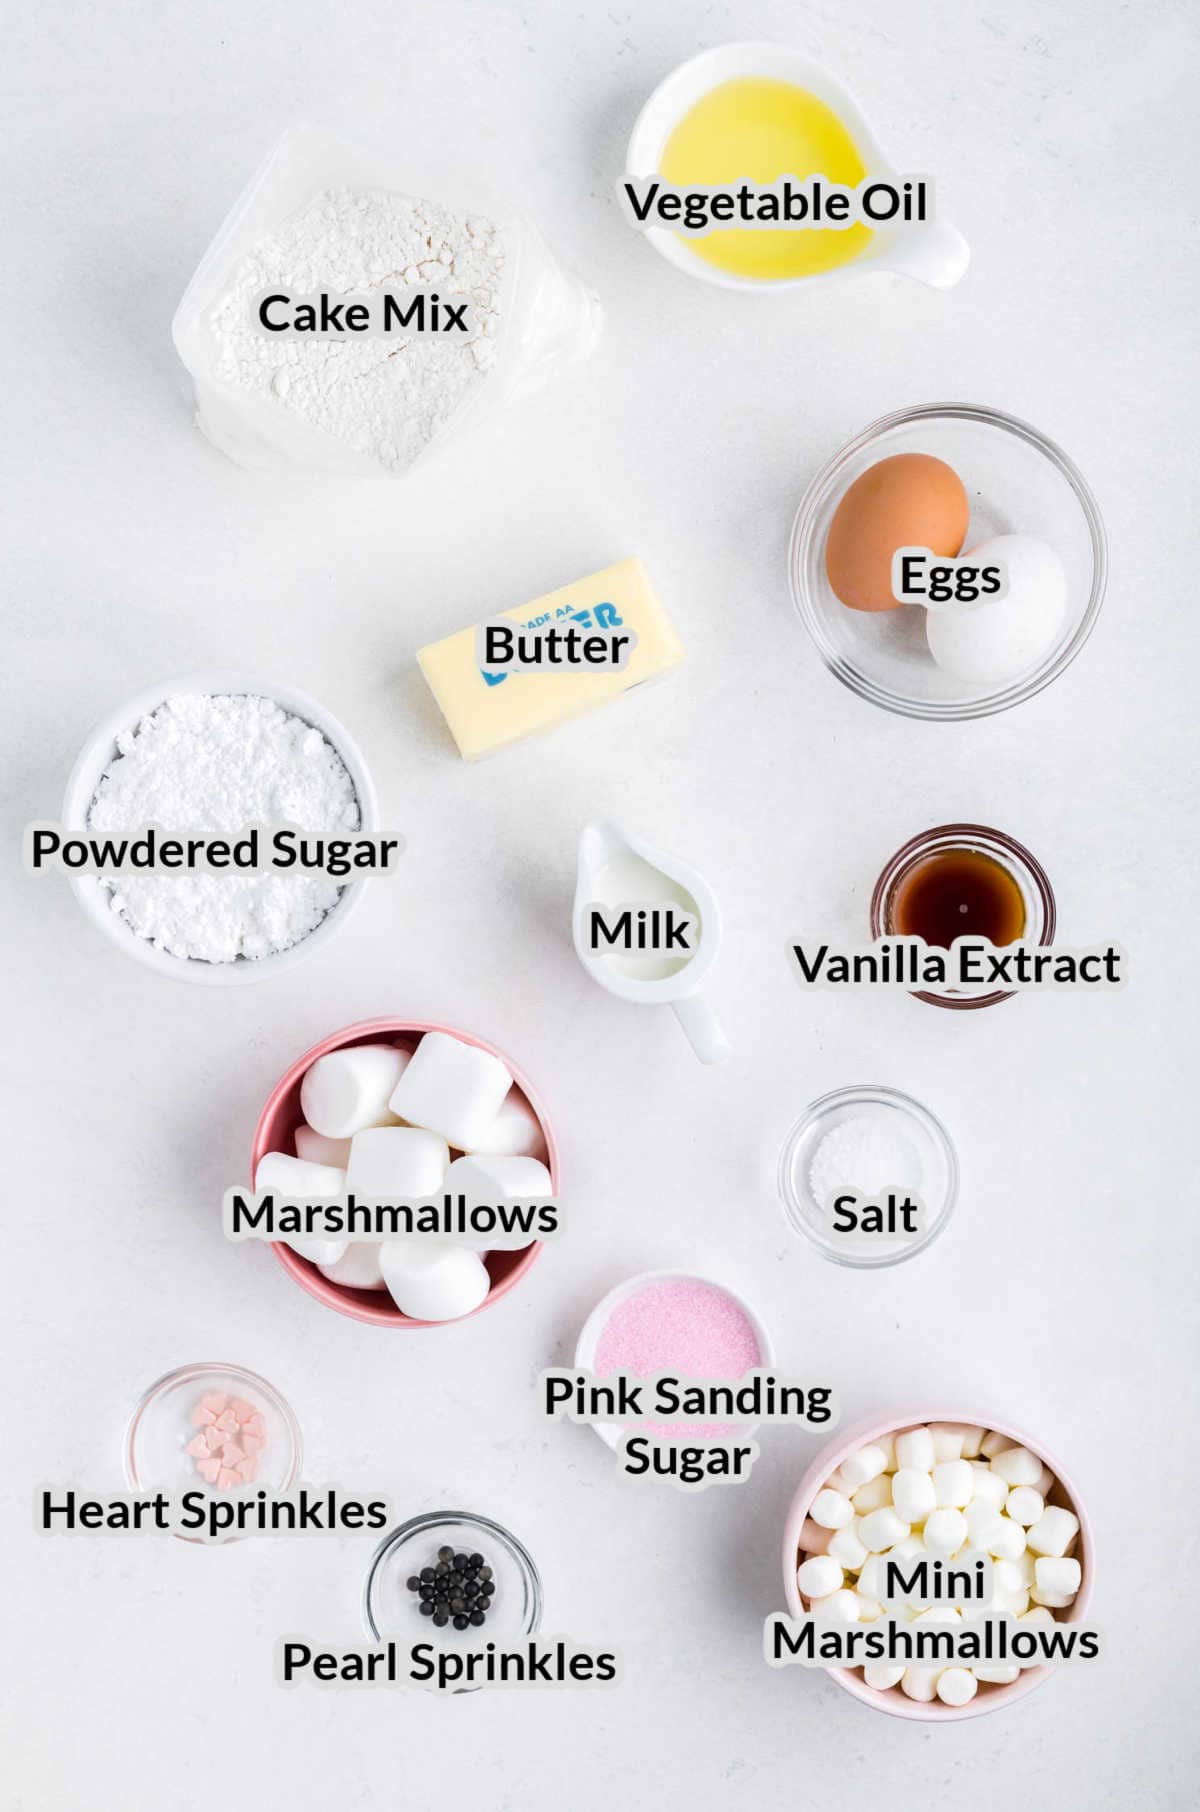
Ingredients for Easter Bunny Cookies
- Cake mix – White cake mix is what I typically grab for these Easter cake mix cookies, but you can use whatever you want!
- Vegetable oil – If you do not have vegetable oil, feel free to swap it out with another neutral oil like avocado or olive oil.
- Eggs – Allow your eggs to come to room temperature before mixing them into the cookie dough.
- Butter – Both salted and unsalted butter will work in this recipe!
- Powdered sugar – Powdered sugar is the magic ingredient in the most perfect homemade frosting!
- Milk – Use a little splash of milk to help bring together the ingredients for homemade frosting.
- Vanilla extract – You can’t make vanilla icing without vanilla!
- Salt – Add a pinch of salt into this recipe helps to balance out the sweetness of all the other ingredients.
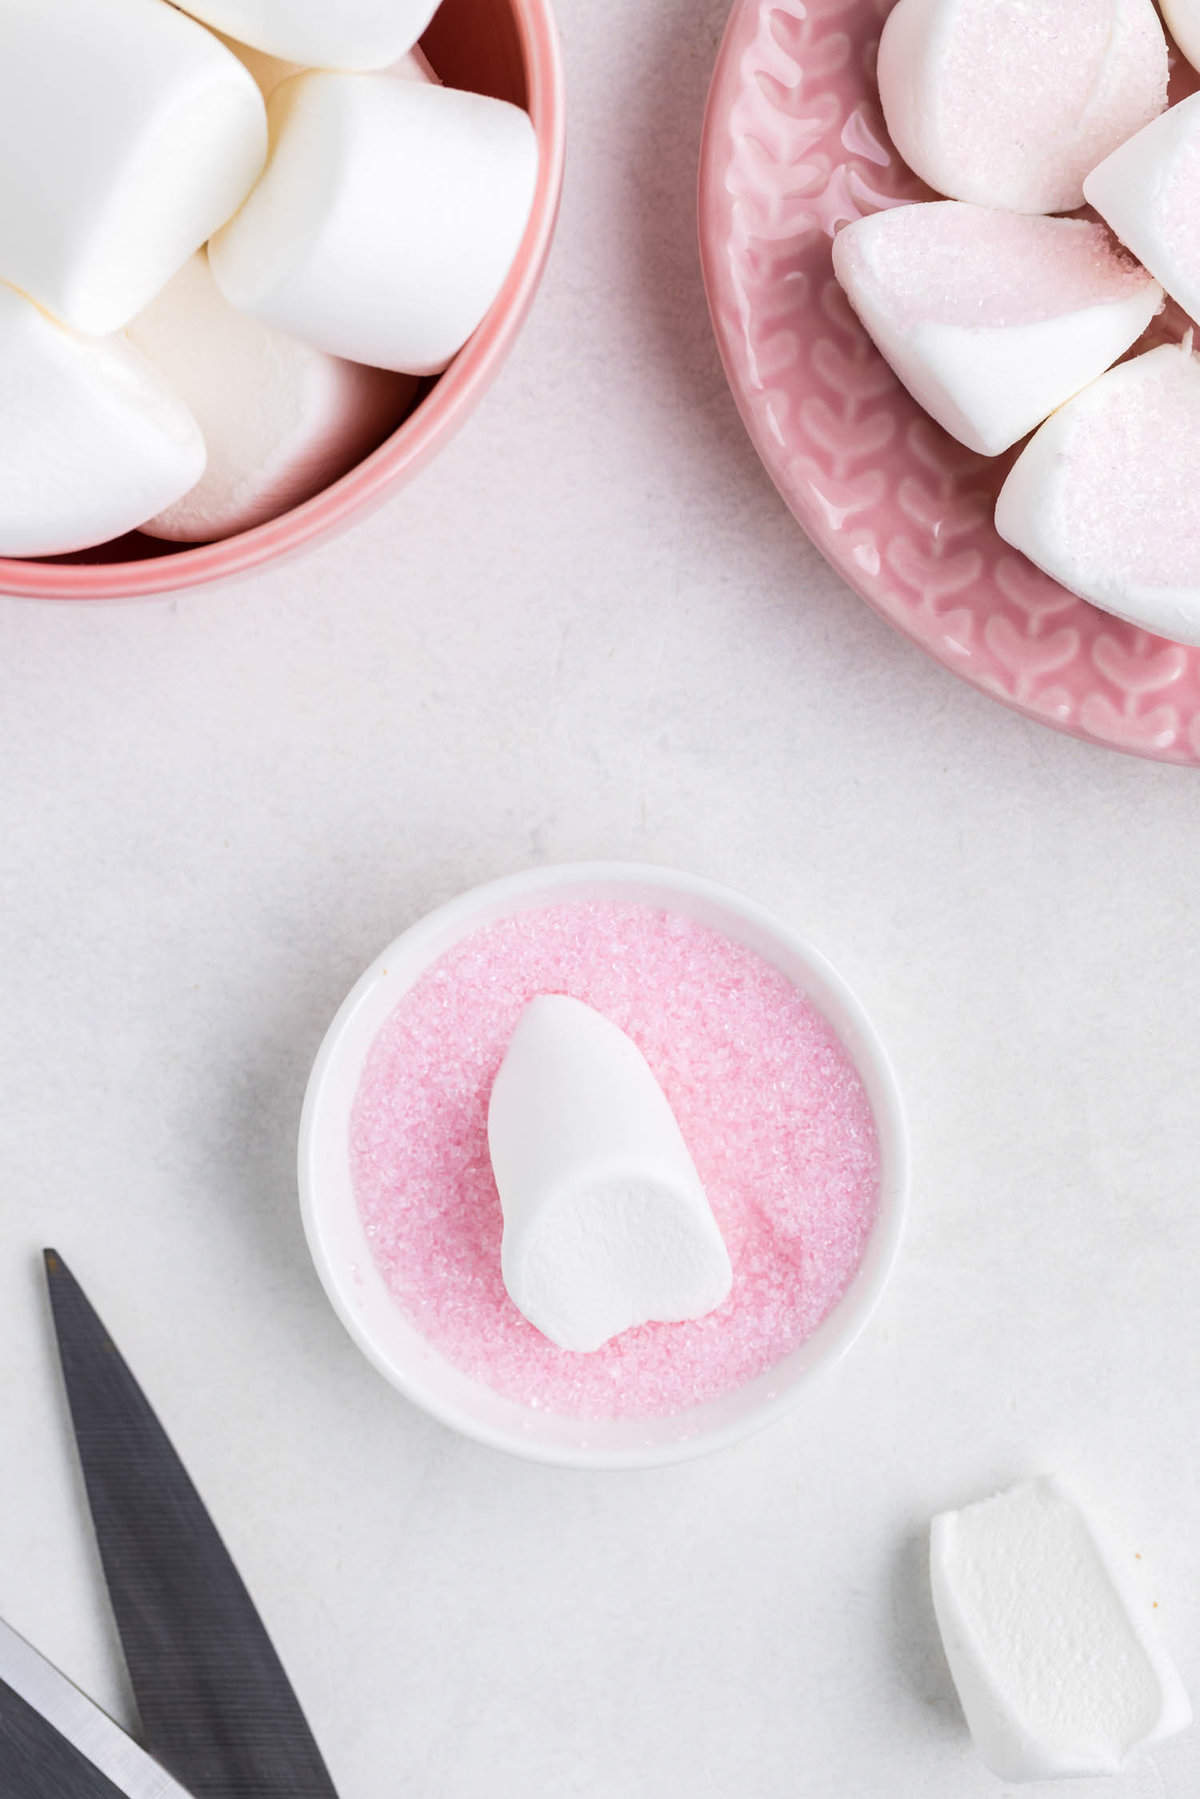
- Pink sanding sugar – Use pink sanding sugar to decorate the little marshmallow ears of your bunny face cookies.
- Mini marshmallows – Mini marshmallows will be a part of the decoration on each bunny face cookie.
- Marshmallows – Cut large marshmallows in half to make bunny ears!
- Heart sprinkles – You typically can find these on the baking aisle at your local grocery store. Check around Valentine’s Day too and go ahead and buy them to store for later!
- Pearl sprinkles – You’ll use two black pearl sprinkles as the eyes for your bunny.
Helpful Tools
- Mixing bowls
- Stand mixer or hand mixer
- Kitchen shears or sharp knife
- Baking sheet
- Cooling rack
- Measuring cups and spoons
- Piping bag
How to Make Bunny Face Cookies
Preheat your oven and then line two baking sheets with parchment paper and set them to the side for later.
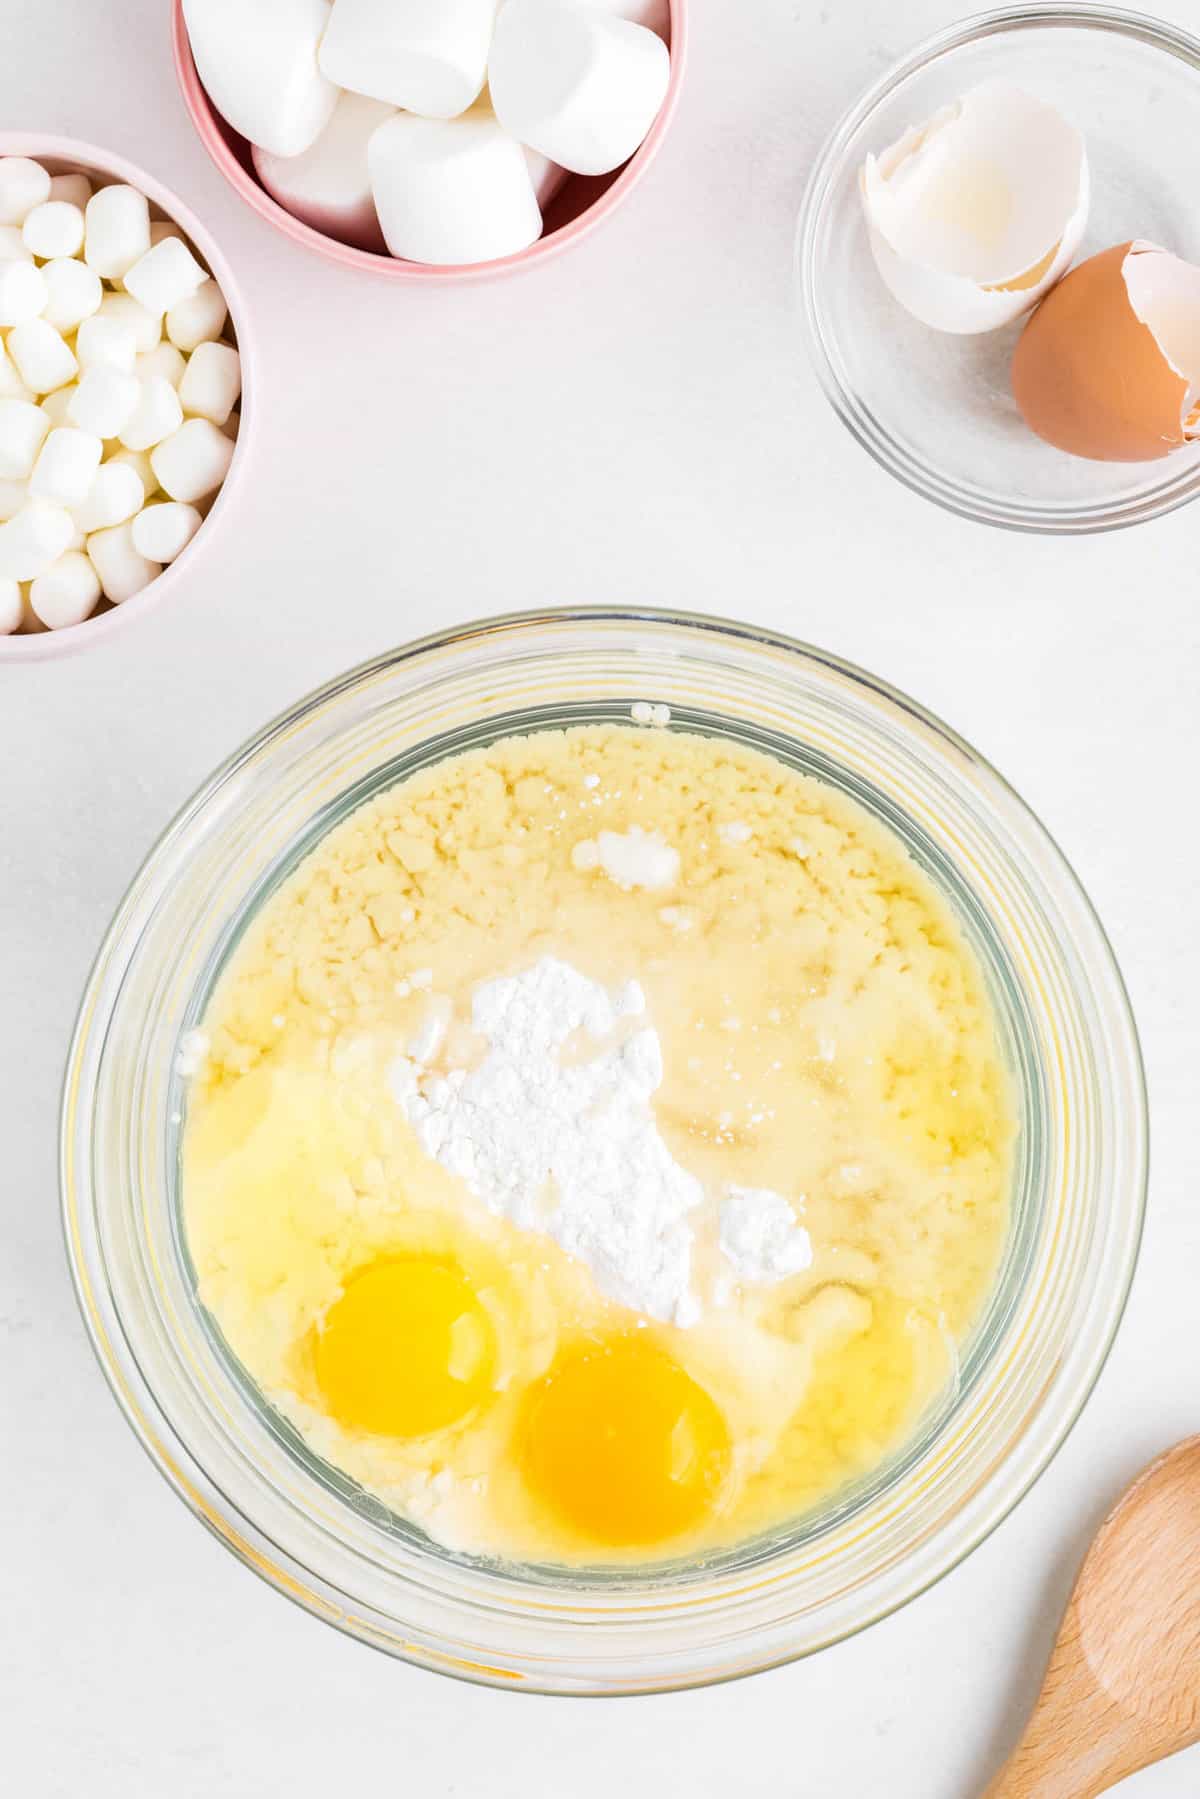
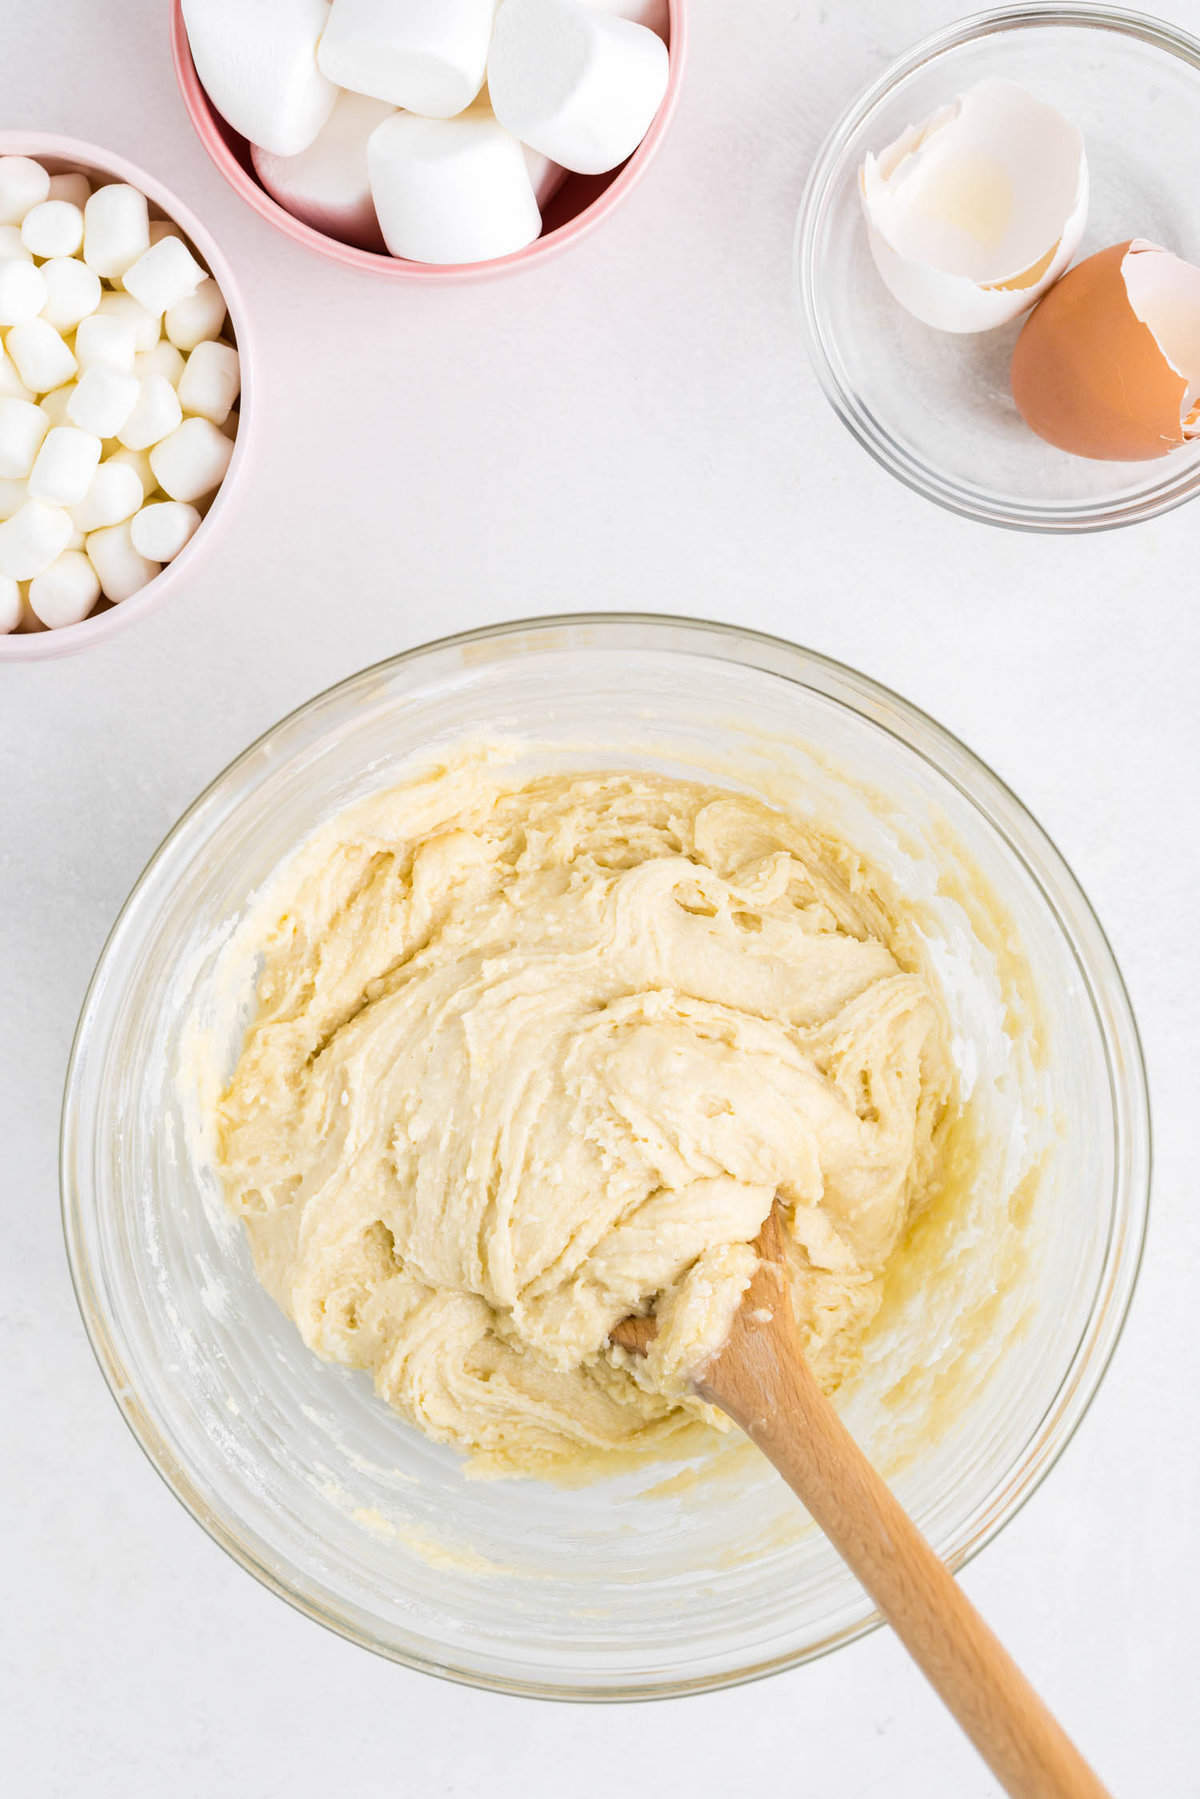
Then, combine cake mix, eggs, and vegetable oil in a medium mixing bowl until thoroughly incorporated.
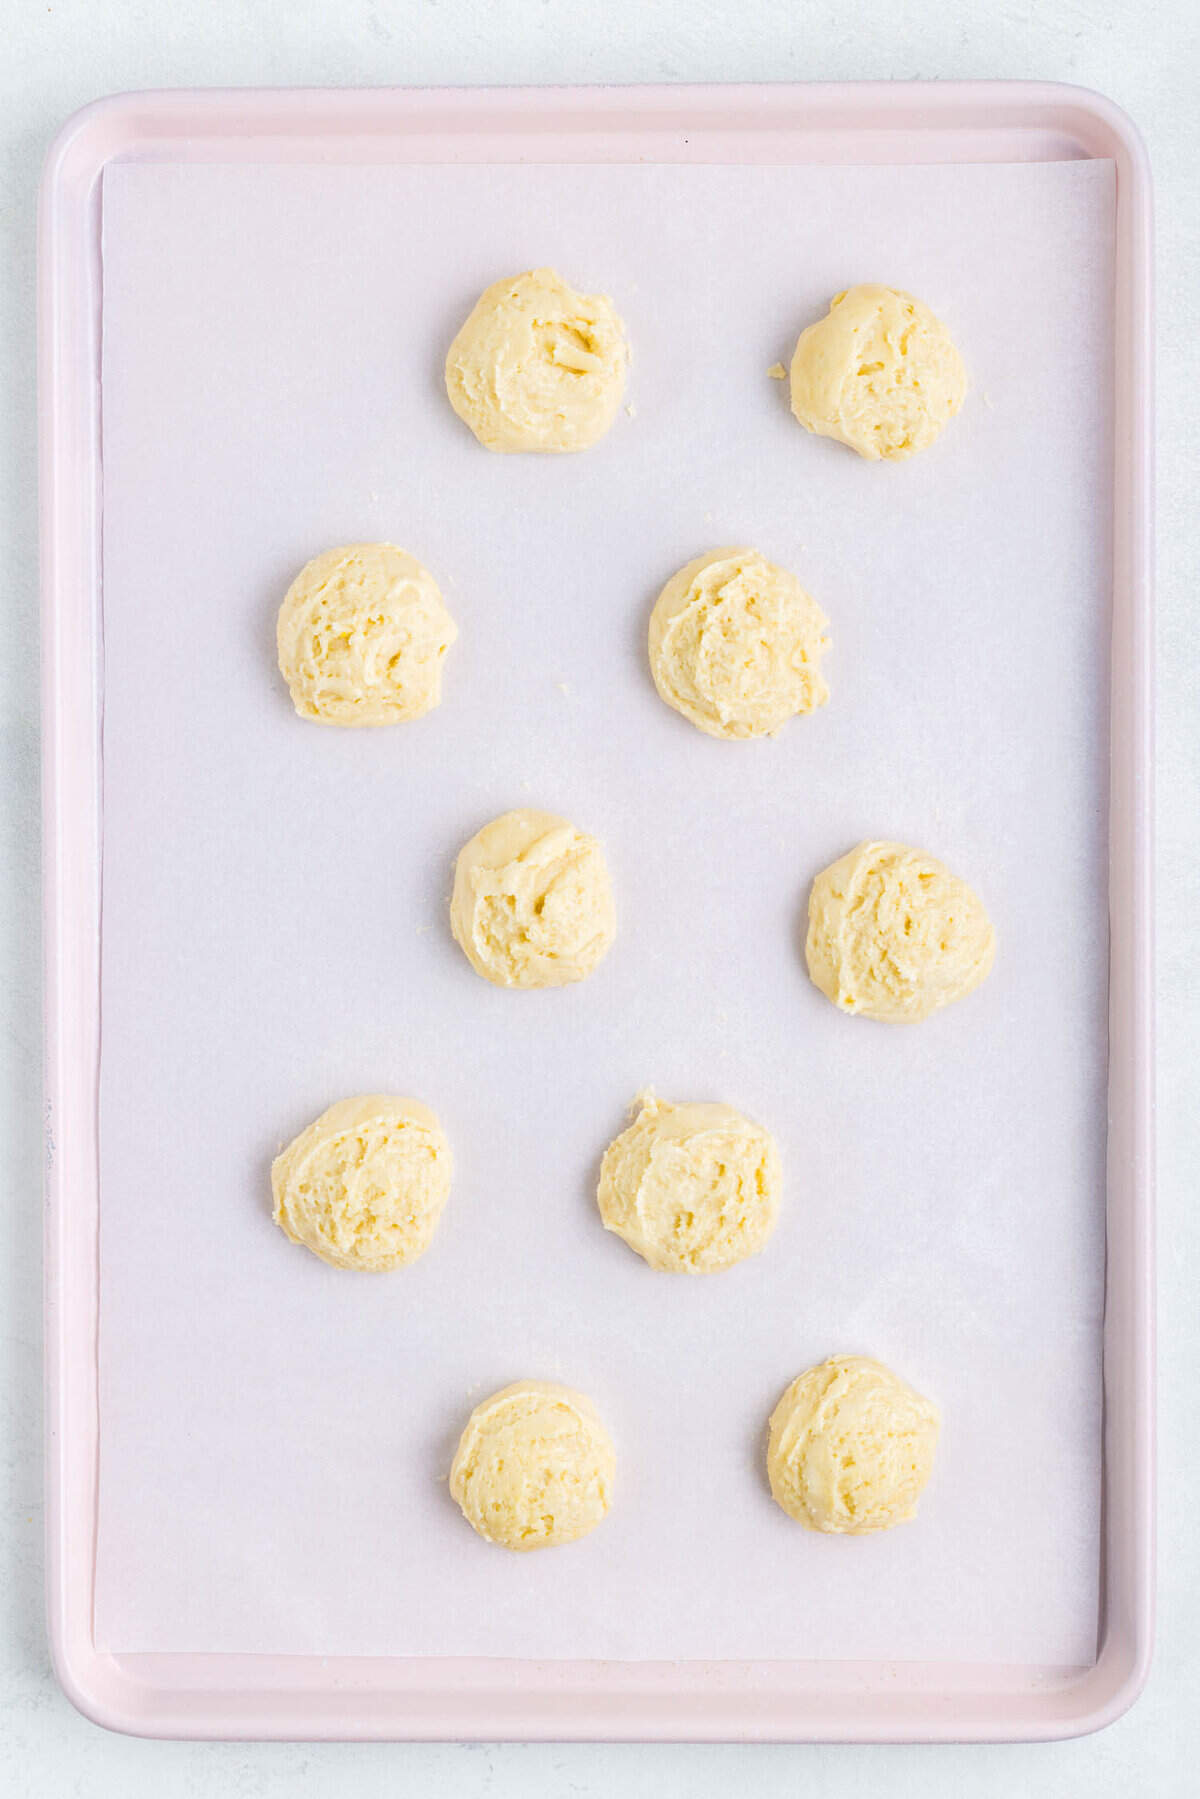
Use a cookie scoop and drop the cookies in even dough balls onto the previously prepared baking sheets.
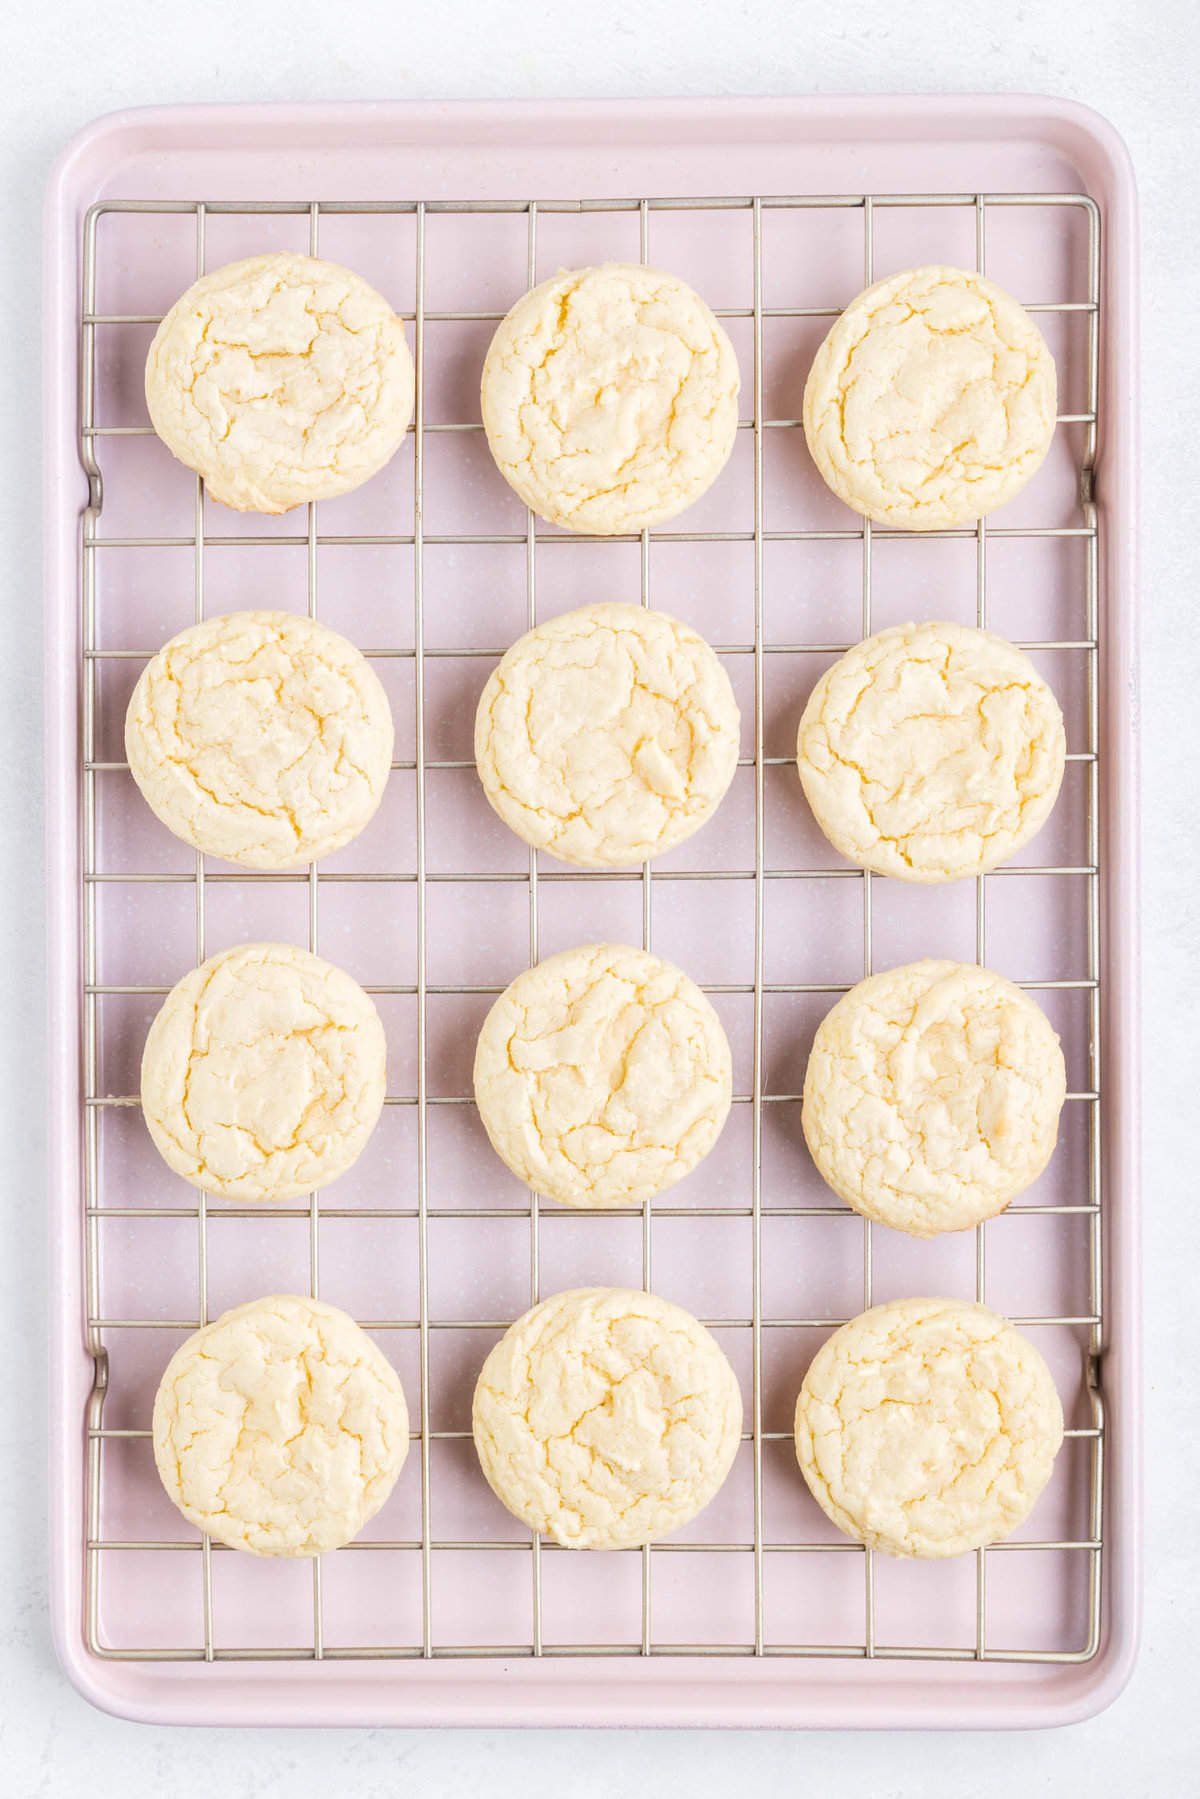
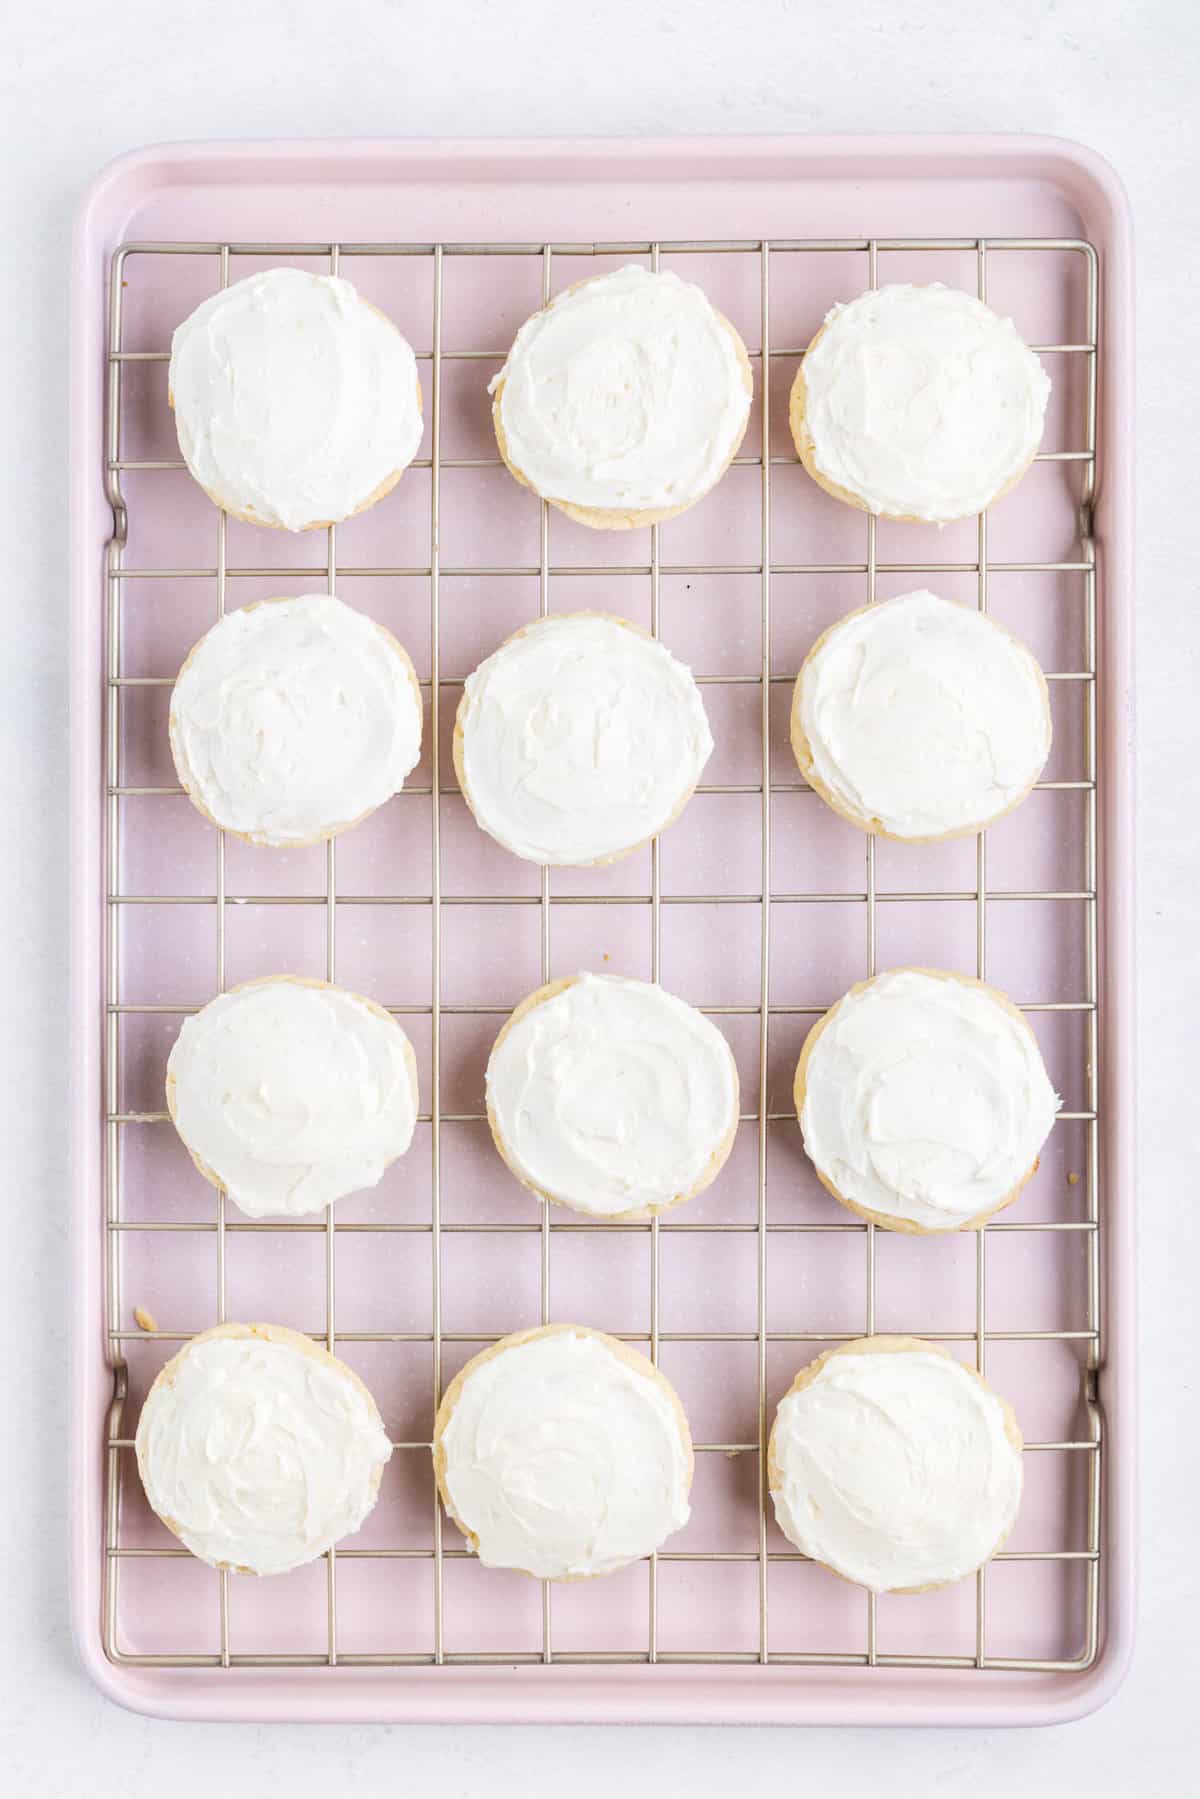
Then bake the cookies for 8-10 minutes until just golden brown. Allow them to cool on the cookie sheet for about 5 minutes, then transfer to a wire rack to cool completely.
While you wait for the cookies to cool, make the frosting. Beat the butter in the bowl of a stand mixer or in a mixing bowl with a hand mixer until it’s light and fluffy.
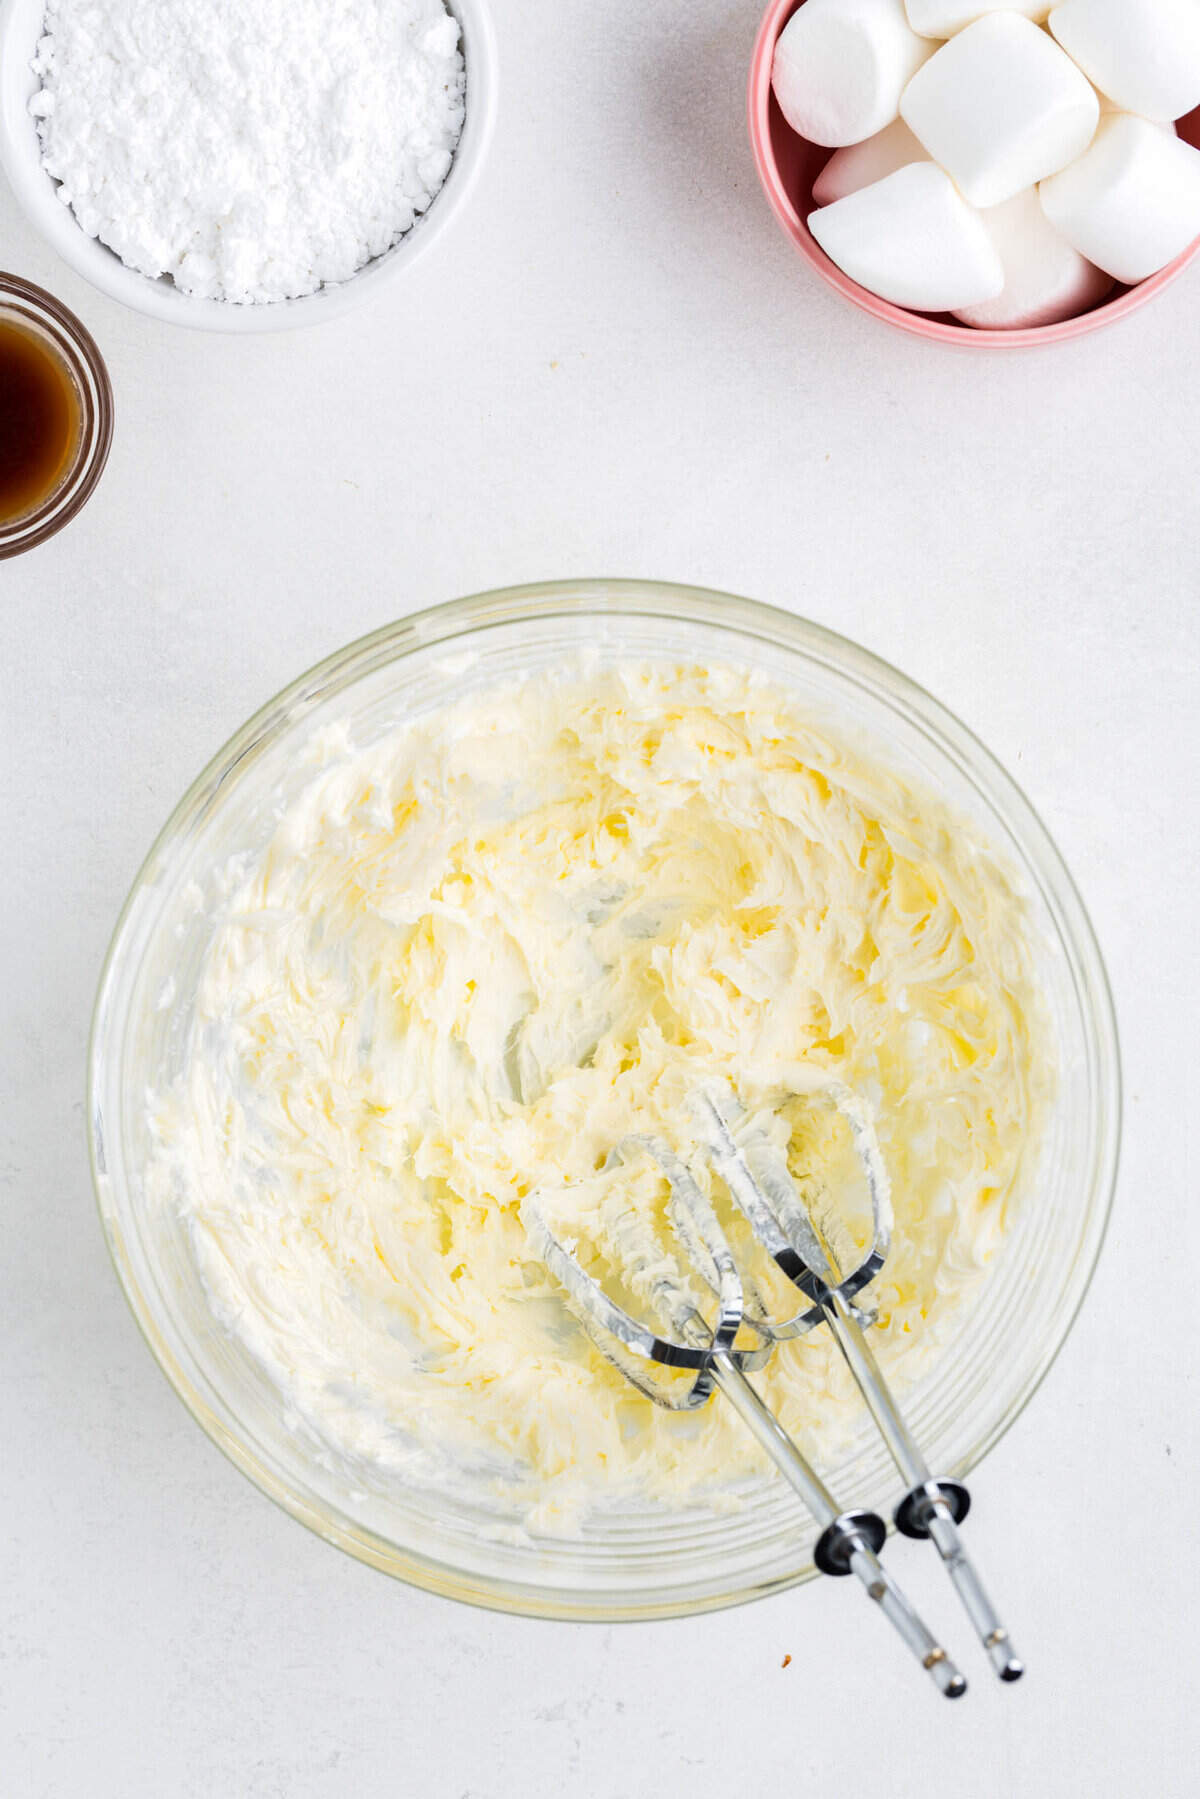

Then add the powdered sugar, vanilla, salt, and milk to the whipped butter and beat until thoroughly combined. Add a bit more milk, 1/2 a tablespoon at a time, until the frosting is the right consistency.
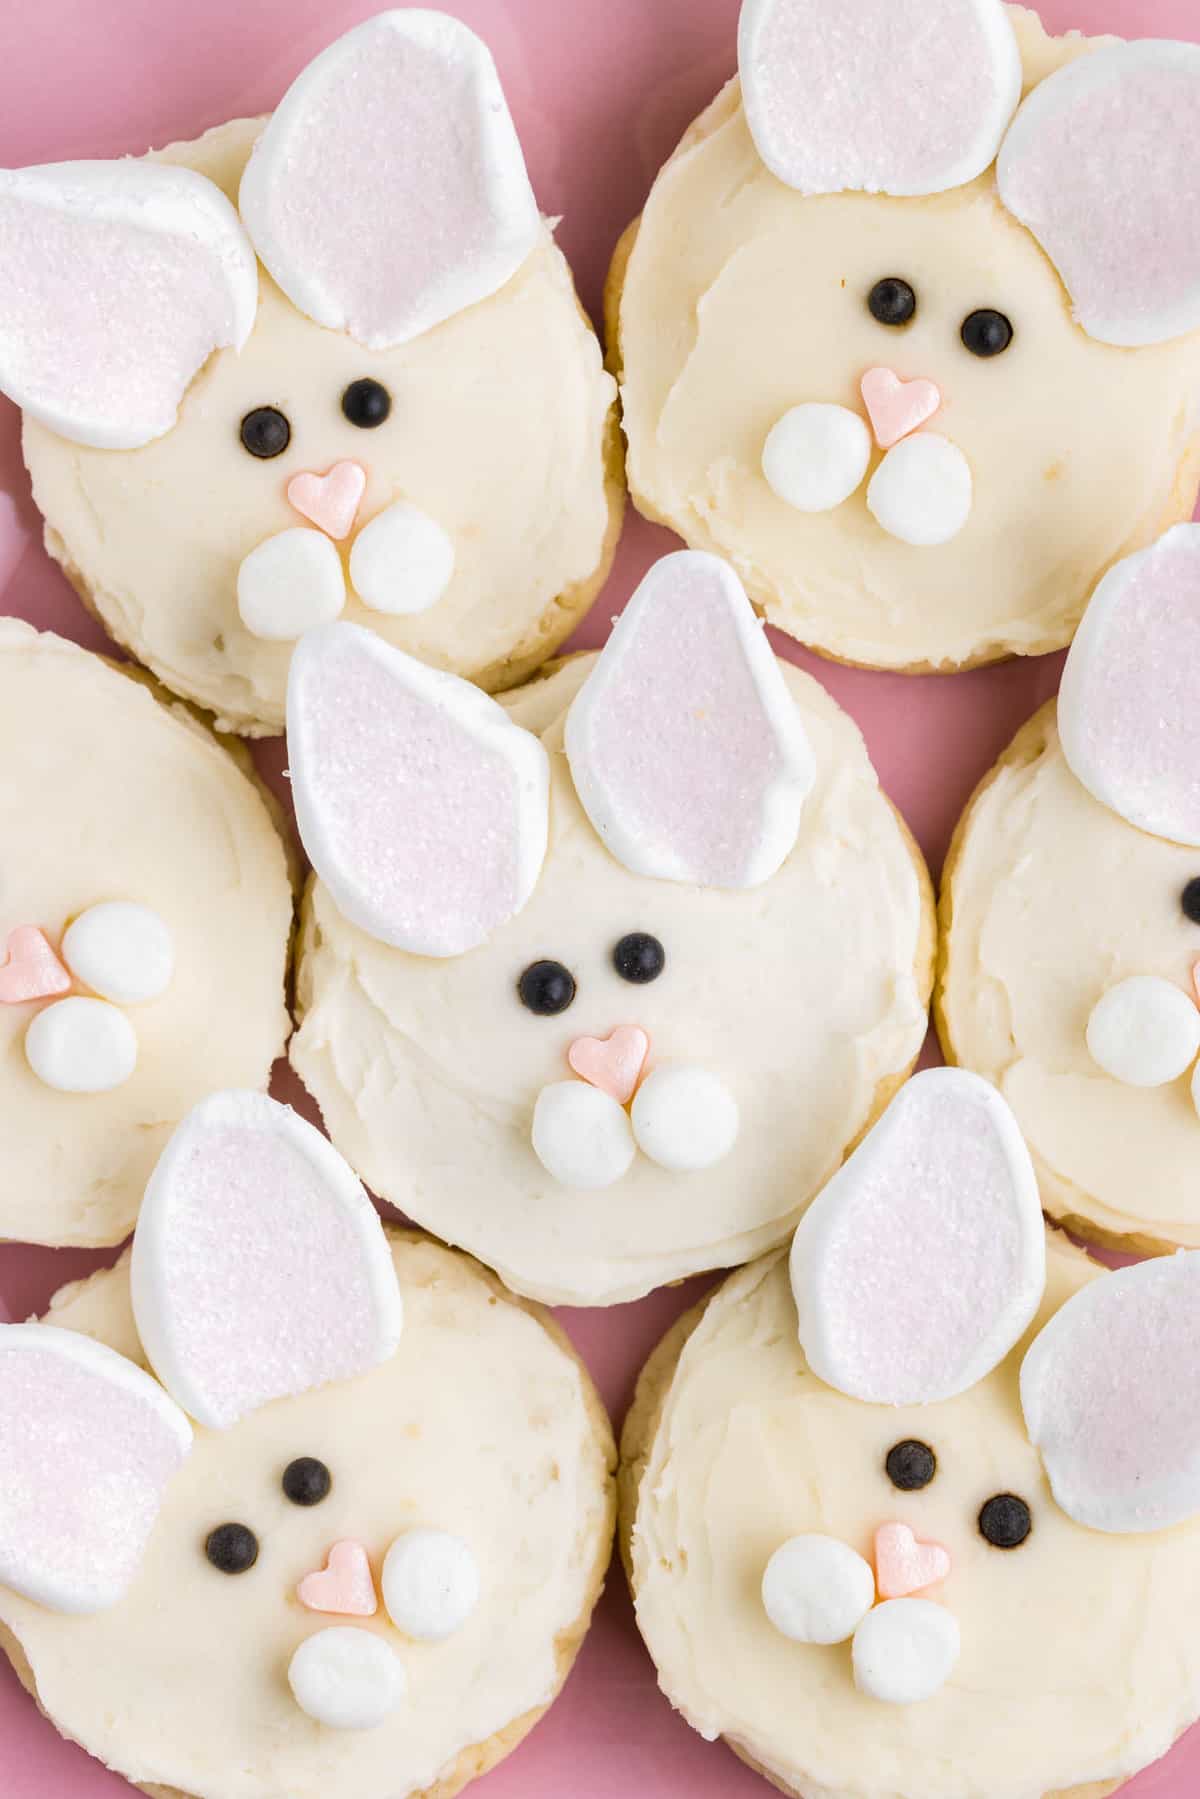
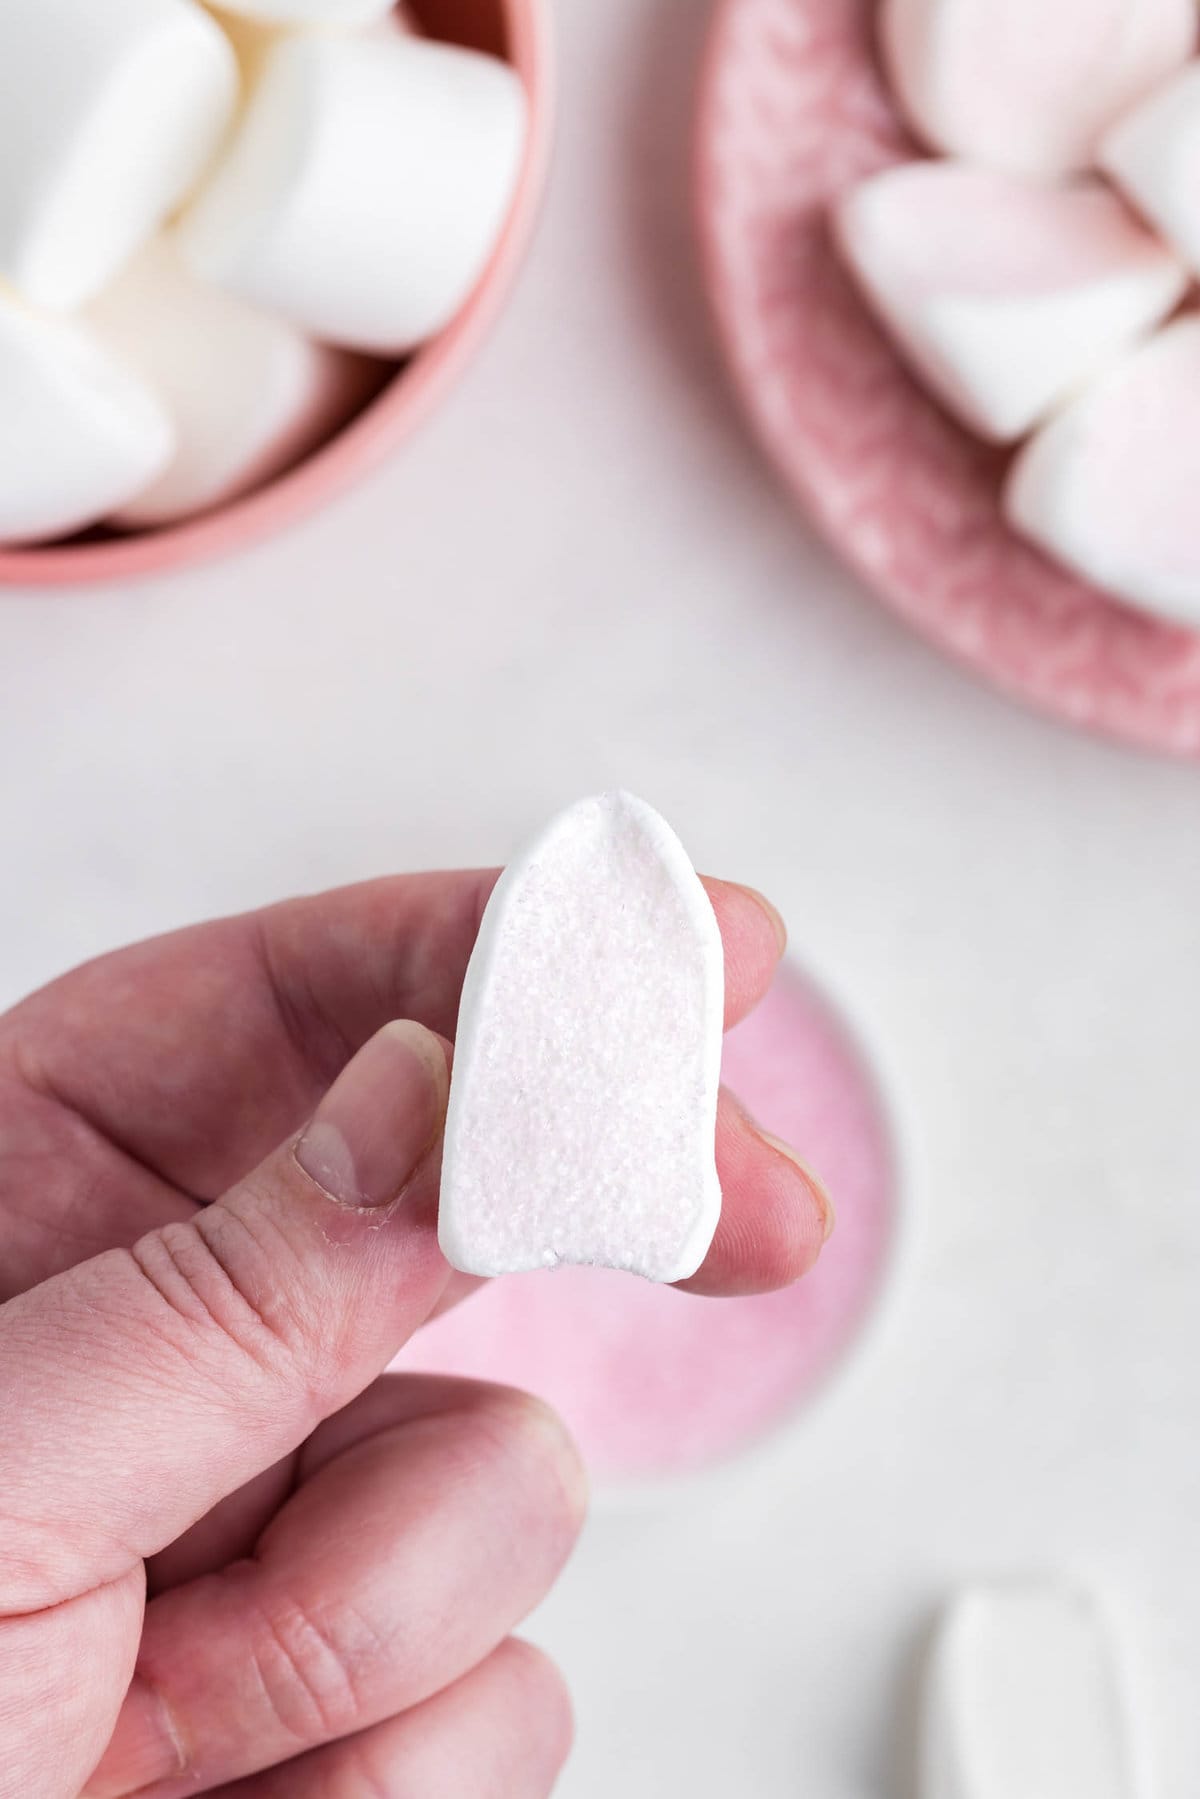
Once the cookies have fully cooled, you can begin decorating!. Cut the large marshmallows in half at a diagonal and then dip each half into the pink sanding sugar.
Cut mini marshmallows in half to create the cheeks for your bunny.
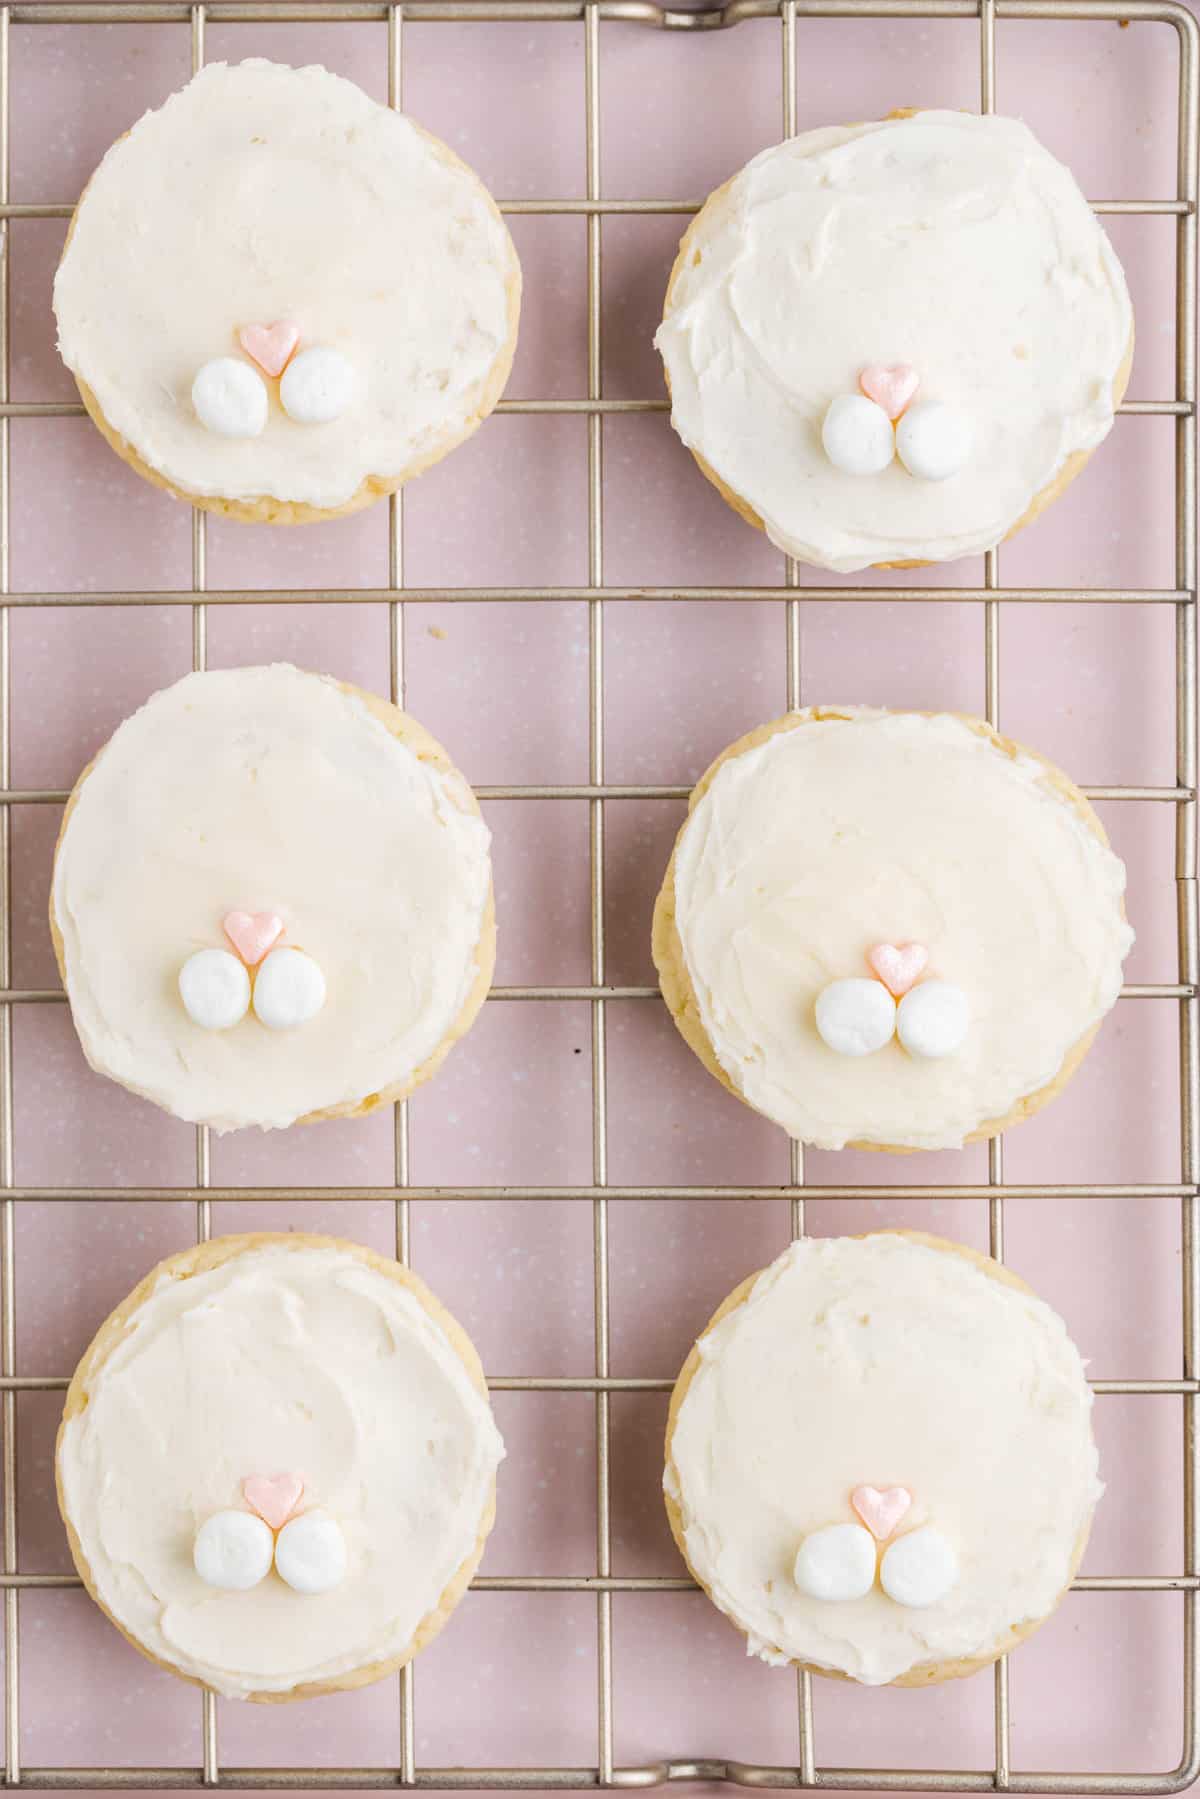
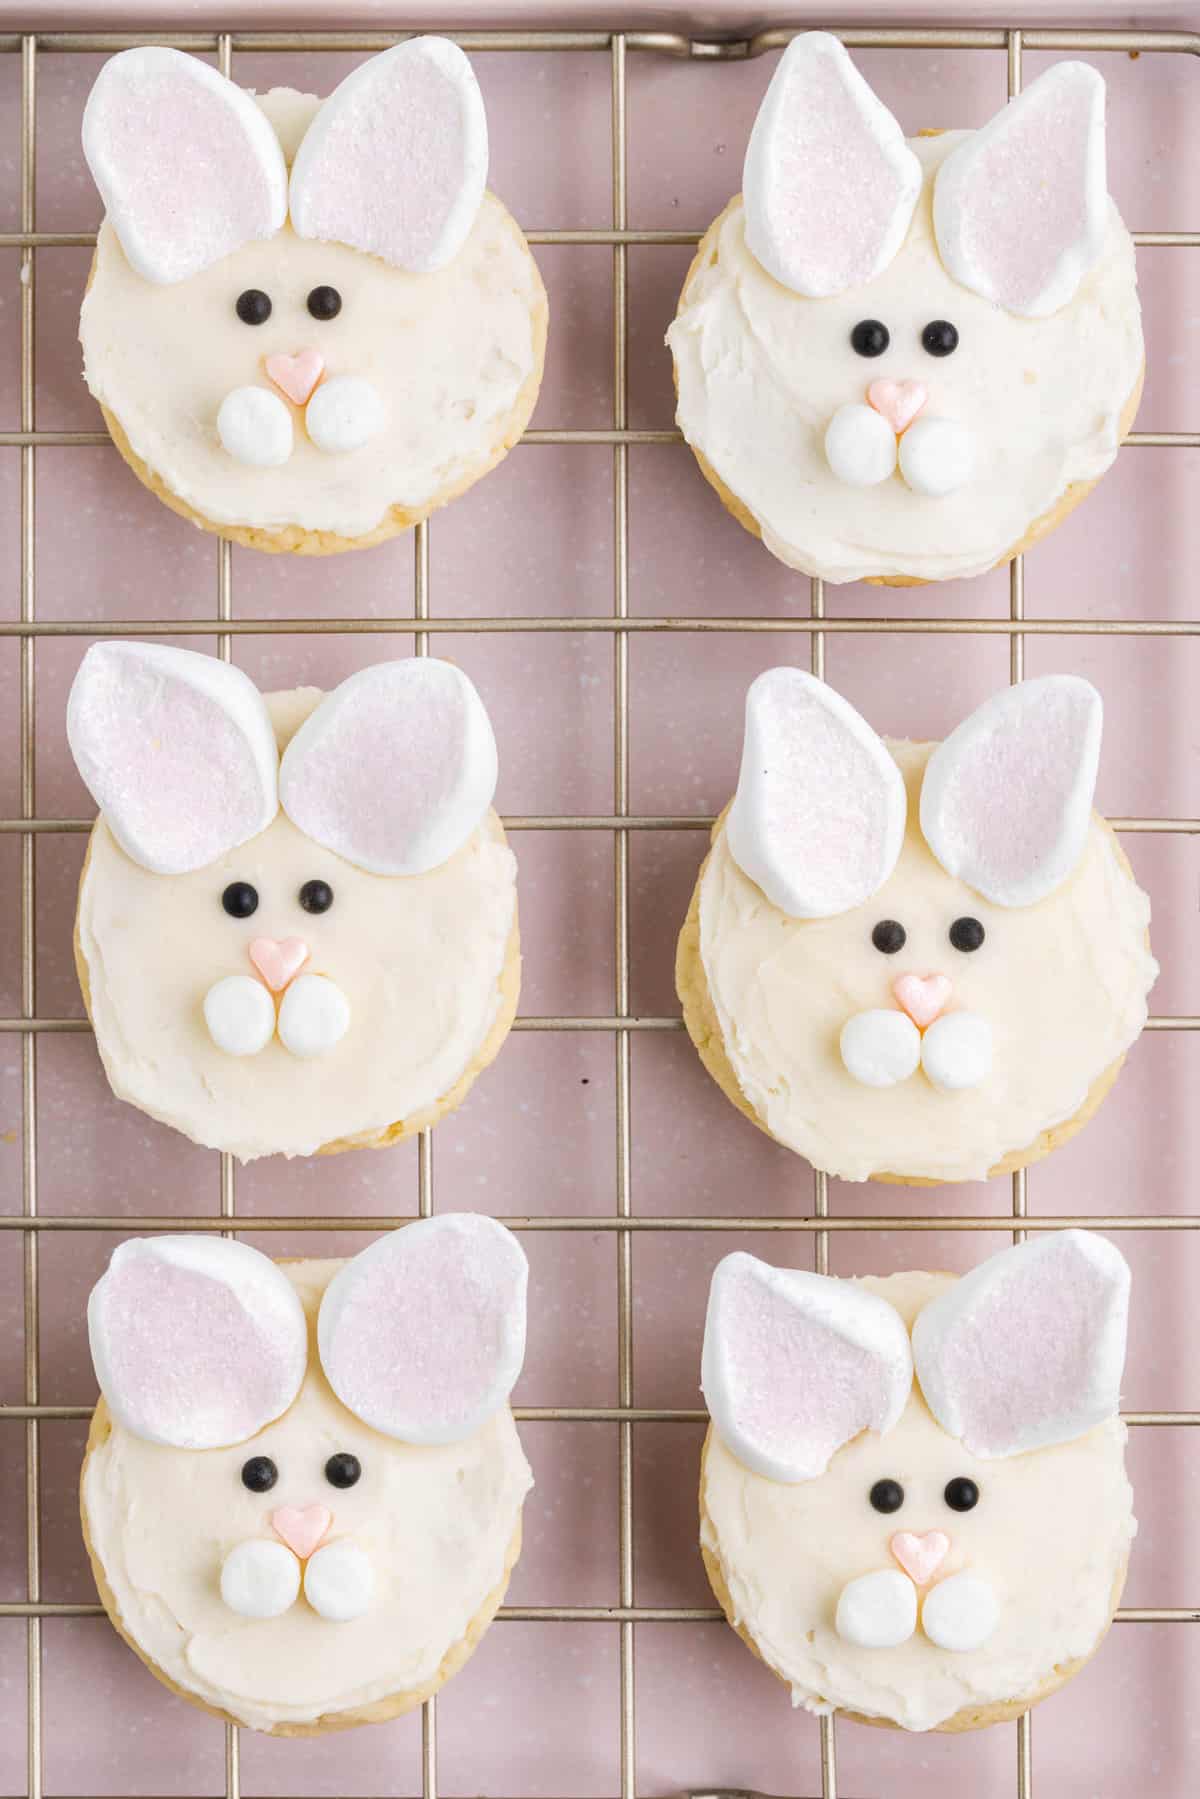
Scoop frosting into a piping bag and frost each cookie. Then immediately place the bunny ears, mini marshmallows, heart sprinkle nose, and pearl sprinkle eyes on each cookies.
Allow the frosting to set and then serve!
How to Store Bunny Face Cookies
Place leftover cookies in an airtight container for up to three days. It is best to store them in a single layer, but if you need to stack them then put a sheet of parchment paper between the layers so that they don’t stick together.
What can I use if I can’t find heart sprinkles?
If you don’t have any luck finding heart sprinkles, you can totally still make these cookies! Grab a pink jelly bean, or a pink M&M, even a dot of pink icing and turn that into the nose. Anything small can be used in place of the heart sprinkles.
I can totally understand needing to save some time and cut out a step or two. Feel free to grab a can of vanilla frosting from the grocery store and use it to frost the bunny face cookies.
Pro Tips for the Best Easter Bunny Cookies
- If you don’t have a piping bag, you can use a plastic zip top bag and cut the corner off. However, you can also ice the cookies with a knife that does not have a serrated edge!
- You can use any color of frosting and any flavor of cake mix that you want. These cookies are completely customizeable!
- Making these with kids? Go ahead and cut the marshmallows beforehand so that all they need to do is ice the cookie and then decorate it!
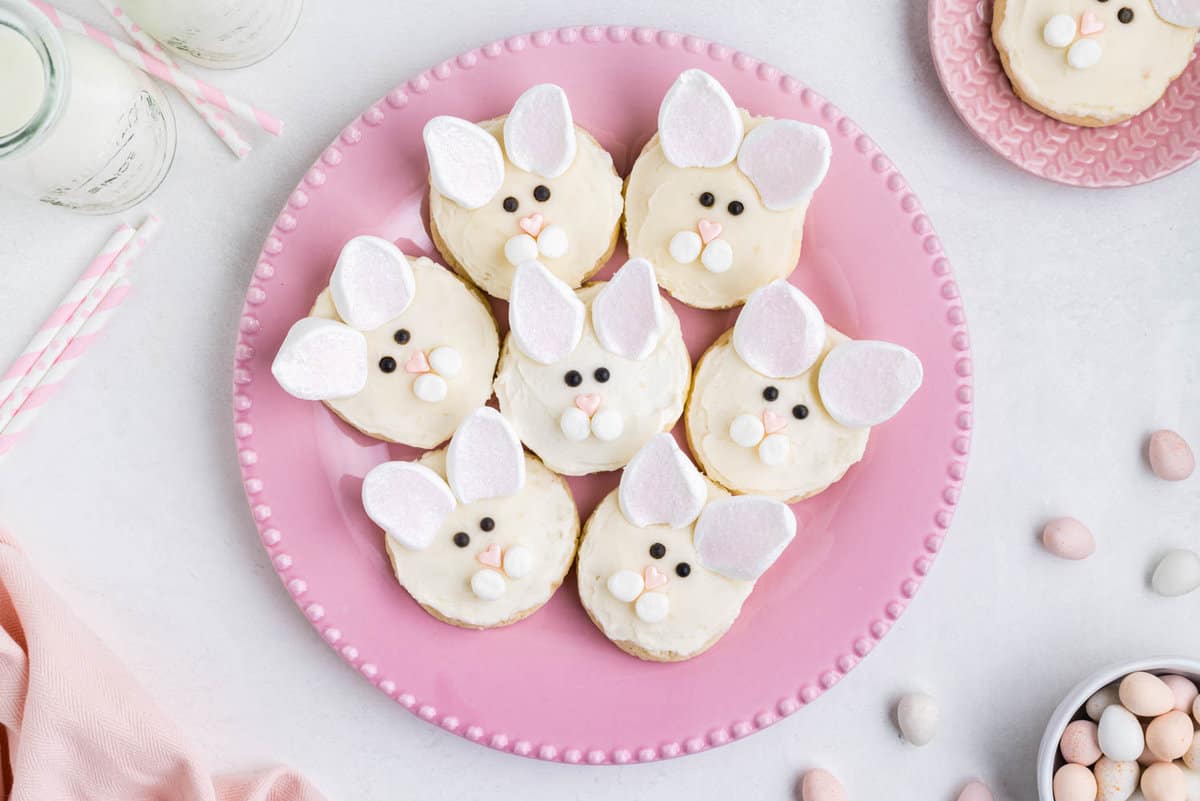
Easy bunny cookies are the best Easter treat! Start a tradition and make these adorable bunny face sugar cookies every year!
More Easter Recipes You’ll Love
- These cute Easter Cupcakes are so colorful and feel like spring! You’ll love how easy they are to make too.
- Grab some candy eggs and make Bunny Bait. The most easy and adorable sweet treat.
- Need an easy shareable treat? Carrot Cake Bars are a great treat to share at parties and a popular flavor around Easter.
- If you’re wishing you had someone to help you plan your Easter menu, you wish has been granted! Check out my round up on Easter Dinner Meal Plan for all the recipes you could ever need.
Did you make this? If you snap a photo, please be sure tag me on Instagram at @julieseatsandtreats or #julieseatsandtreats so I can see your yummy treat!
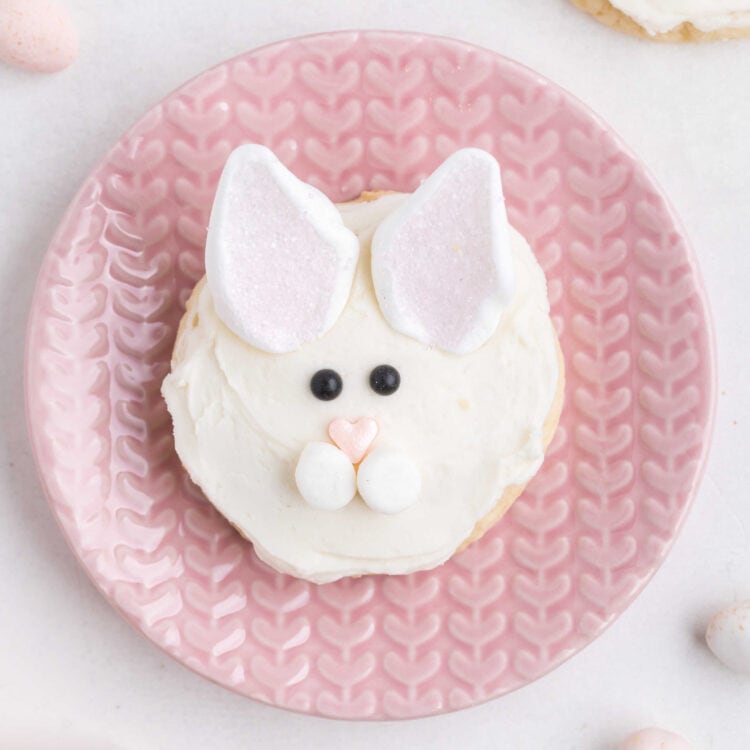
Bunny Face Cookies
Delicious sugar cookie that are decorated to make a cute bunny face on them perfect for Easter!
cookies
Ingredients
COOKIES
- 15.25 ounces vanilla or white cake mix 1 box
- 2 large eggs
- ½ cup vegetable oil
FROSTING
- ¾ cup unsalted butter room temperature, (1 ½ sticks)
- 2 ½ cups powdered sugar
- 1 ½ teaspoons vanilla extract
- 2-4 Tablespoons milk
DECORATIONS
- 16 regular marshmallows
- 2 Tablespoons pink sanding sugar
- 16 mini marshmallows
- 16 large heart sprinkles
- 32 black pearl sprinkles
Instructions
Cookies
- Preheat the oven to 350 degrees Fahrenheit. Line two cookies sheets with parchment paper and set aside.
- Add cake mix, eggs and oil to a medium sized mixing bowl and mix until well combined.
- Using a medium cookie scoop drop the cookie dough onto the parchment lined cookies sheets leaving at least 2 inches between scoops.
- Place baking sheets in preheated oven at 350 degrees Fahrenheit and bake for 8-10 minutes or until the edges are just starting to turn golden brown.
- Remove from oven and allow the cookies to cool on cookie sheets for 5 minutes. Then transfer them to a wire rack to finish cooling.
Frosting
- Add the butter to a medium mixing bowl and beat with hand or stand mixer until light and fluffy.
- Then add the powdered sugar, vanilla, salt and 1 Tablespoon of milk to the bowl with butter. Beat until well combined. Add more milk, 1/2 Tablespoon at a time, until the frosting reaches a consistency where it can be easily spread, but still retains it’s shape.
Assembly
- When the cookies are cooled, cut the large marshmallows in half diagonally with a sharp kitchen shears or chef’s knife. Place the pink sanding sugar into a bowl and dip the freshly cut side of the marshmallow into the pink sugar to create the bunny ears.
- Cut each mini marshmallow in half crosswise to create a bunny muzzle.
- Frost each completely cooled cookie.
- Immediately, while frosting is still wet, place a heart shaped sprinkle in the center of the bottom 1/2 of the cookie. This will create the nose on the cookie.
- Then add two of the mini marshmallow halves directly below the heart to create the bunny muzzle.
- After that, place two of the large marshmallow halves at the top of each cookie to create the ears.
- Then place two black pearl sprinkles between the ears and nose to create the bunny eyes.
- Allow frosting to set before serving the cookies.
Tips
Place leftover cookies in an airtight container for up to three days. It is best to store them in a single layer, but if you need to stack them then put a sheet of parchment paper between the layers so that they don’t stick together.
Nutrition Information
Serving: 1cookie, Calories: 303kcal (15%), Carbohydrates: 51g (17%), Protein: 2g (4%), Fat: 10g (15%), Saturated Fat: 6g (38%), Polyunsaturated Fat: 1g, Monounsaturated Fat: 3g, Trans Fat: 0.5g, Cholesterol: 43mg (14%), Sodium: 204mg (9%), Potassium: 31mg (1%), Fiber: 0.3g (1%), Sugar: 39g (43%), Vitamin A: 298IU (6%), Vitamin C: 0.004mg, Calcium: 68mg (7%), Iron: 1mg (6%)

Leave a Comment