Halloween Sugar Cookies
3 Comments
Posted: 09/26/21
Updated: 09/27/21
This post may contain affiliate links. Please read our disclosure policy.


These thick and delicious Halloween Sugar Cookies are easy to make, hold their shape and have plenty of room to frost! Use your favorite cookie cutters or a cup, mason jar or ramekin to cut them out in a pinch! Then top them with our royal icing recipe and decorate with a Halloween theme. The perfect sweet ending to your Halloween parties.
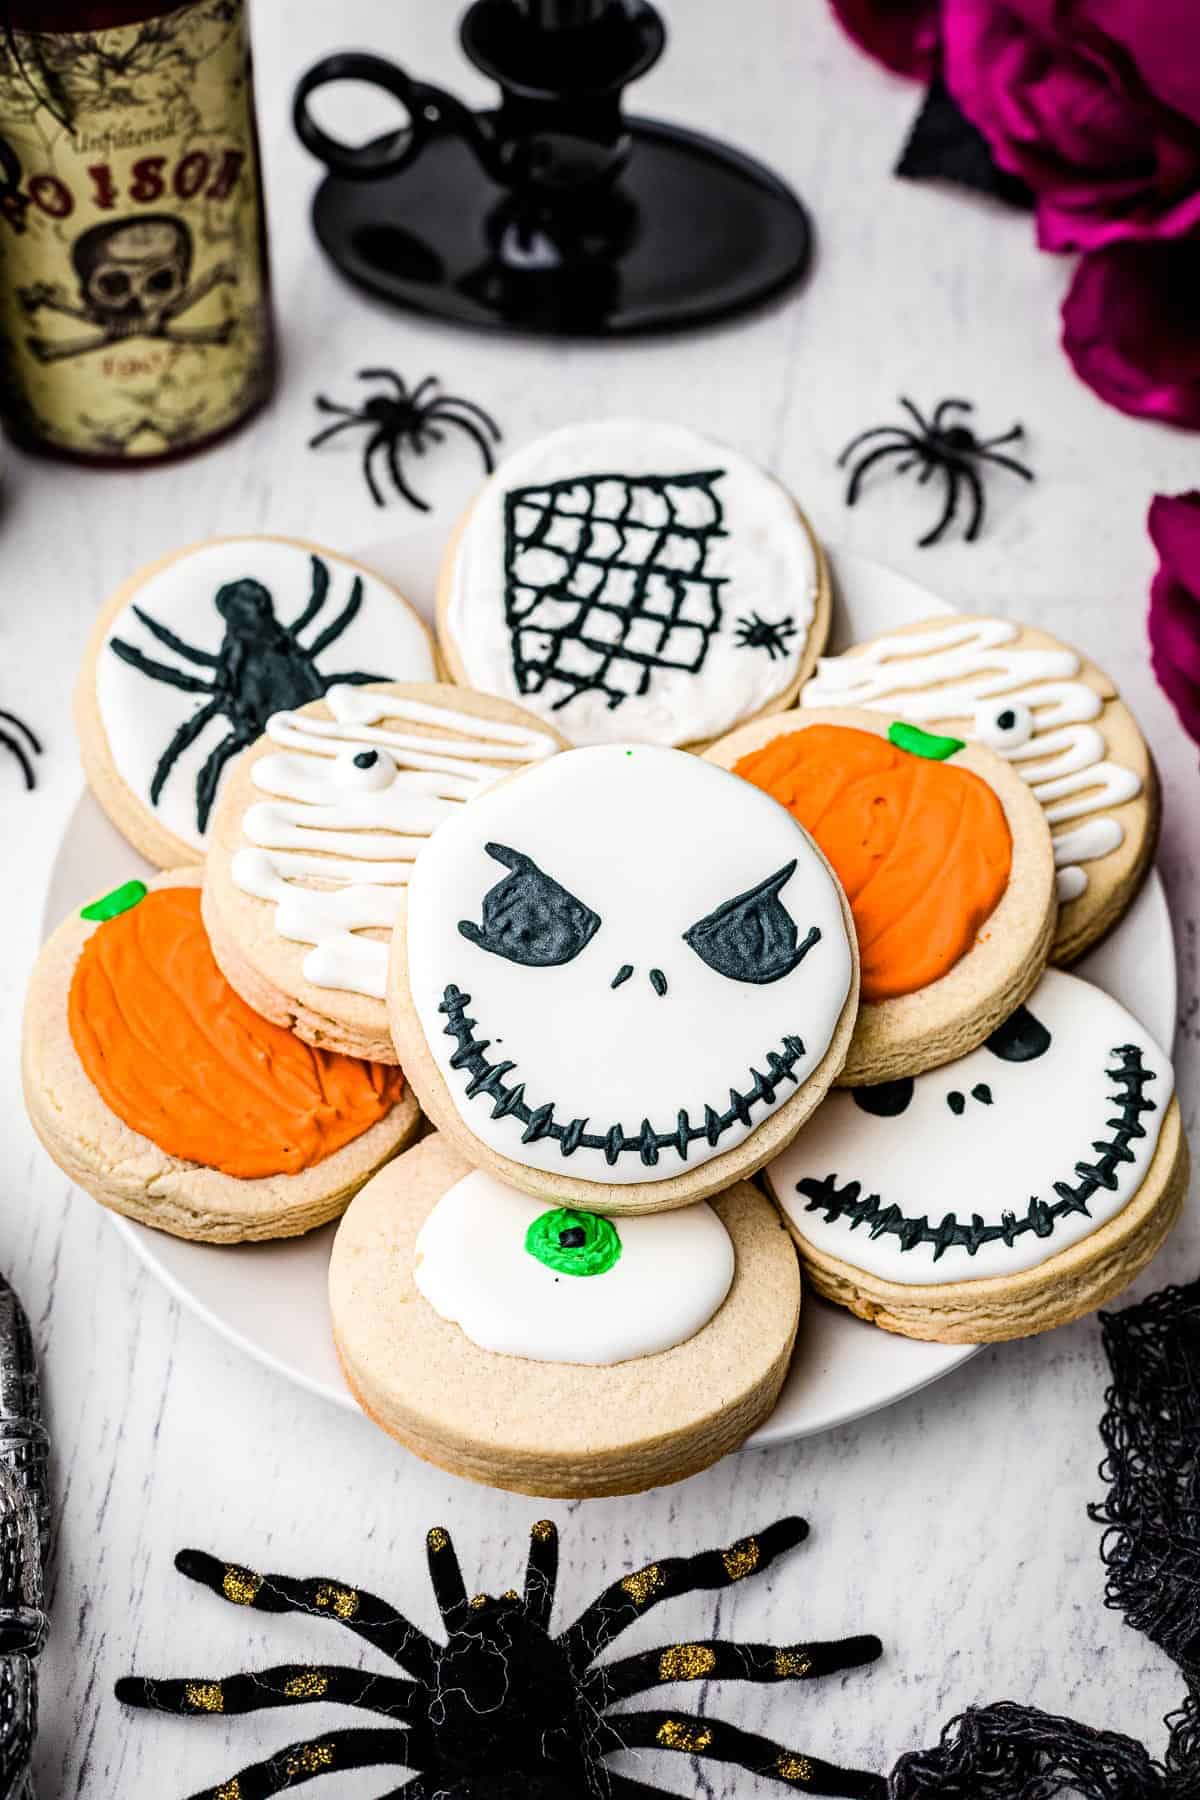
These Halloween cookies look like they came straight from a fancy bakery, but you can make them at home and they are seriously the best.
They start with an amazing cookie base. Thick sugar cookies that are perfect for icing and so delicious. And the icing? I’m showing you how to use royal icing to make the cutest Halloween designs.
Contents
show
Why This Recipe Works
- With this recipe, you get an amazing sugar cookie recipe plus the royal icing recipe all in one post.
- All of the ingredients are simple! Nothing complicated or hard to find.
- I’ve listed out all of the tools you’ll need for the recipe, so there are no surprises.
- Once you cut out the sugar cookie dough, the cookies hold their shape while they bake. No spreading and uneven cookies – they are perfect for decorating.
- I’m showing you how to make some super cute Halloween cookie designs, but feel free to get creative and use your favorite cookie cutters and Halloween decorating ideas for these cookies.
You can make these Halloween sugar cookies ahead for all of your events or just make a batch to share with your family! They’re so cute and so delicious!
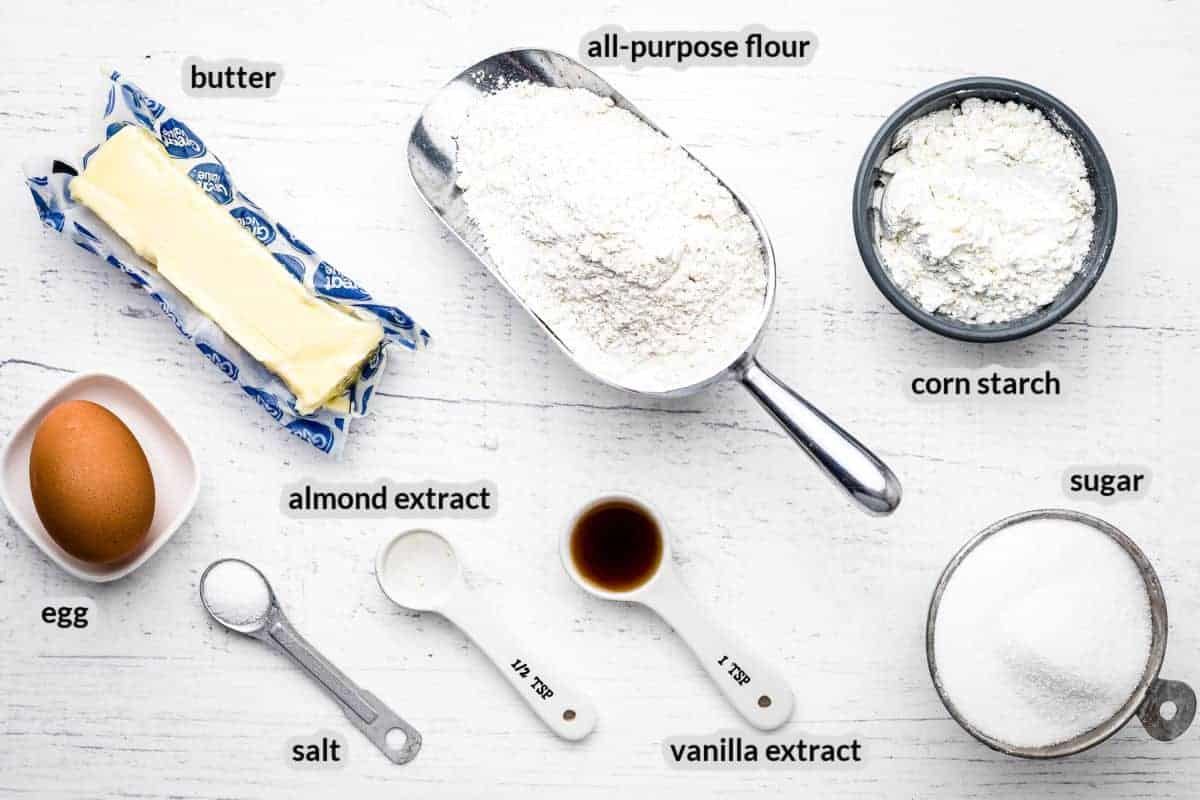
Sugar Cookie Ingredients
- All-purpose flour
- Corn starch
- Salt
- Room temperature unsalted butter
- Granulated Sugar
- Room temperature egg
- Vanilla extract
- Almond extract
How to Make Them
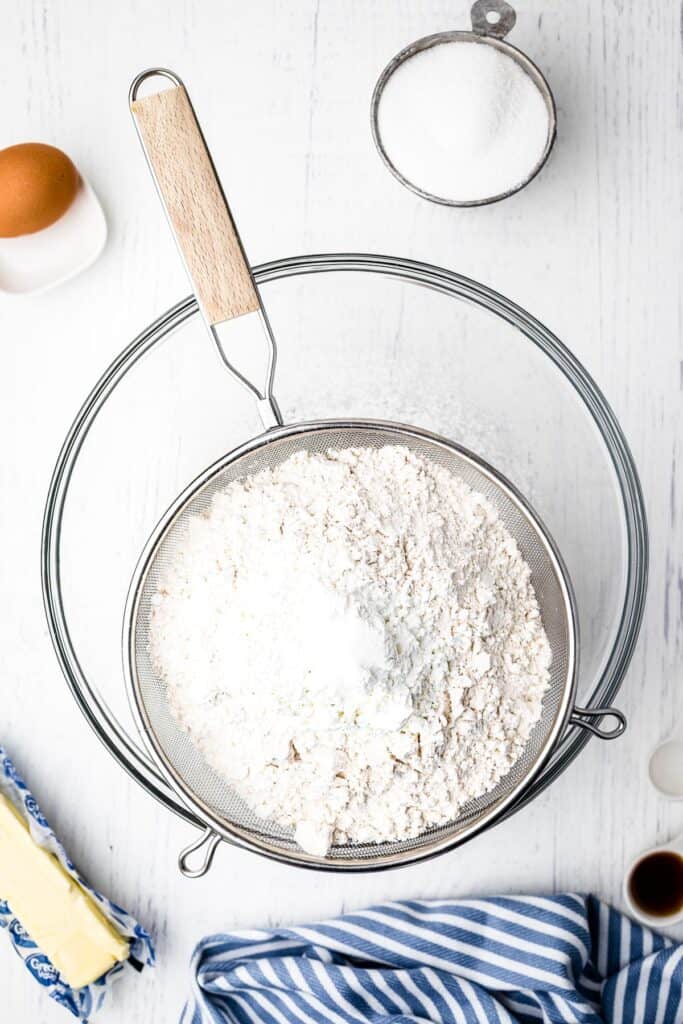
Sift the flour, corn starch, and salt into a medium-sized bowl. You can do this with a sifter or a fine-mesh strainer. Once sifted, whisk the ingredients to fully combine.

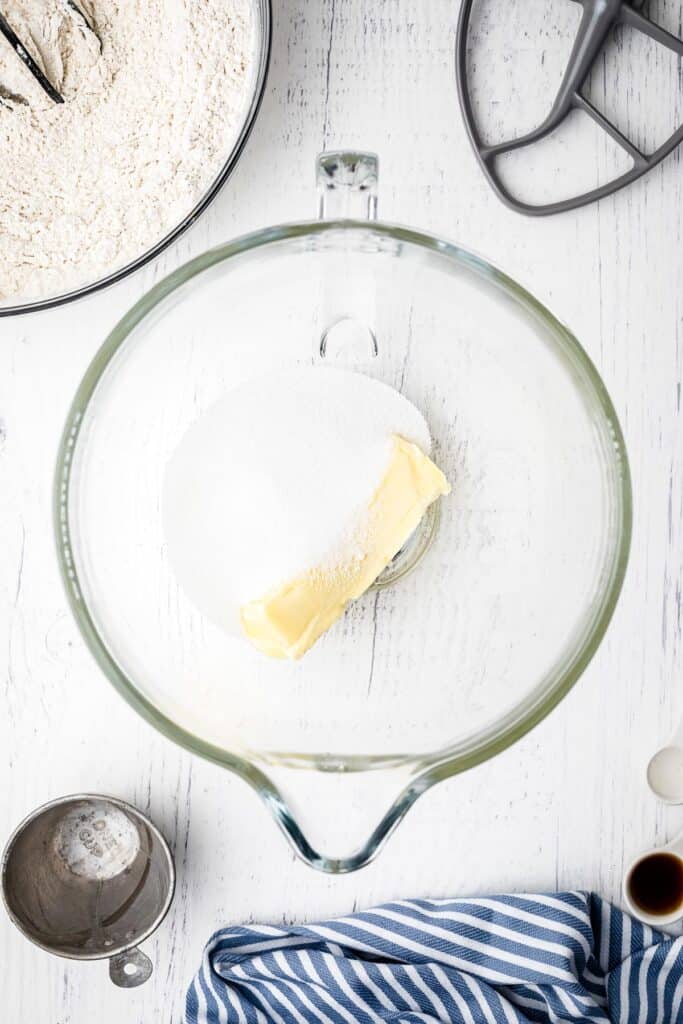
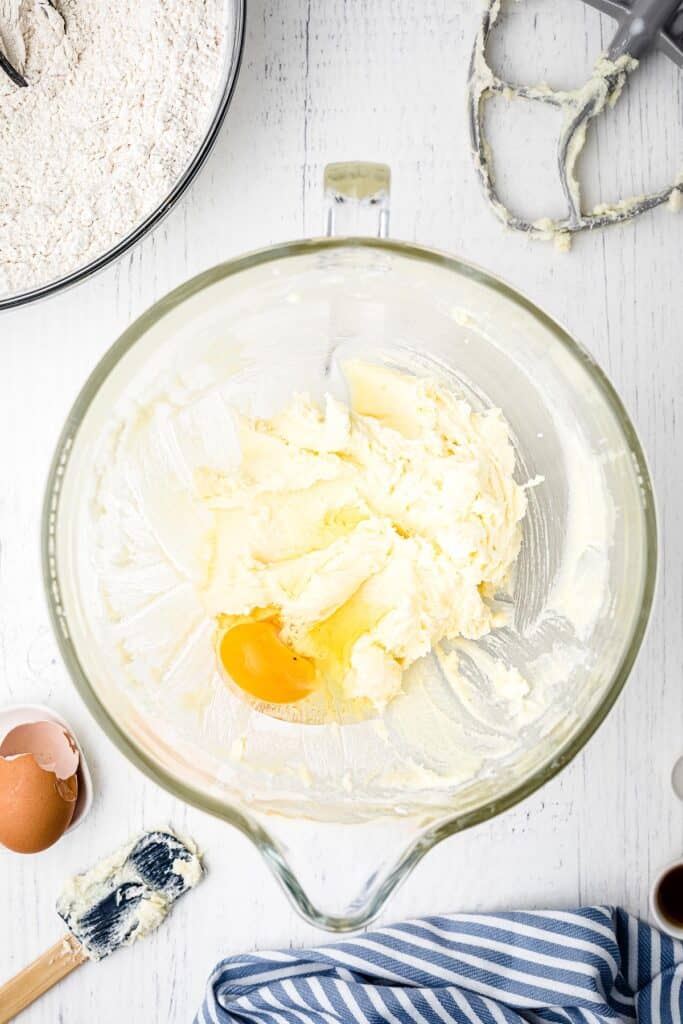
Beat the butter and sugar in a stand mixer on medium speed until the mixture is creamy. This will take about five minutes.
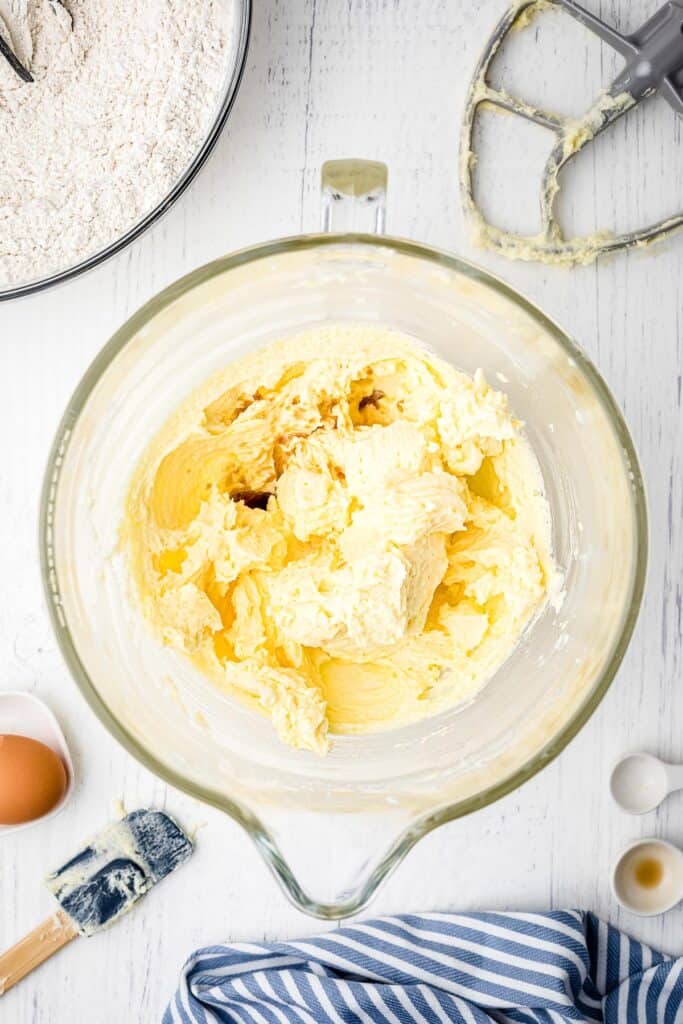
Lower the mixing speed and add the egg followed by the vanilla and almond extract.
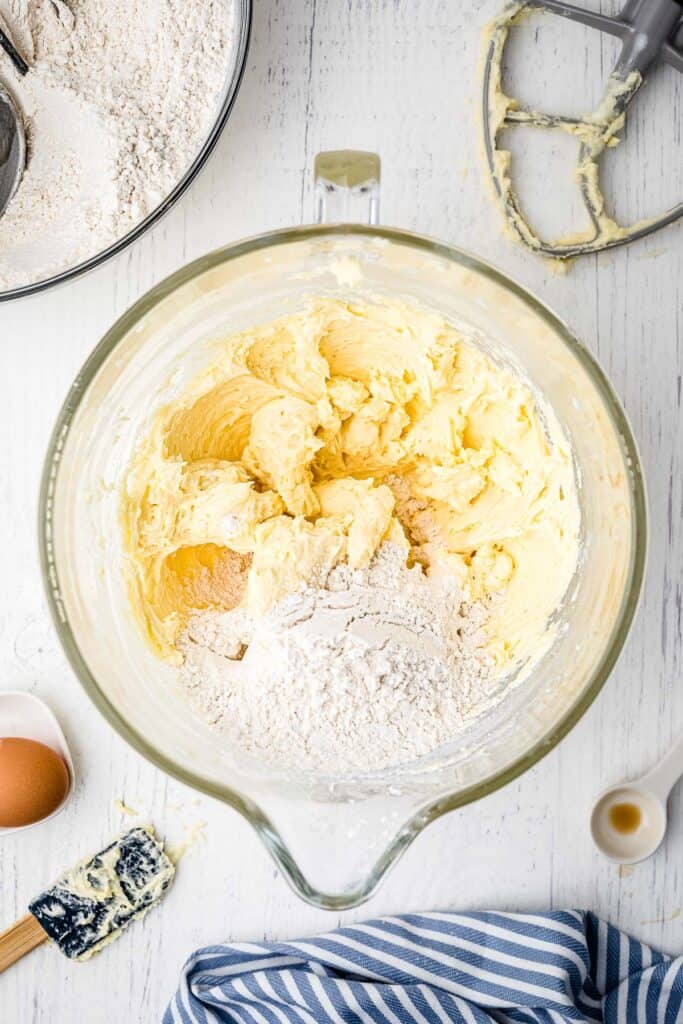
Add the dry ingredients one cup at a time to the butter mixture. Mix well between each addition. After you’ve added all of the dry ingredients, mix until the dough pulls away from the sides of the bowl.
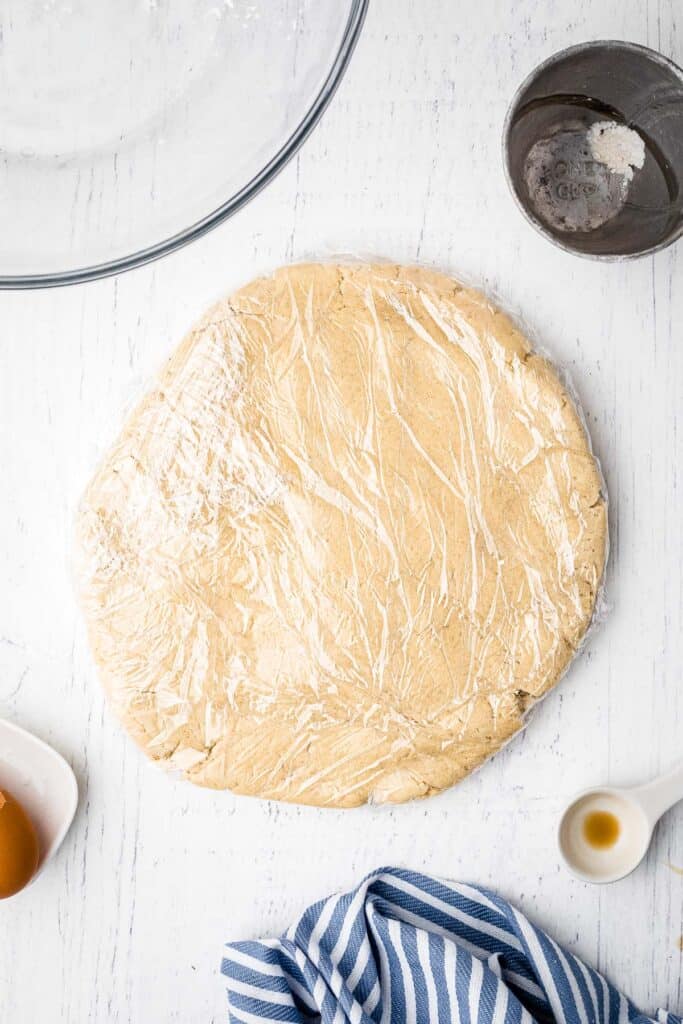
Take the dough out of the bowl and form it into a disc. Wrap it with plastic wrap and chill it for at least 30 minutes.
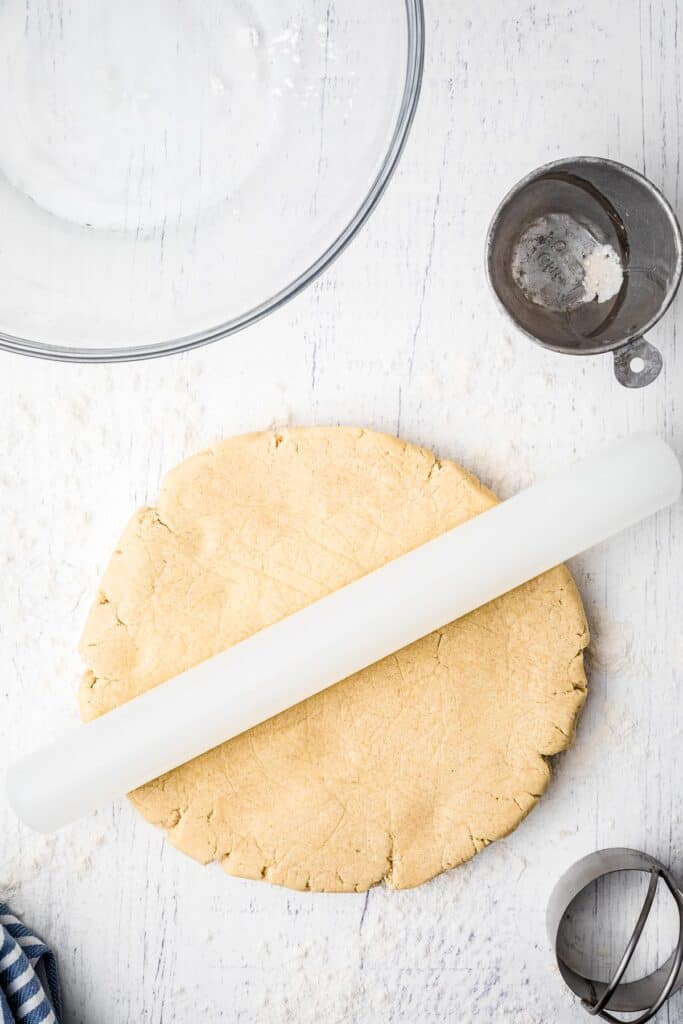
After the dough has chilled, roll it out on a lightly floured surface. Roll it to a thickness of 1/4″ to 1/2″.
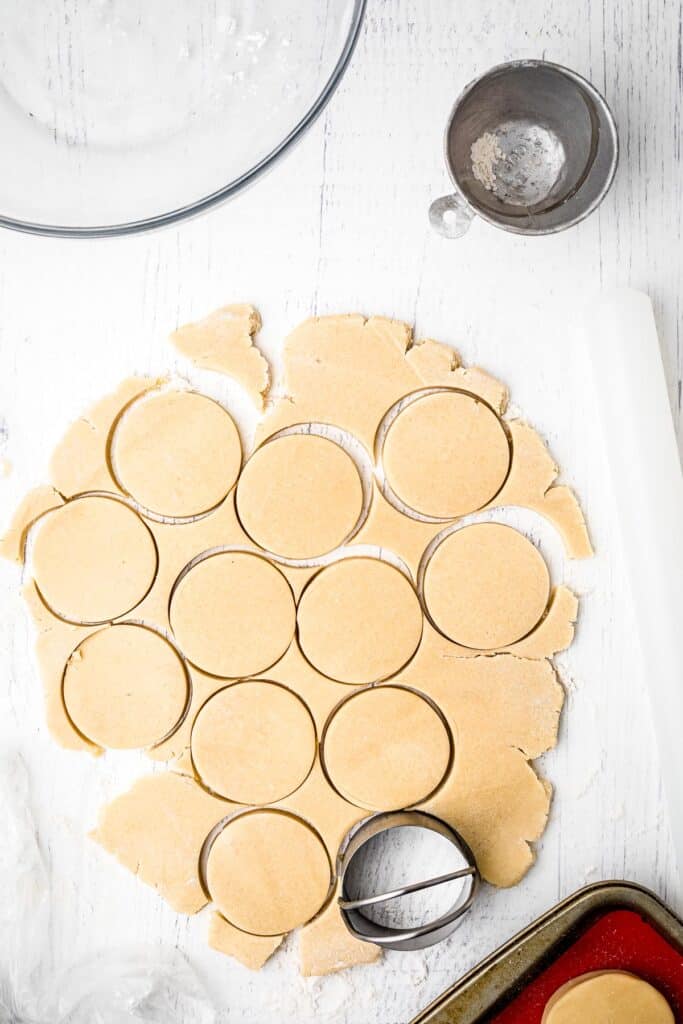
Use a 2 1/2″ round cookie cutter (or biscuit cutter, drinking glass, or ramekin that is the same diameter) and cut out as many rounds as you can. You should be able to get 18 rounds.
You can also use different shaped cookie cutters, but the different cookie sizes will require different baking times and the total number of cookies will be different.
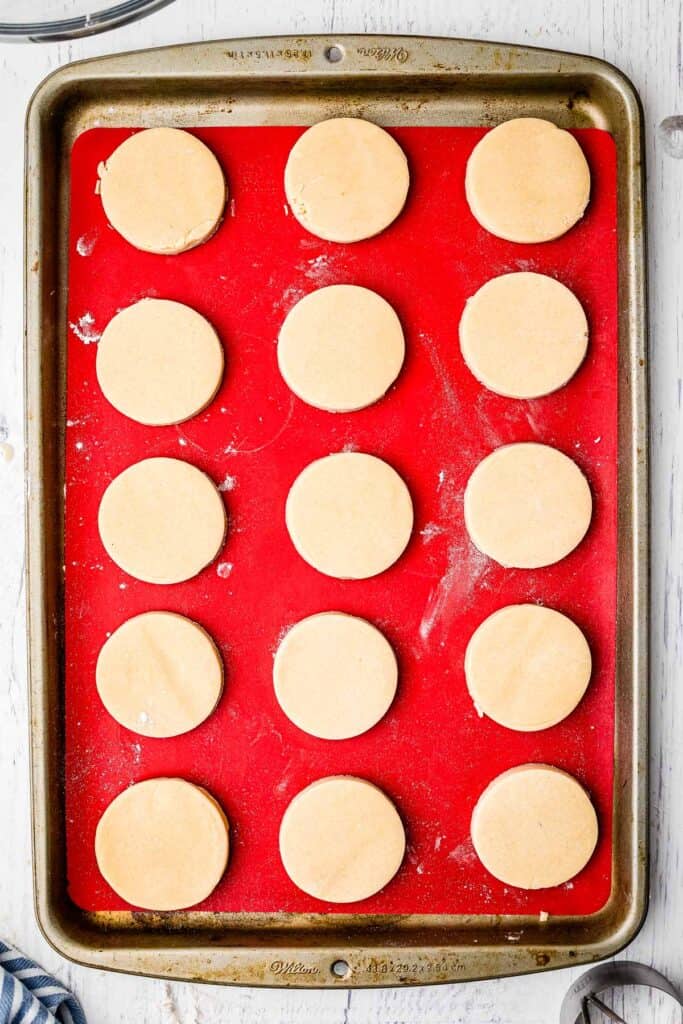
Place the cookie dough rounds on a prepared baking sheet and bake them for 12 minutes at 375°F. Turn the baking sheet halfway through the baking time.
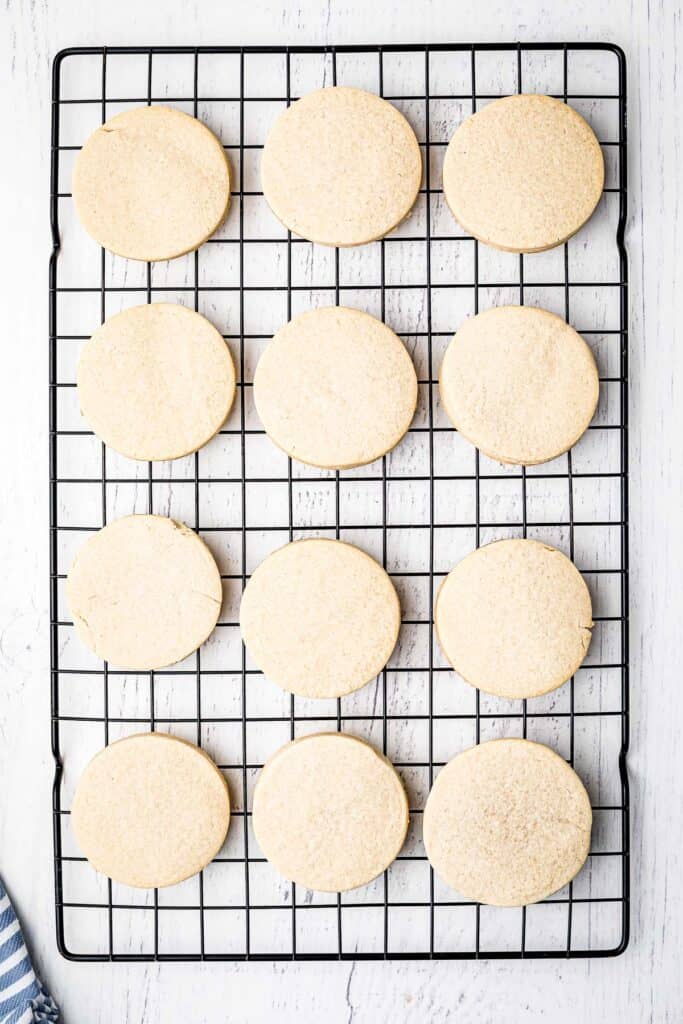
Cool the cookies on the baking sheet for a few minutes before transferring them to a wire rack to cool completely.
How to Make Royal Icing
Although it sounds fancy, royal icing is easy to make and you only need three ingredients.
This kind of icing is great for doing designs on cookies because it hardens. You can do some really fun things with it!
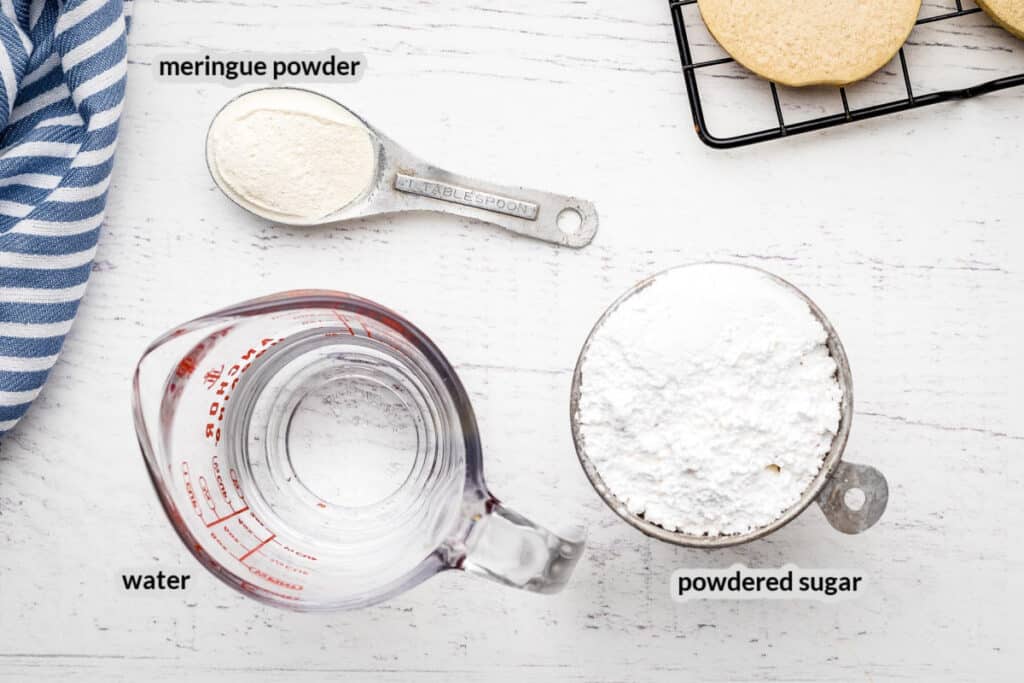
First, combine powdered sugar with the meringue powder. I do this in my stand mixer with the whip attachment.
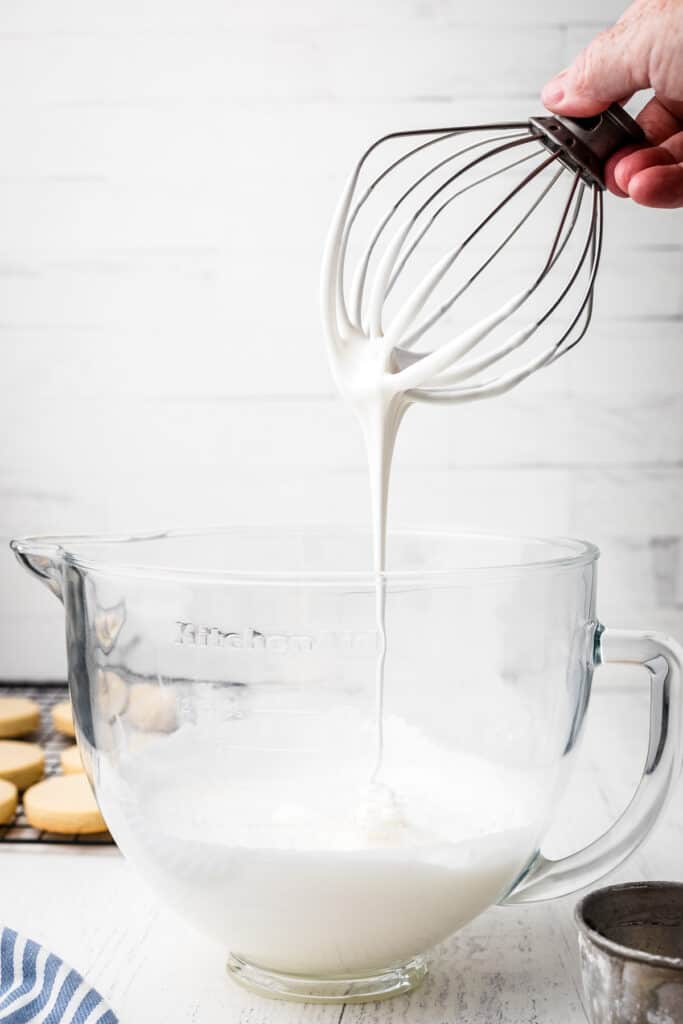
Turn the mixer speed to low, and slowly add water to the sugar mixture. Once all of the powder is moistened, turn the speed up to medium.
Whip the mixture for about seven to ten minutes or until it starts to hold small peaks.
At this point, stop the mixer and pull the whip attachment up. If the icing falls off the whip and melts back into the rest of the icing, it’s ready to use.
How to Ice Halloween Cookies
Don’t ice your sugar cookies until they are completely cooled.
If you are going to use multiple icing colors, divide the icing into different bowls and tint each of them.
For mine, I kept quite a bit of frosting white and did other bowls with green, orange, and black.
It makes it a lot easier to have multiple piping bags and #3 so each color has its own. The decorating will go a lot faster!
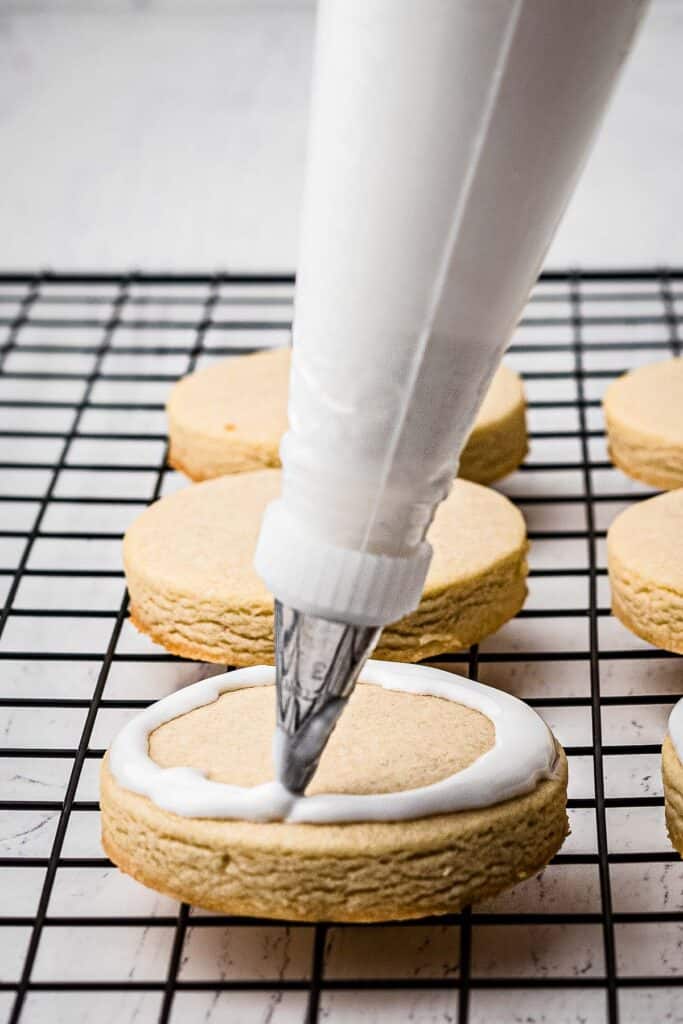
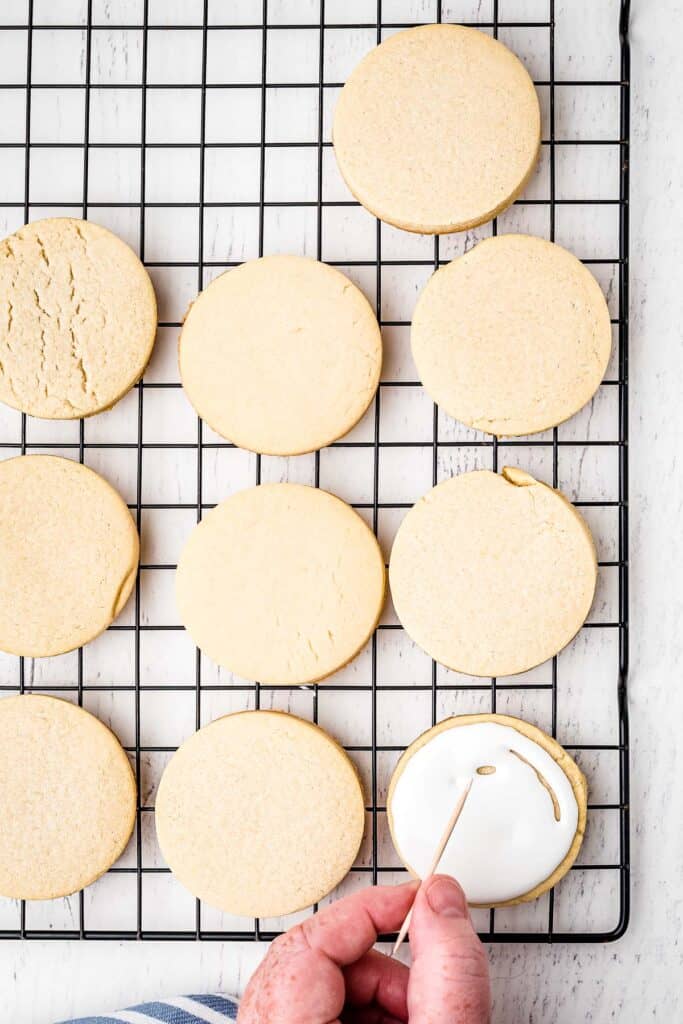
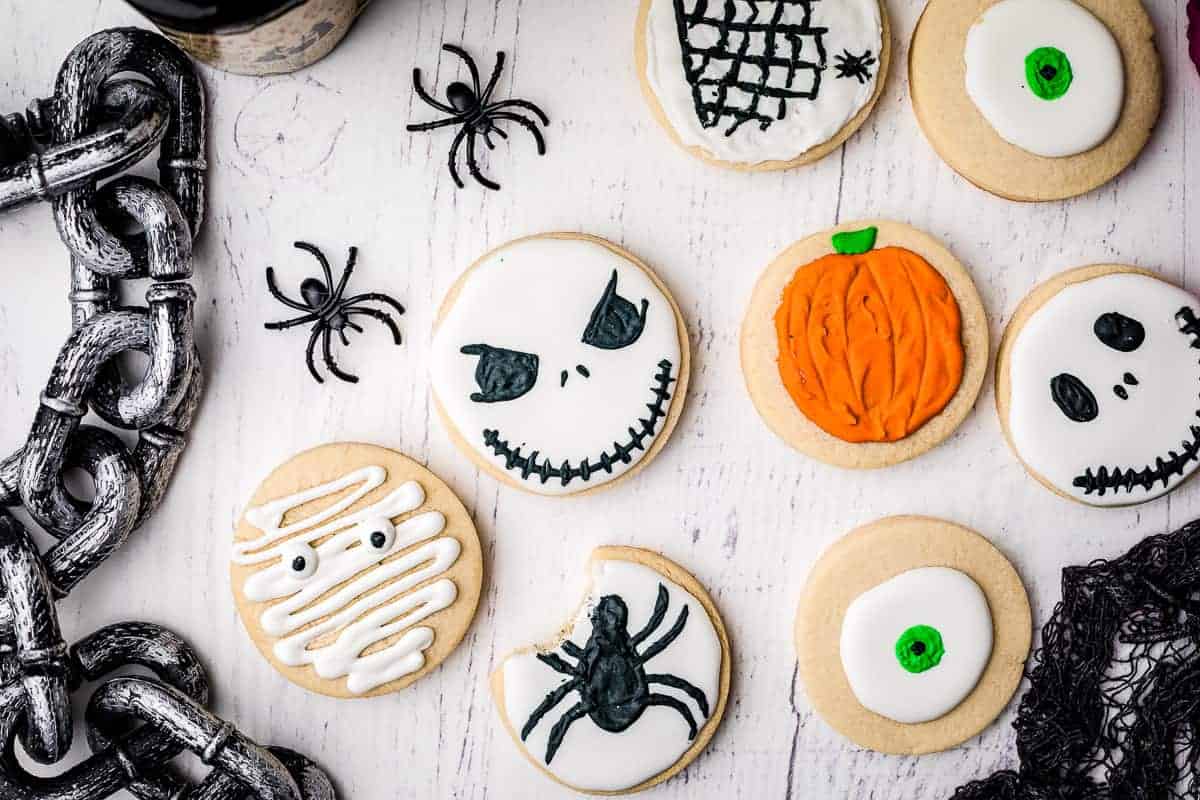
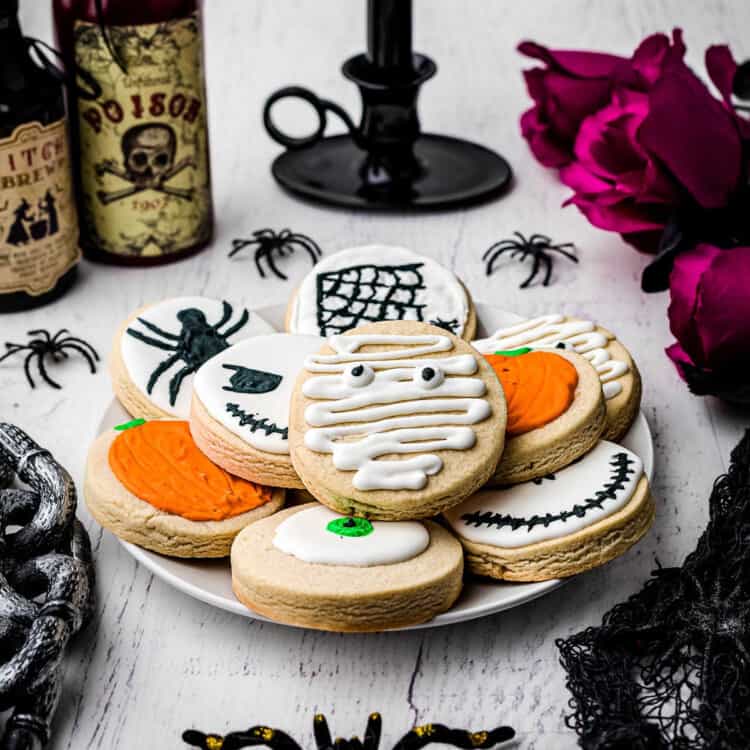
Skeleton Faces: Pipe a line of white icing around the edge of the cookie. Once it’s set, flood the middle with more icing. Use a toothpick to spread the icing so it’s evenly filling the center. Let the icing set and then pipe the skeleton’s eyes, nostrils, and mouth as shown in the photo.
Eyeball: For these, I piped a smaller circle a little bit away from the edge of the cookie. Once set, fill in with more white icing and spread it evenly. Let it set before using green icing to create the green iris. Let that color set and then add the black pupil.
Mummies: This one is really easy! Just pipe a squiggly line onto the cookie. If you have edible googly eyes you can place them while the icing is wet. Or wait for it to set and pipe two little black eyes.
Pumpkin: For this one, I piped a line of orange icing in the shape of a pumpkin and then flooded the center. Instead of letting the icing fully set, I waited until it was almost set and carved the lines of the pumpkin to give it texture and shape. You can do this with a toothpick. Don’t forget to pipe the cute little green stem!
Spider and Spider Web Cookies: For these, I did the white background and then piped one with a large spider and created a spider web for the other cookie. If you are feeling confident, you can pipe the black icing onto the white before it’s set – it will sink in and create a smooth surface. If you’re not super confident in your piping skills, wait until the white hardens and pipe your design then.
Other (Easy!) Decorating Ideas: Not into fancy decorating? Just make the white (or other colors) background and while the icing is wet, sprinkle on some fun Halloween sprinkles. They will look great!
Pro Tips
The great thing about these Halloween cookies is that they keep well a room temperature.
Once they are fully set, place them in an airtight container. I like to layer them with parchment paper. They will keep well for several days!
You can make the cookies ahead of time and decorate them later to break up the work. Make them up to two days in advance and keep them in an airtight container.
You can also freeze the baked sugar cookies for up to a month. Allow them to fully cool after baking and then store them in a freezer-safe container. To thaw, leave them at room temperature before decorating them.
I just love this Halloween sugar cookie recipe! They’re not only adorable to look at but they taste amazing, too. Make a batch and have fun decorating them – I know they will make all of the little ghosts and goblins in your life very happy!
More Decorated Cookie Ideas
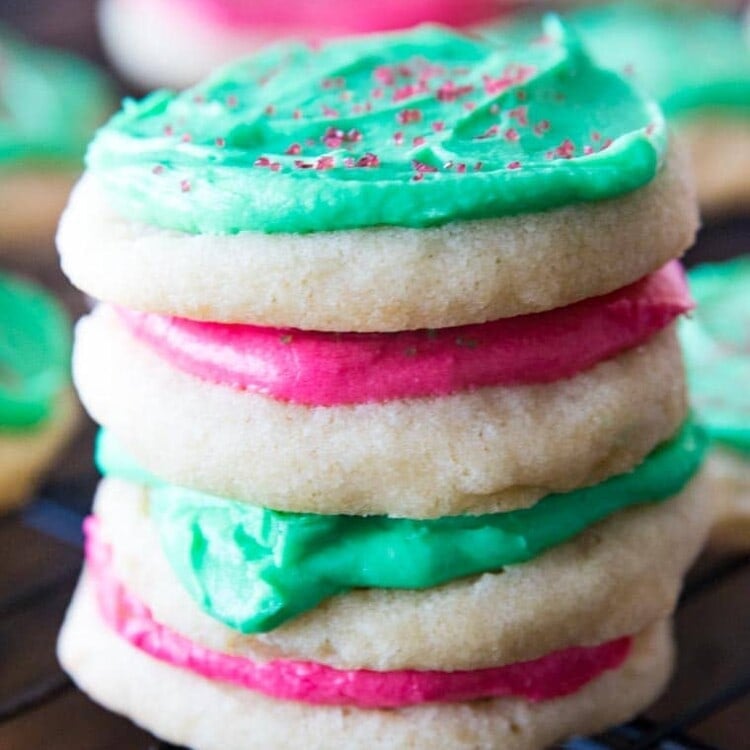
- Lofthouse Cookies are irresistible sugar cookies that you can make at home! My copycat recipe tastes just like the originals complete with the frosting and sprinkles.
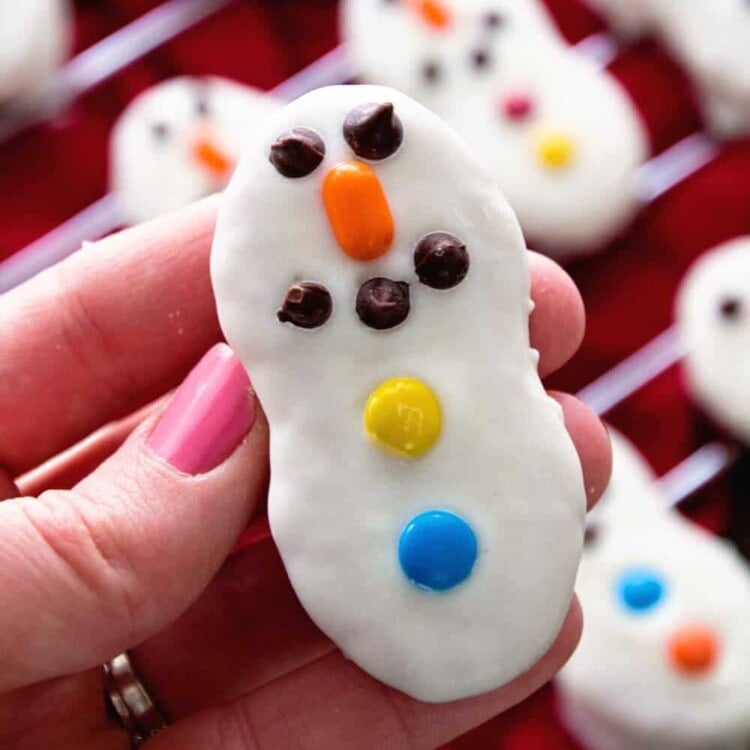
- Snowman Cookies are so cute and easy to make! All you need are some Nutter Butter cookies and icing to make them look like snowmen. It’s a great project to do with the kiddos!
- Red Velvet Cookies topped with creamy frosting are easy to make and perfect any time of year.
Did you try this recipe and love it? Rate it, please!!!? Seriously though a five-star rating below will make my day!
If you snap a photo, please be sure to tag me on Instagram at @julieseatsandtreats or #julieseatsandtreats so I can see your yummy treat!!
Did you make this? If you snap a photo, please be sure tag me on Instagram at @julieseatsandtreats or #julieseatsandtreats so I can see your yummy treat!
Halloween Sugar Cookies
Thick and delicious sugar cookie recipe decorated with a Halloween themed Royal Icing!
Ingredients
Sugar Cookies
- 2-1/2 c All Purpose Flour
- ¼ c. Corn starch
- ¼ tsp Salt
- ¾ c. Butter Unsalted room temperature
- ¾ c. Granulated Sugar
- 1 Large Egg room temperature
- 1 tsp Vanilla Extract
- ½ tsp Almond Extract
Royal Icing
- 4 c. powdered sugar
- 3 Tbsp Meringue powder
- 9-10 Tbsp water room temperature
- Gel Food Coloring optional
Instructions
Sugar Cookies
- Sift the flour, corn starch and salt into a medium sized mixing bowl.
- Run a whisk through it to mix well and set aside.
- With a stand mixer, In a large mixing bowl beat the butter and the sugar together, on medium speed, until creamy, about 5 minutes.
- Turn the mixer to low and add the egg while beating, then add the vanilla and almond extract.
- One cup at a time add the flour mixture until it is well incorporated. The sugar cookie dough will pull away from the mixing bowl at this point.
- Take the dough and form a ball, then flatten out into a disc. Wrap in plastic wrap and place into the refrigerator for a minimum of 30 minutes.
- Preheat the oven to 375°F.
- Take the dough out of the refrigerator and turn out onto a lightly floured surface.
- Take a rolling pin and roll out to about ¼” – ½” thick.
- Using a 2-1/2” round cookie cutter, cut as many discs out of the dough as possible and place onto a baking sheet lined with a silicone mat (or parchment paper).
- Take the remaining dough and mold into a ball again and roll out again. Cut out more cookies until all the dough has been used.
- Place the baking sheet into the oven and cook for 12 minutes. Turn the tray around half way.
- Remove from the oven and allow to cool a little on the baking sheet before transporting to a wire rack.
- Once cooled completely decorate as desired.
Royal Icing
- Add the powdered sugar to a large mixing bowl attached to your stand mixer, as well as the meringue powder and stir a little to mix.
- Using your wire whip, turn on your stand mixer on a low speed and slowly add the water. As the powder subsides you can turn up the speed to medium.
- Whip the mixture well for about 7-10 minutes, until you start to see tips forming.
- Check the consistency of the icing. If it falls off the wire whip and melts back into the bowl of icing within 5-10 seconds then it’s perfect.
- Cover the bowl tightly with plastic wrap until you are ready to use it.
- Take a piping bag and a number three tip and place into a tall glass, folding the edges over the outside of the glass. This is the easiest way to fill up an icing bag with less mess.
- Use a rubber band to tie the top of the icing bag. Place a piece of wet paper towel in the bottom of the glass, this will help the tip stay moist while you are working.
- If you are using other colors, pour a little of the remaining icing into a small bowl and mix in a little of the food color until you reach the desired color.
- If your cookies have a white background, which most of mine did (in the images), use the piping bag to pipe the icing around the outside edges, and then fill the middle. Use a toothpick to spread the icing evenly.
- Leave cookie to set while you move onto the next, or if you are using sprinkles on your cookies sprinkle them on at this point, while the icing is still wet.
- Use the colors you have mixed and a toothpick to create the designs on the cookies. If you are putting a design on the white background let the white set first before you start with your next color.
Tips
HELPFUL TIPS!
The great thing about these Halloween cookies is that they keep well a room temperature.
Once they are fully set, place them in an airtight container. I like to layer them with parchment paper. They will keep well for several days!
You can make the cookies ahead of time and decorate them later to break up the work. Make them up to two days in advance and keep them in an airtight container.
You can also freeze the baked sugar cookies for up to a month. Allow them to fully cool after baking and then store them in a freezer-safe container. To thaw, leave them at room temperature before decorating them.
DECORATING TIPS!
Skeleton Faces: Pipe a line of white icing around the edge of the cookie. Once it’s set, flood the middle with more icing. Use a toothpick to spread the icing so it’s evenly filling the center. Let the icing set and then pipe the skeleton’s eyes, nostrils, and mouth as shown in the photo.
Eyeball: For these, I piped a smaller circle a little bit away from the edge of the cookie. Once set, fill in with more white icing and spread it evenly. Let it set before using green icing to create the green iris. Let that color set and then add the black pupil.
Mummies: This one is really easy! Just pipe a squiggly line onto the cookie. If you have edible googly eyes you can place them while the icing is wet. Or wait for it to set and pipe two little black eyes.
Pumpkin: For this one, I piped a line of orange icing in the shape of a pumpkin and then flooded the center. Instead of letting the icing fully set, I waited until it was almost set and carved the lines of the pumpkin to give it texture and shape. You can do this with a toothpick. Don’t forget to pipe the cute little green stem!
Spider and Spider Web Cookies: For these, I did the white background and then piped one with a large spider and created a spider web for the other cookie. If you are feeling confident, you can pipe the black icing onto the white before it’s set – it will sink in and create a smooth surface. If you’re not super confident in your piping skills, wait until the white hardens and pipe your design then.
Other (Easy!) Decorating Ideas: Not into fancy decorating? Just make the white (or other colors) background and while the icing is wet, sprinkle on some fun Halloween sprinkles. They will look great!
Nutrition Information
Calories: 331kcal (17%), Carbohydrates: 65g (22%), Protein: 1g (2%), Fat: 8g (12%), Saturated Fat: 5g (31%), Polyunsaturated Fat: 1g, Monounsaturated Fat: 2g, Trans Fat: 1g, Cholesterol: 30mg (10%), Sodium: 38mg (2%), Potassium: 8mg, Fiber: 1g (4%), Sugar: 61g (68%), Vitamin A: 260IU (5%), Calcium: 4mg, Iron: 1mg (6%)
Danielle says
The kids and I whipped up a batch of these for daycare treats. They had so much fun making them!
Malinda says
These turned out great and the kids loved decorating them!!! Thanks for sharing!!!
Alison says
Love the royal icing tips! We made pumpkins & mummies.