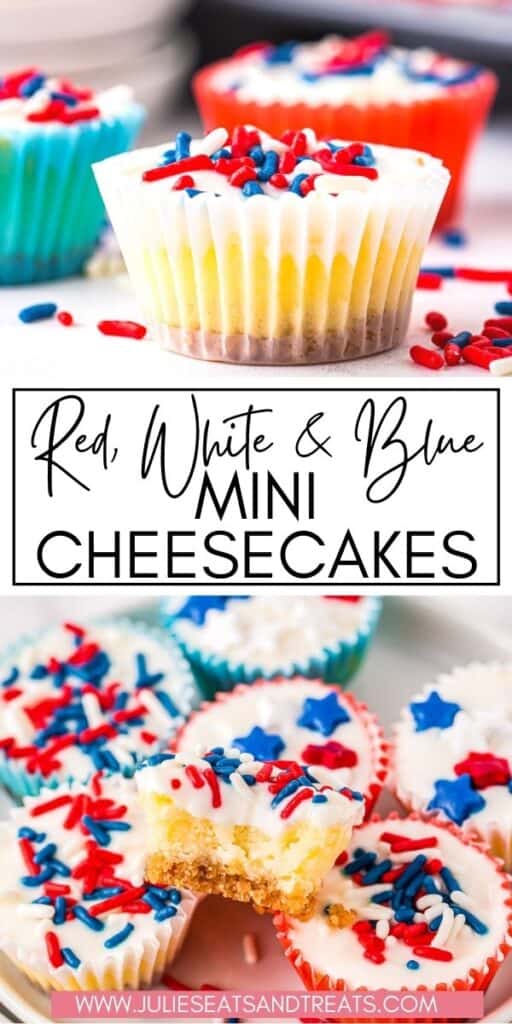

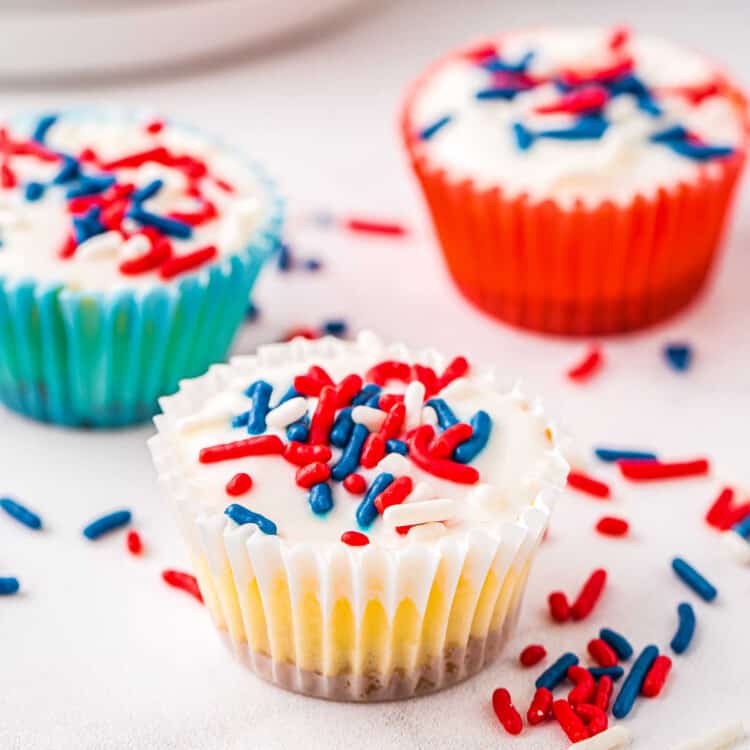
You won’t be able to stop eating these baked Red, White, and Blue Mini Cheesecakes. They are easy to make and packed with flavor. They start with a vanilla wafer crust, topped with a smooth cheesecake and a sweet sour cream topping with sprinkles! The perfect sweet ending to your patriotic celebration like the Fourth of July!
So, where do I start with these adorable mini cheesecakes?! There are so many reasons to love them!
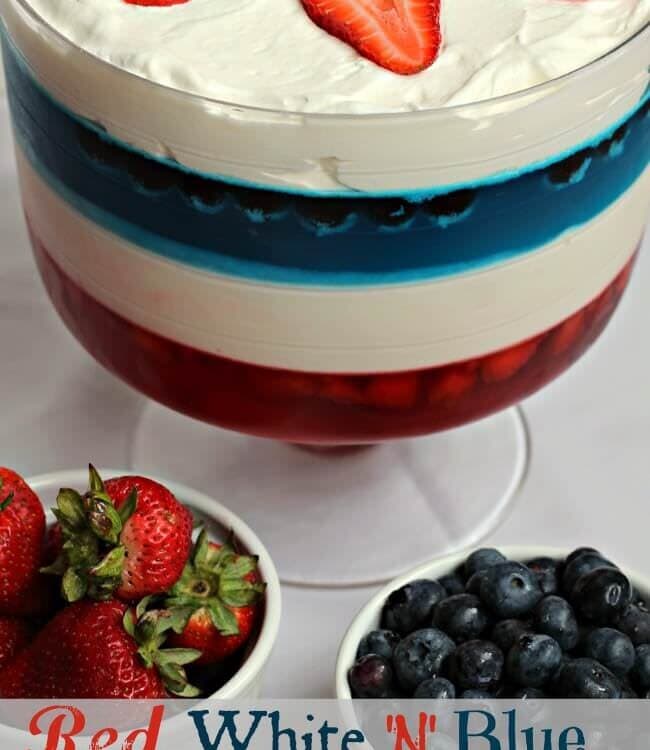
I love patriotic desserts for Memorial Day and July 4th, and these little bite-sized cheesecakes are my new favorite. Well, they’re right up there with my red, white, and blue ice cream and 4th of July cupcakes! And my red, white and blue dirt cups are always a hit with kiddos.
You Will Love This Recipe
- These cheesecake bites are the perfect size for parties, potlucks, BBQs, and picnics. They are so much easier to serve than slices from a big cake.
- I’m showing you step-by-step how to make the best mini cheesecakes. If you’ve made cupcakes, you can make this recipe!
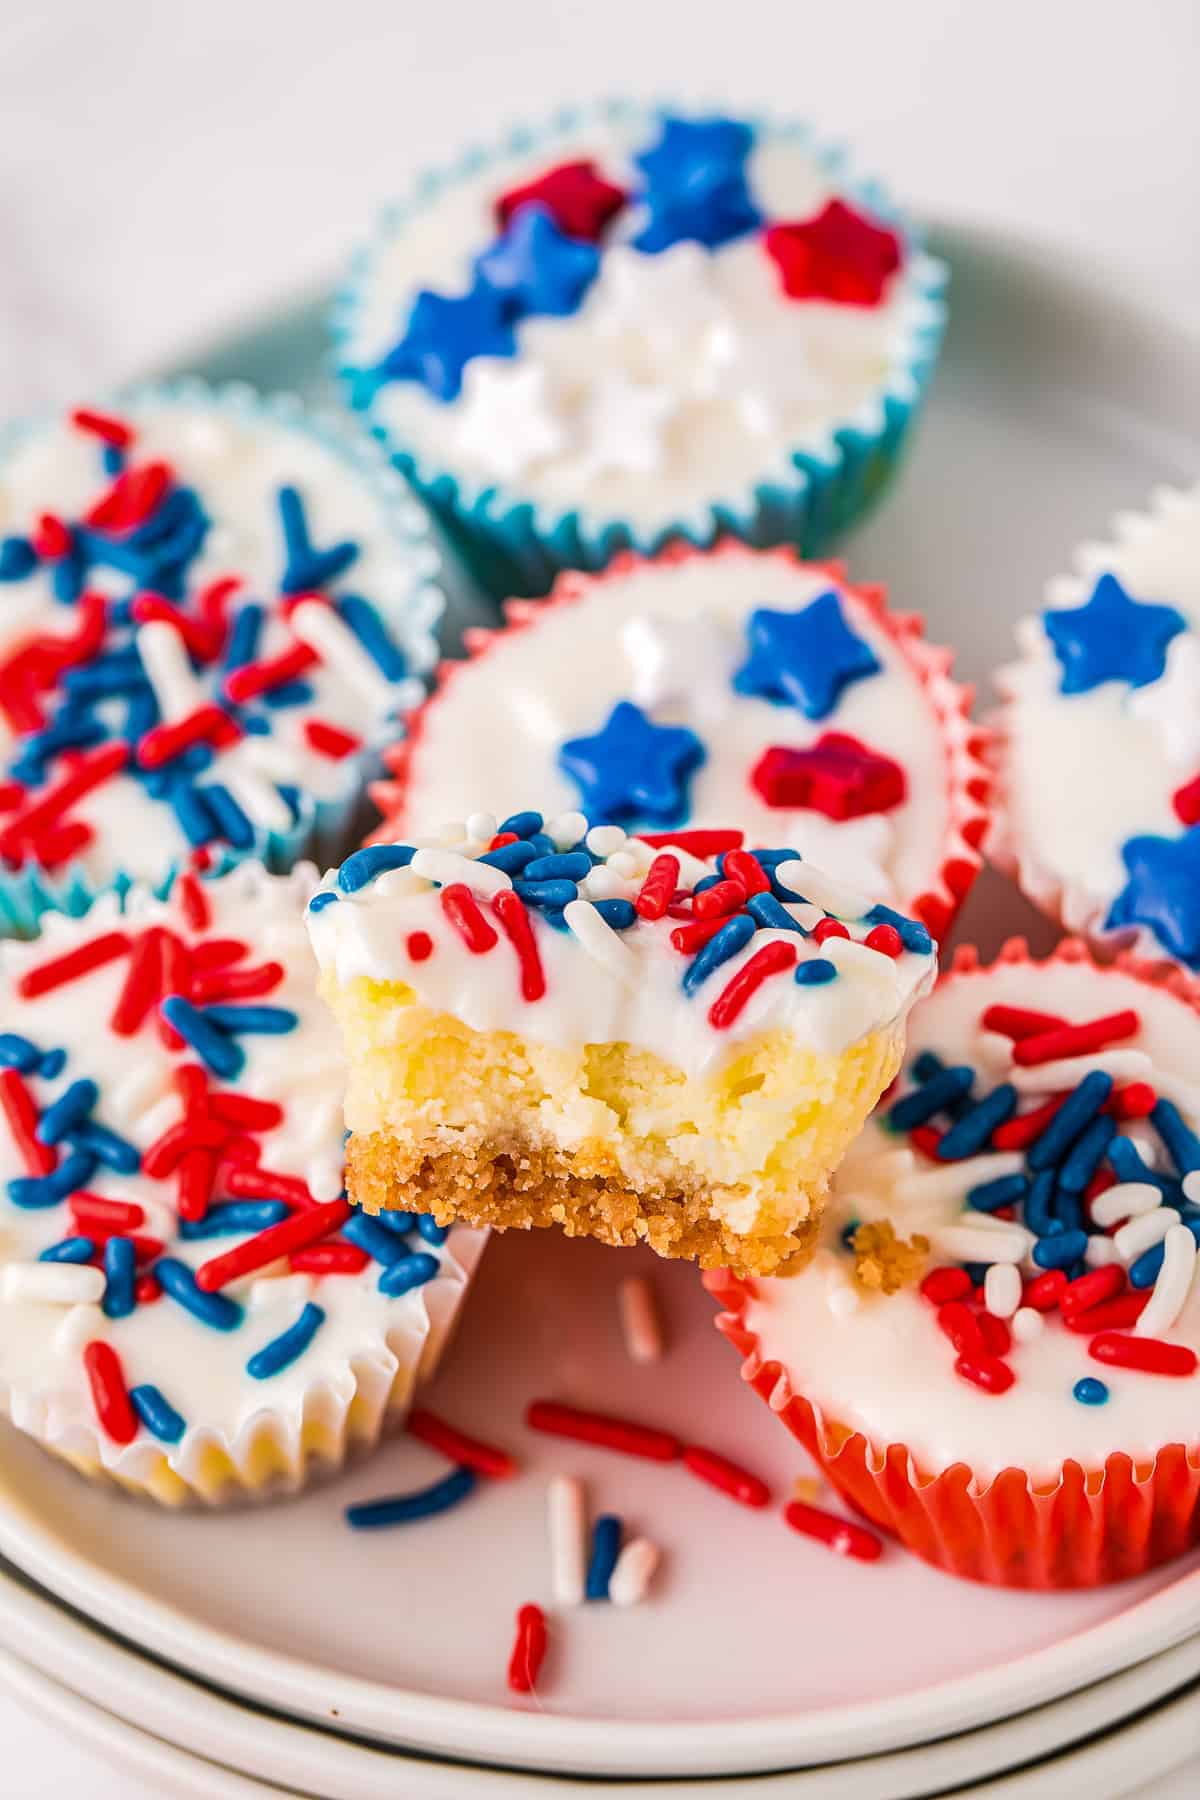
- They have a crunchy nilla wafer crust, a creamy cheesecake filling, and a sour cream topping – the perfect flavor combination.
- This is an easy baked cheesecake recipe. Unlike some no-bake cheesecakes, you don’t have to worry about them not setting up properly. Baked mini cheesecakes turn out perfect every time.
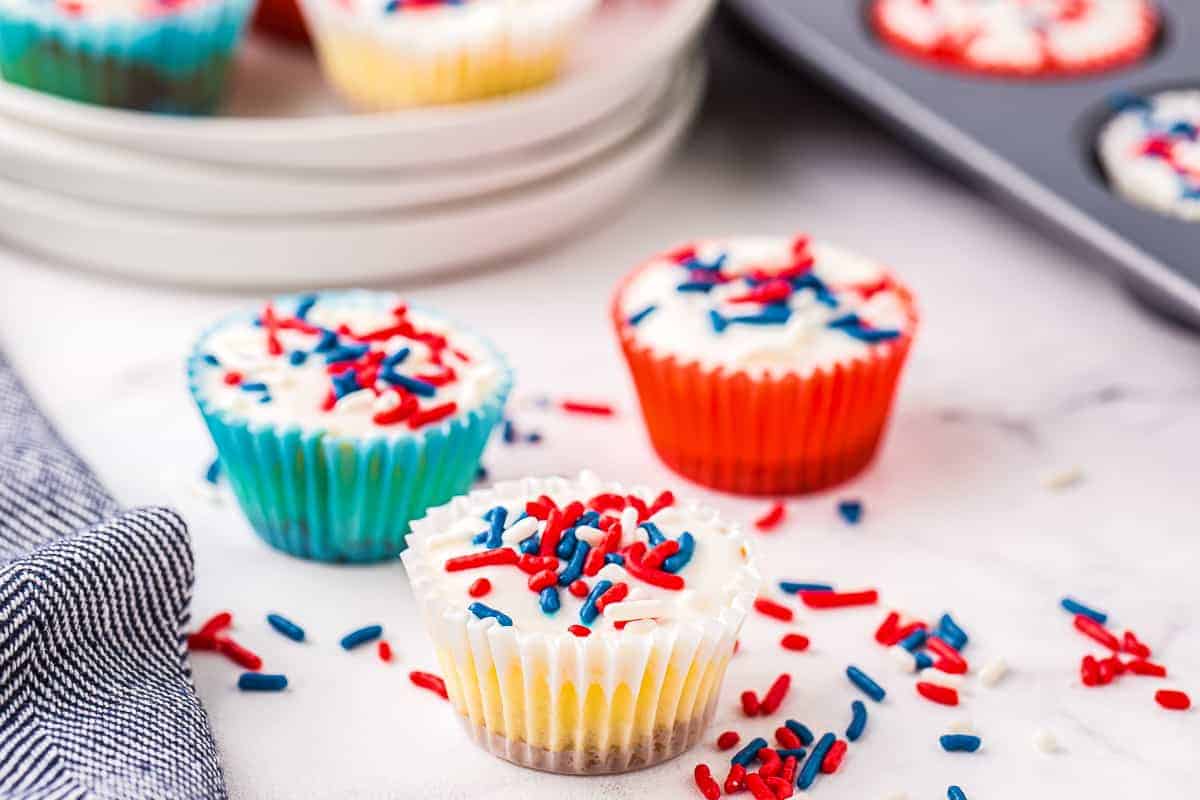
- Top them with red, white, and blue sprinkles for a patriotic twist, or use any sprinkle you like to match the event. These are great all year for any occasion.
These red, white, and blue mini cheesecakes are so easy you’re going to want to add these to your summer holiday celebration menu – everyone will love them!
Ingredients
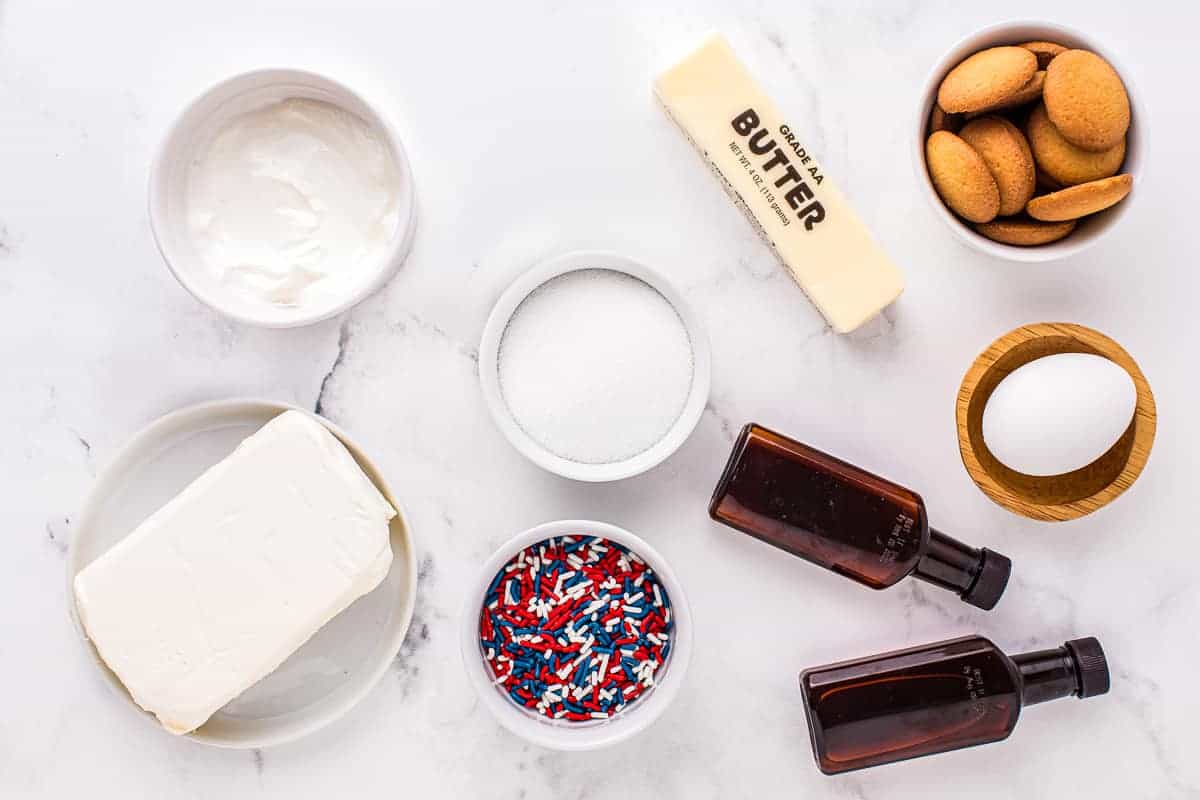
- Vanilla Wafers Cookies – You can also use the same amount of crushed Oreos or graham crackers if you want to switch up the crust.
- Salted butter – Melt in the microwave in 30-second increments.
- Softened full-fat cream cheese – This recipe works (and tastes) best with full-fat cream cheese.
- Granulated sugar
- Egg – Let it sit out at room temperature. It will make it easier to mix into the batter.
- Extracts – We used a mixture of vanilla extract and almond extract. If almond isn’t your thing, just add a little more vanilla and skip the almond flavoring, but we think it takes best with both.
- Sour cream – Like the eggs, let it come to room temperature for mixing. It will incorporate into the filling easier if it’s at room temperature.
- Sprinkles – Red, white, and blue for a patriotic dessert or any color you like!
Products Needed
How to Make the Crust
Line the mini cupcake pan with the mini paper liners. Place the cookies and butter in the food processer and crush the cookies until they are fine crumbs.
Using a teaspoon, drop the crust mixture into each liner. Place the pan in the refrigerator or freezer so the crusts can set.
How to Make the Filling
In a large bowl, beat the cream cheese, sugar, egg, vanilla extract, and almond extract until light and fluffy. This should take about one to two minutes.
Fill the chilled crusts with one tablespoon of filling. Bake the cheesecakes for 12 to 15 minutes. They are done when the middles are still soft – there shouldn’t be any cracks on the tops.
Place the pan away from the oven and let the cheesecakes cool for at least 15 minutes.
How to Make the Topping
In a bowl, mix the sour cream, sugar, vanilla, and almond extract until well combined.
Once the cheesecakes are cool, top each with one to two teaspoons of topping. Use the back of the spoon to spread the topping in an even layer.
Top each cheesecake with sprinkles! If you are not serving them right away, keep them in the fridge. I think they are best served cold.
Recipe FAQs
The key to making the best mini cheesecakes is using room temperature eggs and cream cheese. If you use cold ingredients you have to mix them longer, which can cause your cheesecakes to sink in the middle when you bake them. Room temperature ingredients are easier to mix so stick with those.
They will be set, but soft in the middle. There shouldn’t be any cracks in the surface of the cheesecake. At this point, they are done!
Yes, they freeze great. Make them as instructed but don’t add the topping. Once the cheesecakes are cooled, store them in an airtight container. They will freeze well for up to three months. Thaw them at room temperature and then add the topping before serving.
Keep them in the refrigerator until you are ready to serve them. The easiest way to transport them is in a baking dish with a lid. Just be careful to not shake the dish. If you are not serving them right away, keep the dish in a cooler with ice. The cheesecakes are best when they are cold.
If you want mini cheesecakes for a crowd this is the recipe to make! The red, white, and blue them is perfect for the upcoming summer holidays. I hope you try them and love them!
More Desserts
Can’t get enough cream cheese? Me neither! Here are more desserts you have to try!
- Soft Zucchini Cookies topped with cream cheese frosting are a great way to use up zucchini.
- Strawberry Pretzel Salad is a potluck classic! It’s salty-sweet with a layer of cream cheese for a treat everyone will love.
- For a great no-bake dessert, make Chocolate Lasagna! Layers of crushed Oreos, pudding, cream cheese, and mini chocolate chips are so hard to resist.
- My Banana Bars are a trusted family recipe that never fails to disappoint!
- This patriotic 4th of July Cake has three layers in red, white and blue and is topped with homemade buttercream, sprinkles, and cherries.
Love this recipe? Rate it, please! Seriously though a five-star rating below will make my day!
If you snap a photo, please be sure to tag me on Instagram at @julieseatsandtreats or #julieseatsandtreats so I can see your delicious creations!!
Did you make this? If you snap a photo, please be sure tag me on Instagram at @julieseatsandtreats or #julieseatsandtreats so I can see your yummy treat!
Red, White and Blue Mini Cheesecakes
Ingredients
Base:
- ½ c. vanilla wafers cookies
- 2 Tbsp salted butter melted
Filling:
- 8 oz package full-fat cream cheese softened
- ⅓ c. granulated sugar
- 1 egg room temperature
- ½ tsp vanilla extract
- ¼ tsp almond extract
Topping:
- ¾ c. sour cream room temperature
- 3 Tbsp granulated sugar
- ½ tsp vanilla
- ¼ tsp almond extract
- Red, white & blue sprinkles optional garnish
Instructions
- Preheat the oven to 350 degrees F.
- Line a mini cupcake pan with 24 mini cupcake liners.
- Put the wafers and butter in the food processor or blender and blend into fine crumbs. (You can also put the wafers into a plastic bag and crush them with a rolling pin).
- Put 1 teaspoon of the crumb mixture into each liner or until it’s used up. Set aside in the refrigerator or freezer for now.
- Make filling by beating together cream cheese, sugar, egg, vanilla extract, and almond extract until light and fluffy, about 1-2 minutes.
- Using a 1 tablespoon measure, spoon the cream cheese mixture on top of the vanilla wafers.
- Bake in the oven for 12- 15 minutes or until set. The middles should still be soft and not cracked when you take them out.
- Cool for 15 minutes, away from the stove.
- While the cheesecakes are cooling, blend together the sour cream, sugar, vanilla and almond extract until well combined.
- Once the cheesecakes are fairly cool, put 1-2 teaspoons of topping on each, using the back of the spoon to spread the topping to the edges.
- Shake sprinkles over the top, optional. Best when served cold.
Tips
The key to making the best mini cheesecakes is using room temperature eggs and cream cheese. If you use cold ingredients you have to mix them longer, which can cause your cheesecakes to sink in the middle when you bake them. Room temperature ingredients are easier to mix so stick with those. How do you know when they are done baking?
They will be set, but soft in the middle. There shouldn’t be any cracks in the surface of the cheesecake. At this point, they are done! Can you freeze them?
Yes, they freeze great. Make them as instructed but don’t add the topping. Once the cheesecakes are cooled, store them in an airtight container. They will freeze well for up to three months. Thaw them at room temperature and then add the topping before serving. What’s the best way to transport them?
Keep them in the refrigerator until you are ready to serve them. The easiest way to transport them is in a baking dish with a lid. Just be careful to not shake the dish. If you are not serving them right away, keep the dish in a cooler with ice. The cheesecakes are best when they are cold.


Alison LaFortune says
The vanilla wafer crust was the best! These were super easy to make ahead of time.
Danielle says
Absolutely amazing!! Thanks for sharing!
Julie Evink says
Glad you enjoyed it!
Malinda says
These were so fun! The kids loved them!
Julie Evink says
Glad you enjoyed them!