Roast Turkey
15 Comments
Posted: 11/02/20
This post may contain affiliate links. Please read our disclosure policy.
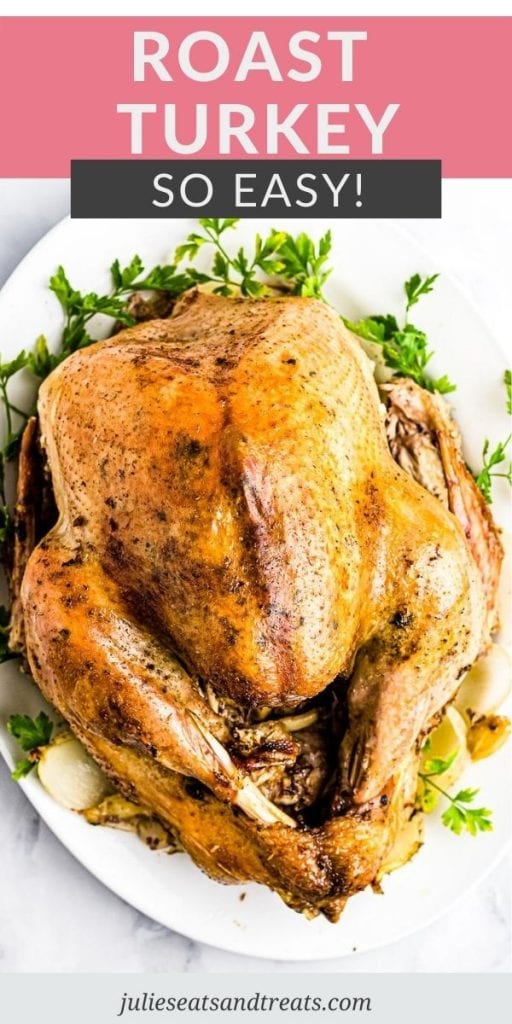
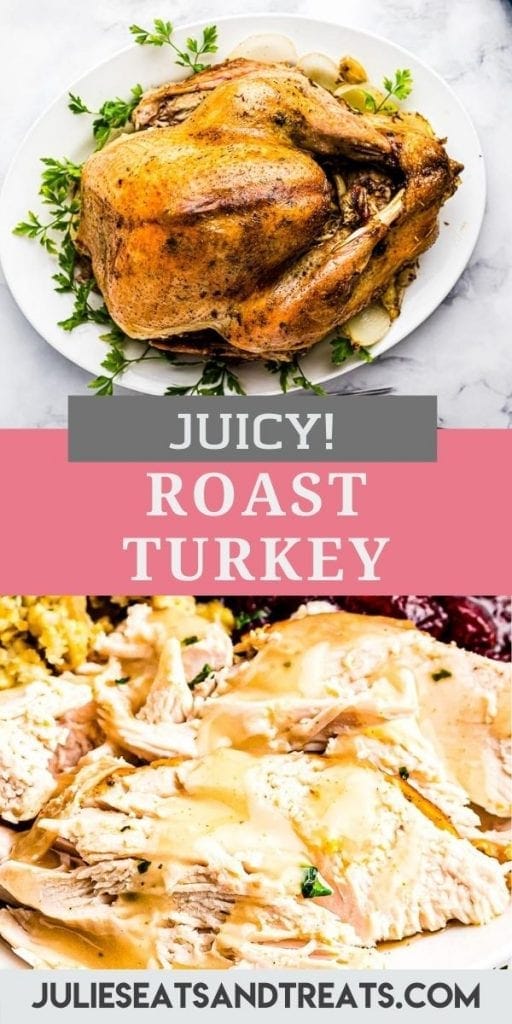
Easy, fuss-free Roast Turkey that anyone can make. If you want to make turkey for the holidays this is the recipe to use. Anyone can make it. It’s tender, juicy meat with a crispy skin. Plus, there’s no brining for this easy turkey recipe!
I have the best roast turkey recipe for you today and you are going to want to make it for the holidays this year! It’s a no fuss, easy recipe that works every time. If you love juicy, perfectly cooked turkey you are going to love it.
It will go perfectly with all of your favorite side dishes for the holidays. Add some pumpkin pie and it’ll be a dinner no one will forget!
Contents
show
Why This Recipe Works
- I’m sharing all of my best tips and clear instructions – there’s no guesswork!
- You don’t have to brine it overnight – you can prep it the whole thing the day you want to roast it.
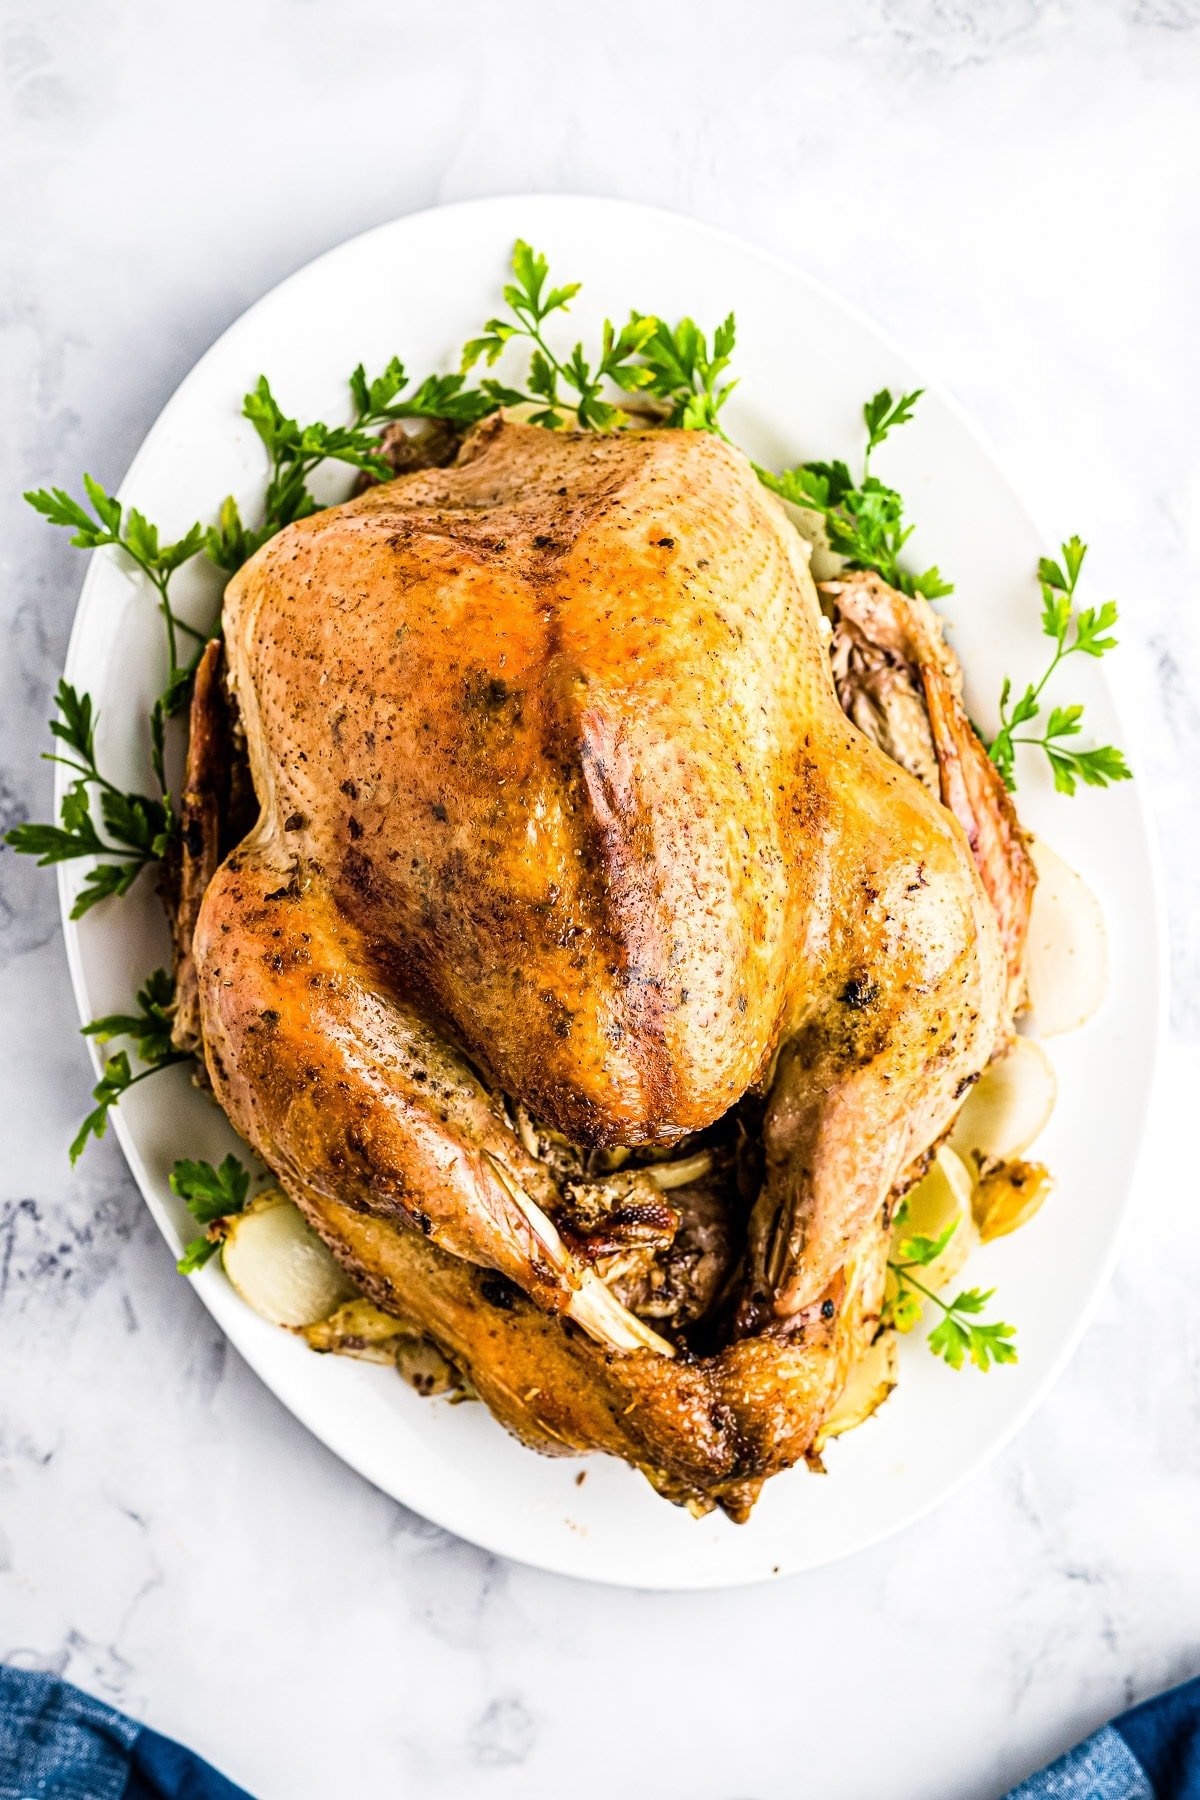
- It’s not only delicious – it’s beautiful, too! It comes out of the oven golden and juicy – it will wow your family and guests when they see it.
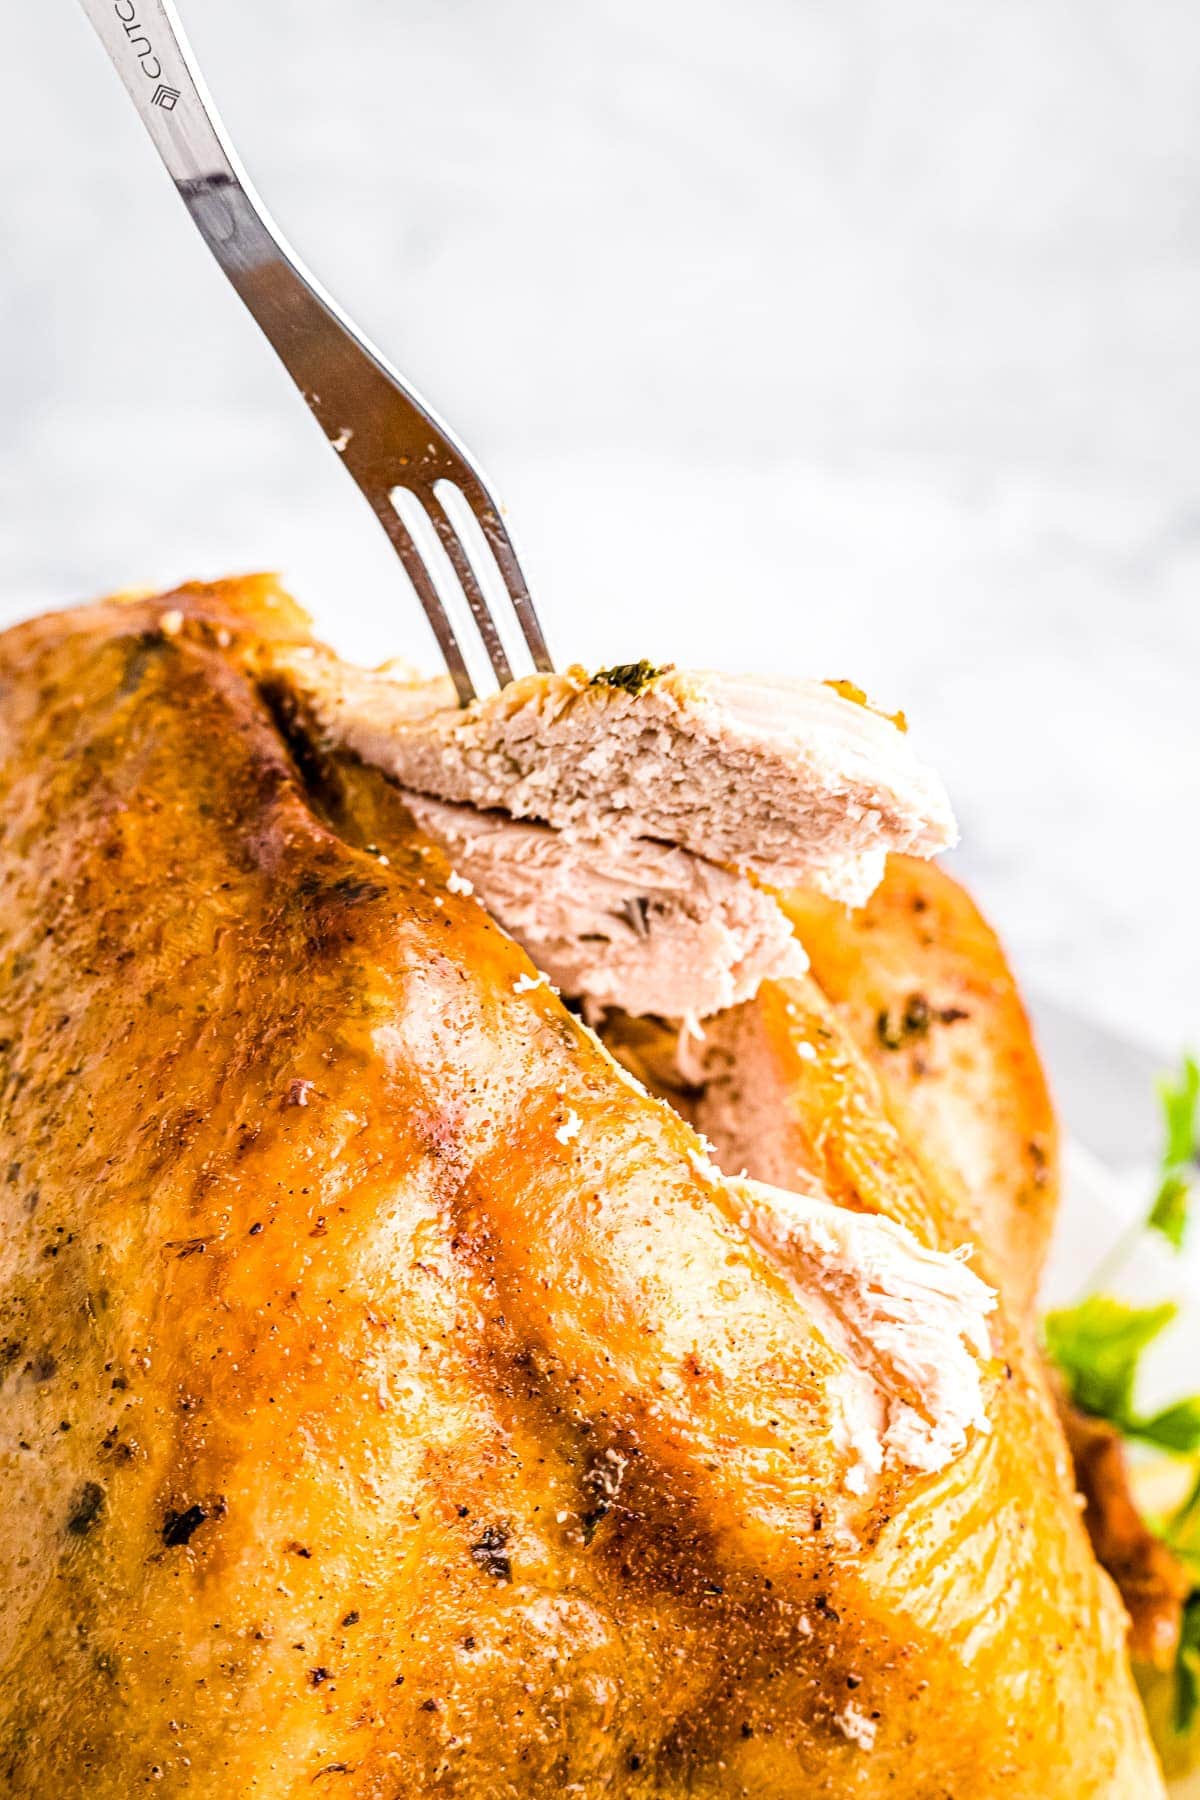
- The skin is crispy and the meat is full of flavor and so juicy – just the way it should be.
Whether this is your first-time making roast turkey or if you’re just looking to switch things up this year, this is the recipe to try. It’s always a hit!
This Recipe is All About Flavor!
The turkey is flavored from the inside-out. I like to stuff the cavity with aromatics and season the outside with lots of herbs, spices, and butter. It’s loaded with flavor!
My special butter rub goes under the skin and on top so it flavors both the meat and the skin. It also helps crisp the skin while it cooks and gives it the most amazing color. It looks like it’s straight out of a magazine!
Products Needed

How to Roast a Turkey
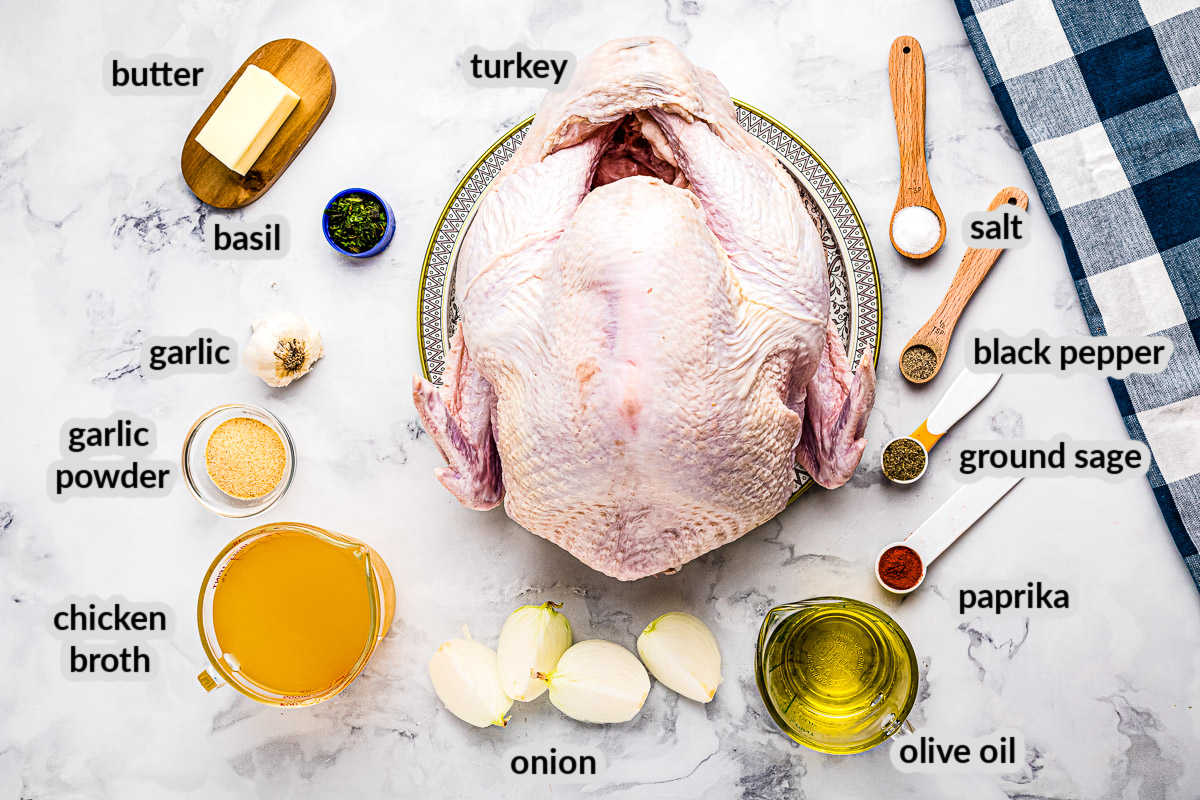
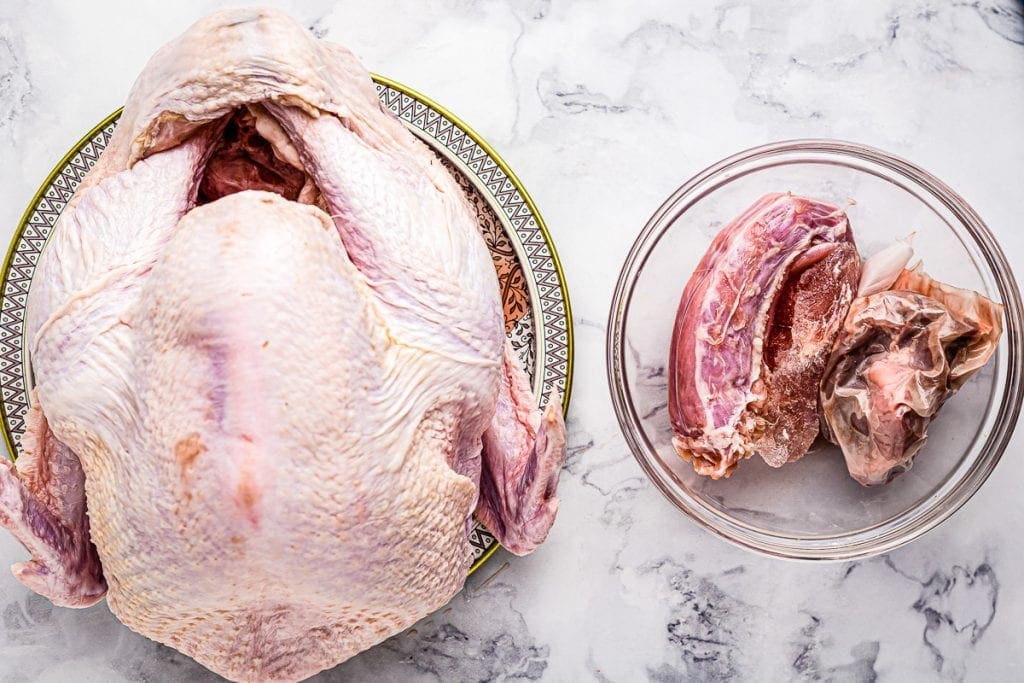
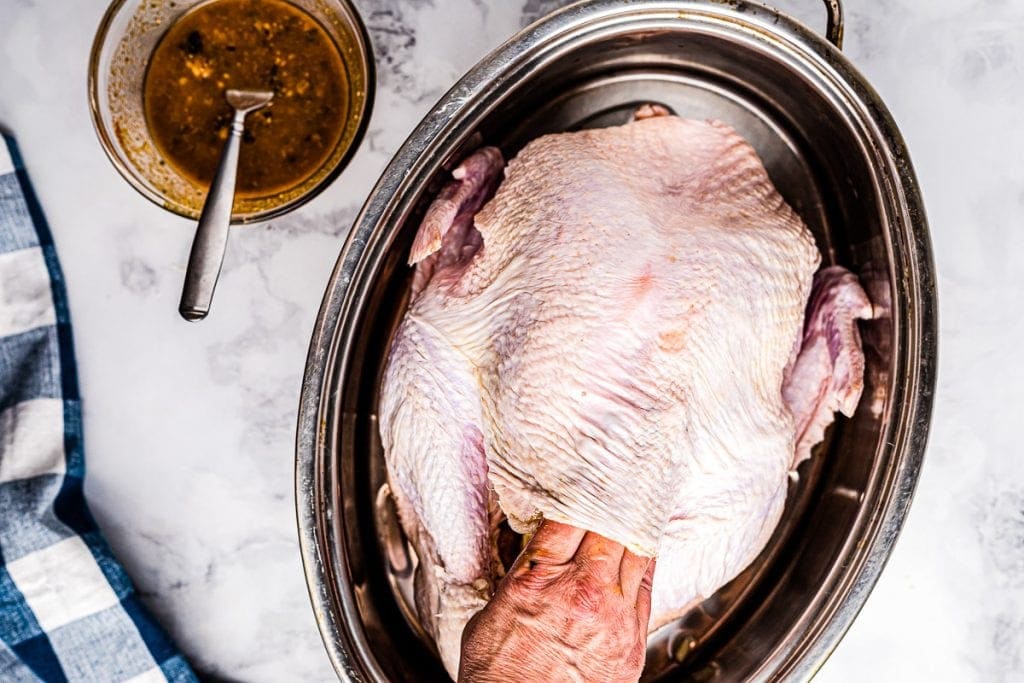
You will need a thawed 12-pound turkey. Start by removing the giblets. They are usually in a bag inside the cavity. Place the turkey in the roasting pan.
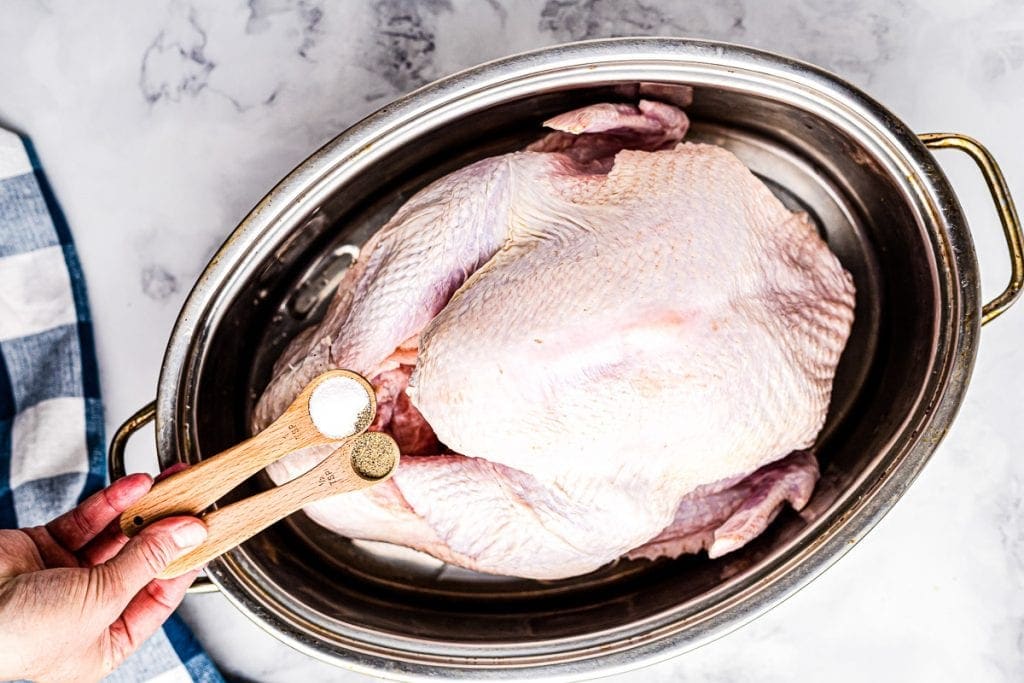
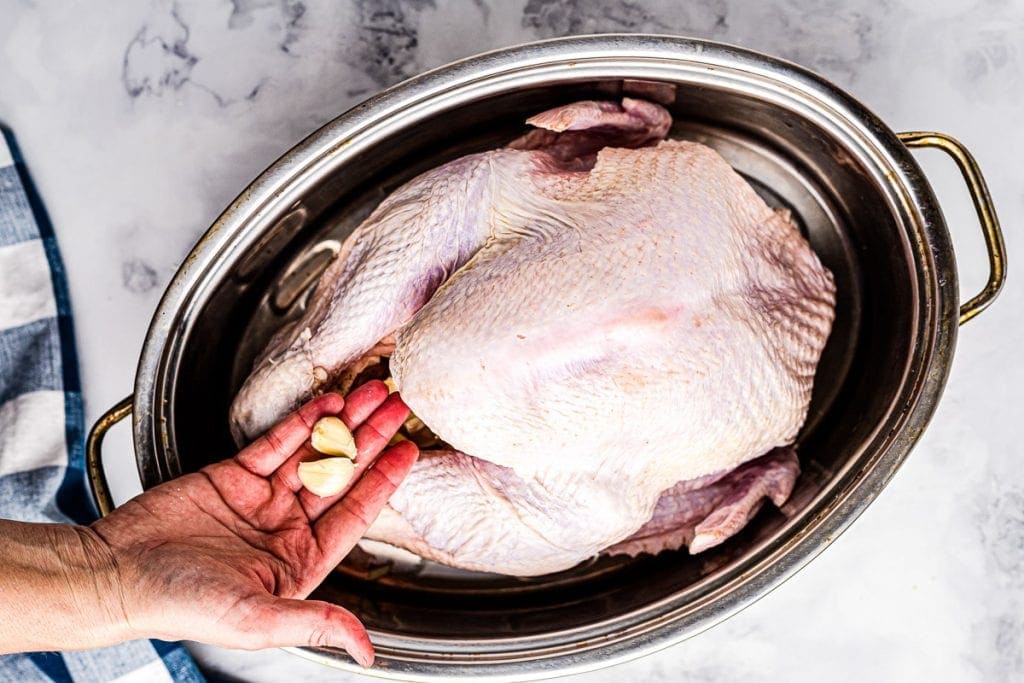
Season the inside with salt and pepper and then place the onion and garlic inside the cavity.
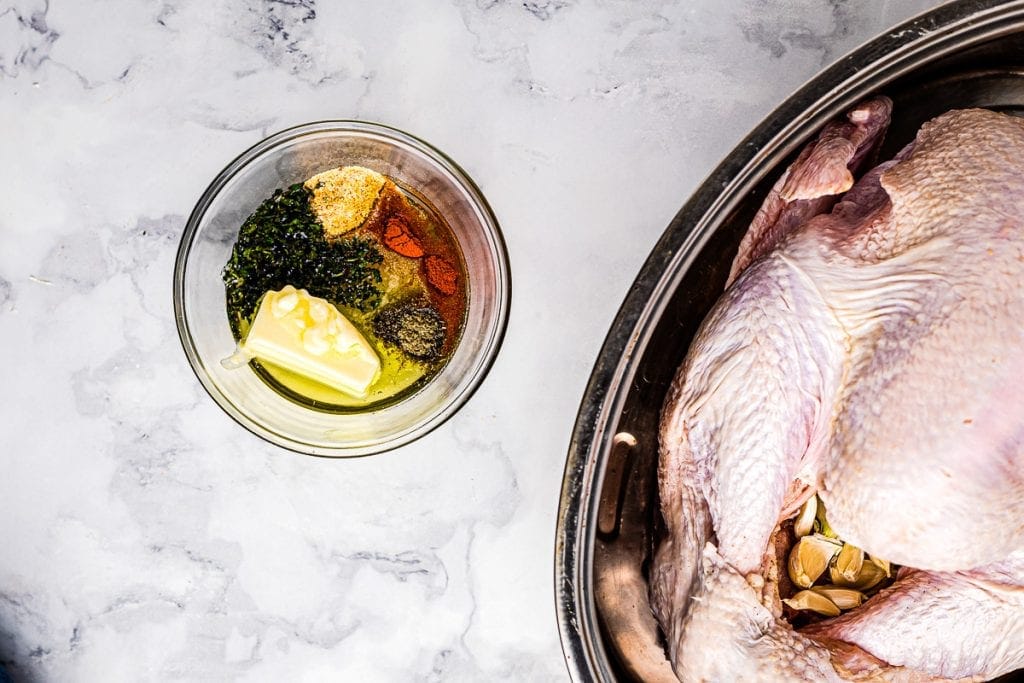
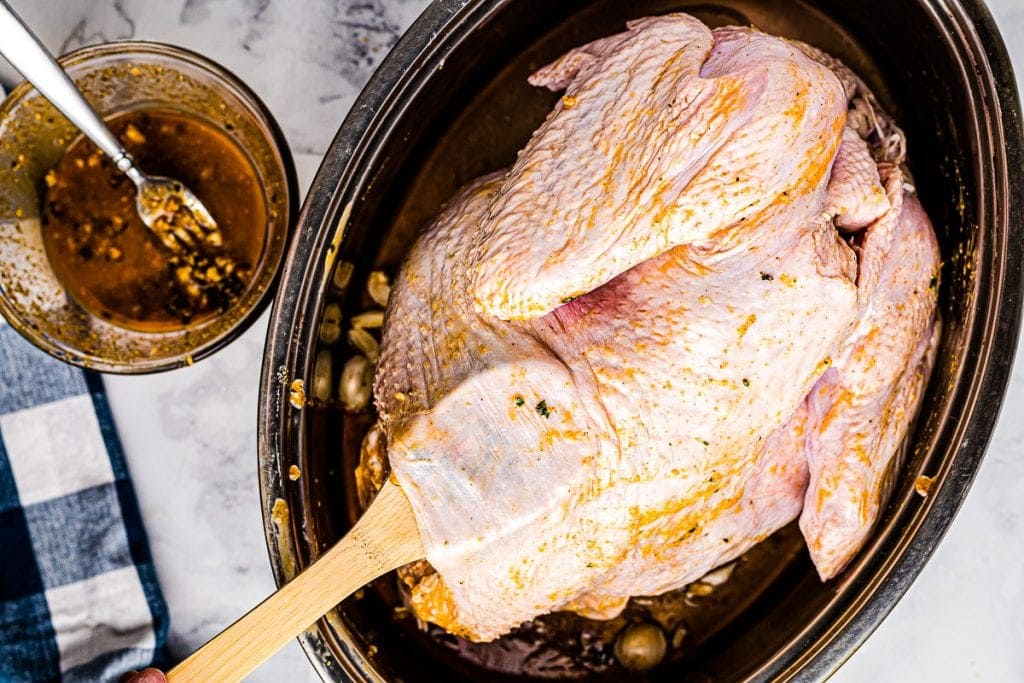

Make the butter rub by combining the olive oil, butter, garlic powder, basil, sage, and paprika in a small bowl.
You will rub part of this mixture under the skin and on top of it. Start by gently lifting the skin covering the breast meat and rub the butter underneath. Turn the turkey over and rub the butter under the skin cover the legs, too.
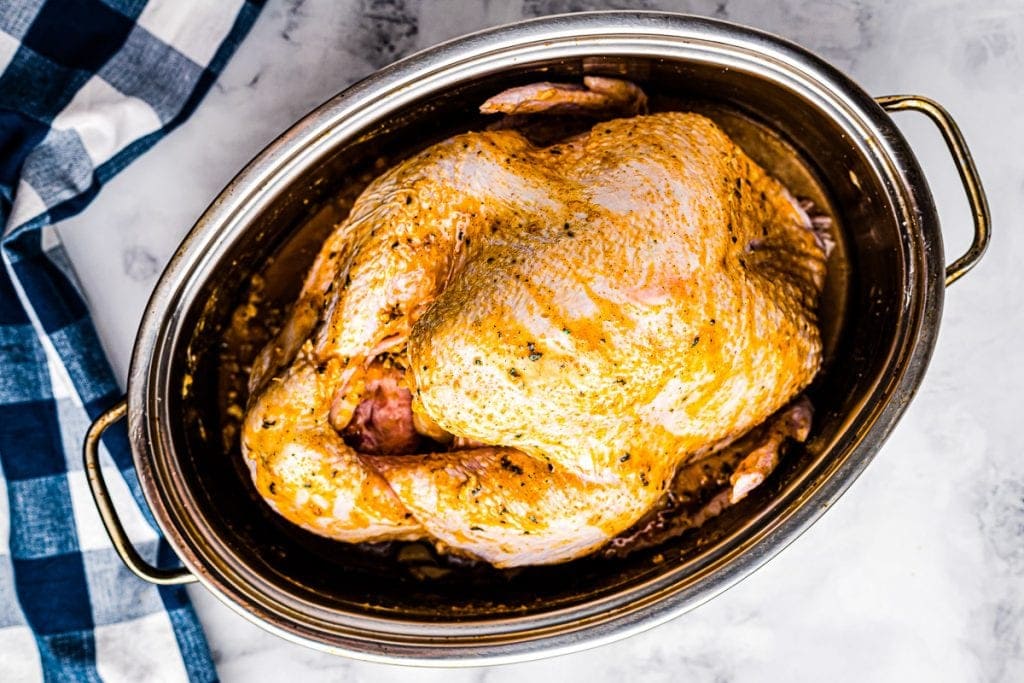
Turn it back over (breast-side-up) and rub the rest of the mixture over the outside of the turkey.
Pour the chicken broth into the bottom of the roasting pan and then cover it with the lid.
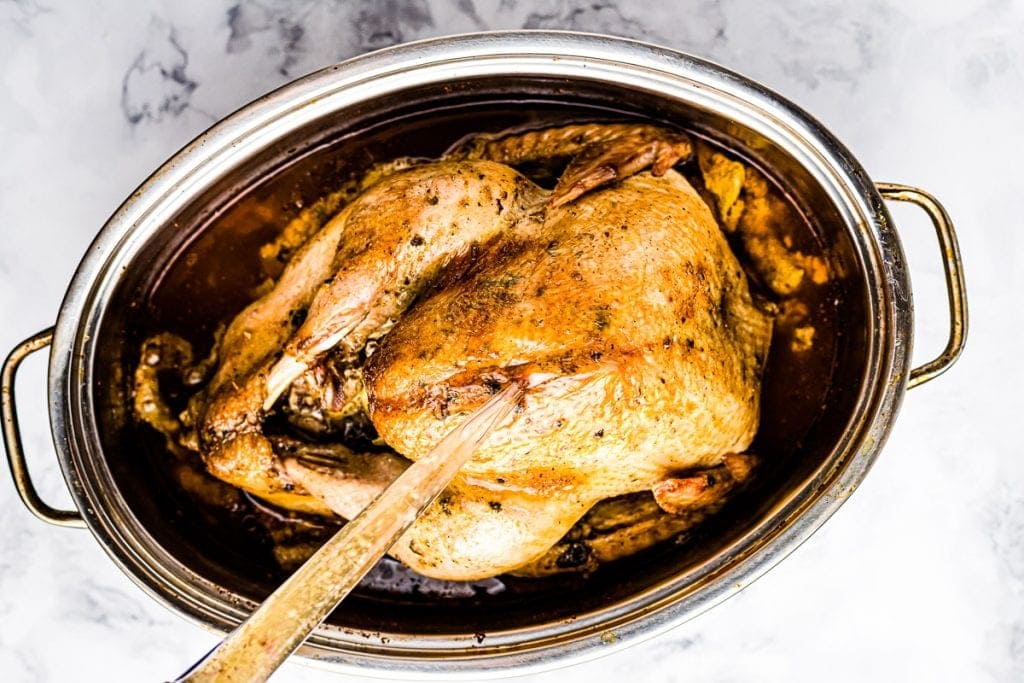

Roast it for three hours at 325 degrees F. Remove the lid and baste the top of the turkey with the liquid in the bottom of the pan.
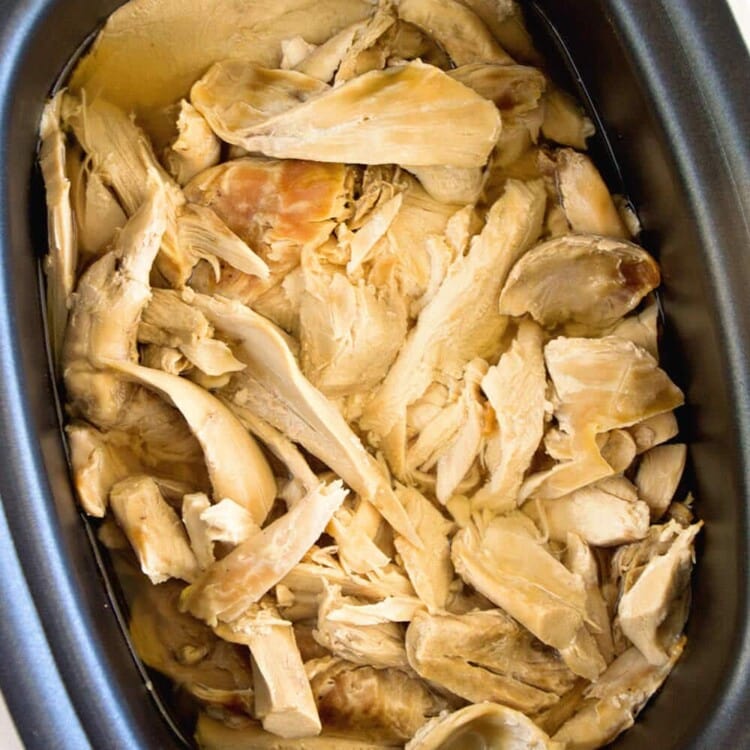
Leave the turkey uncovered and bake it until it’s golden brown and the thickest part of the thigh is 165 degrees F.
Once it’s done, take it out of the oven and leave it in the pan. Tent the roasting pan with foil and let it rest for 30 minutes before carving it.
Recipe FAQs!
Here are some questions I get about roasting turkey! If I didn’t answer yours be sure to ask in the comments – I am here to help!
Mine is bigger/smaller than 12 pounds – how long should I roast it?
The rule of thumb is 15 minutes of cooking time (at 325 degrees) for every pound. So, just multiply the weight of your turkey by 15 and then divide by 60. That will give you an estimated cooking time. So, if you have a 10-pound one you would need 150 minutes of cooking time which is 2 and 1/2 hours.
Keep in mind this is an estimate – you should always check the internal temperature. It is fully cooked when the temperature is 165 degrees F at the thickest part of the thigh.
If you bake it at a higher or lower oven temperature you will need to adjust the time, too. My estimate assumes you bake it at 325 degrees.
Should I rinse the turkey first?
This is something people used to do, but it’s not necessary. The problem when you do this is that you risk spreading bacteria around your sink and counters.
Unless the recipe specifies this step (for example, turkeys that are brined) feel free to skip it!
Can I roast a frozen turkey?
Technically, you can but I don’t recommend it because it will take a lot longer! It’s always better to bake a fully thawed one, so if you have a frozen one make sure to allow plenty of time for it to thaw in the refrigerator.
My turkey has one of those red things that pop up when it’s done cooking – can I skip using a thermometer?
Honestly, they are not reliable and it’s better to use a meat thermometer to determine if it’s done. You won’t run the risk of over or under-cooking it!
Why does it need to rest before you carve it?
Allowing it to rest for 30 minutes lets the juices redistribute back into the meat. If you slice it as soon as it comes out of the oven the juices will run out and the meat will be dryer. For the juiciest turkey always let it rest!
How long does it take to thaw a turkey?
This is a tough question because it depends on your refrigerator and the size of your turkey! My best advice is to give it several days to thaw or longer if you have a big one.
The safest way thaw it is in the refrigerator – don’t thaw it at room temperature!
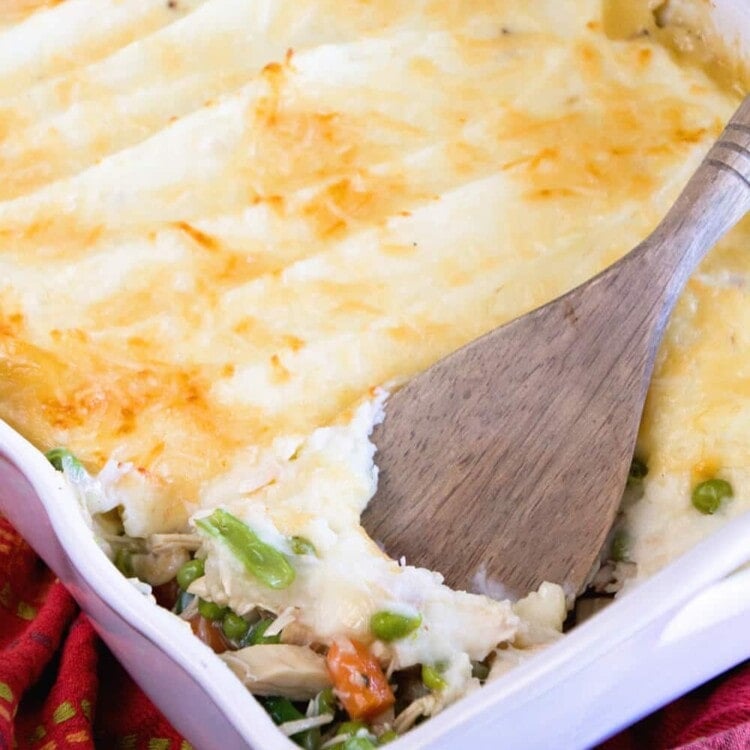
Side Dish Recipes!
If you’re making roast turkey you’re going to want some delicious holiday side dish recipes to go with it! Here are some amazing recipes you might like to try:
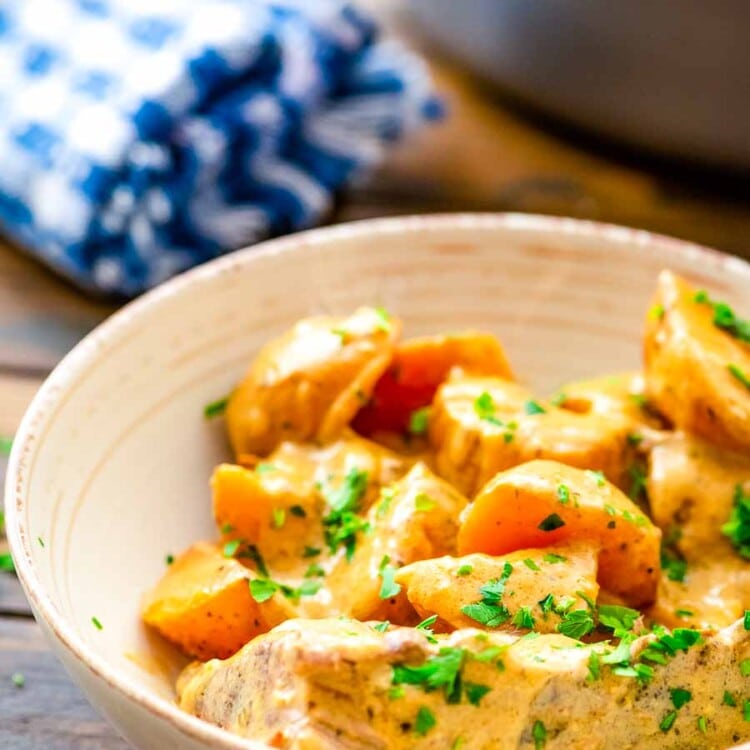
- Make a batch of my Best Mashed Potatoes! They are so creamy and always a hit when I make them.
- Thanksgiving isn’t complete without Sweet Potato Casserole! My recipe stays true to the classic complete with ooey-gooey marshmallows!
- My Easy Stuffing pairs perfectly with turkey. It’s so delicious!
- Save oven space and make Green Bean Casserole in your crock pot! This is my favorite way to make it.
- Cheesy Scalloped Potatoes are the perfect holiday side dish – everyone loves them!
- Don’t forget some homemade Cranberry Sauce! It’s an easy recipe you can make in your Instant Pot.
- Everyone will love some Baked Mac and Cheese!
- We’ve round up our favorite quick and easy Thanksgiving Side Dish recipes that will make this holiday stress-free and enjoyable!

I hope you give this recipe a try – I know you will love it! It’s such an easy recipe, but it looks like you worked forever to make it. Everyone will be so impressed!
Love it? I knew you would! Rate it, please! It would be awesome if you’d give it a five-star rating below.
If you snap any photos, don’t forget to tag me on Instagram @julieseatsandtreats or #julieseatsandtreats that way I’m sure to see your pictures!
Did you make this? If you snap a photo, please be sure tag me on Instagram at @julieseatsandtreats or #julieseatsandtreats so I can see your yummy treat!
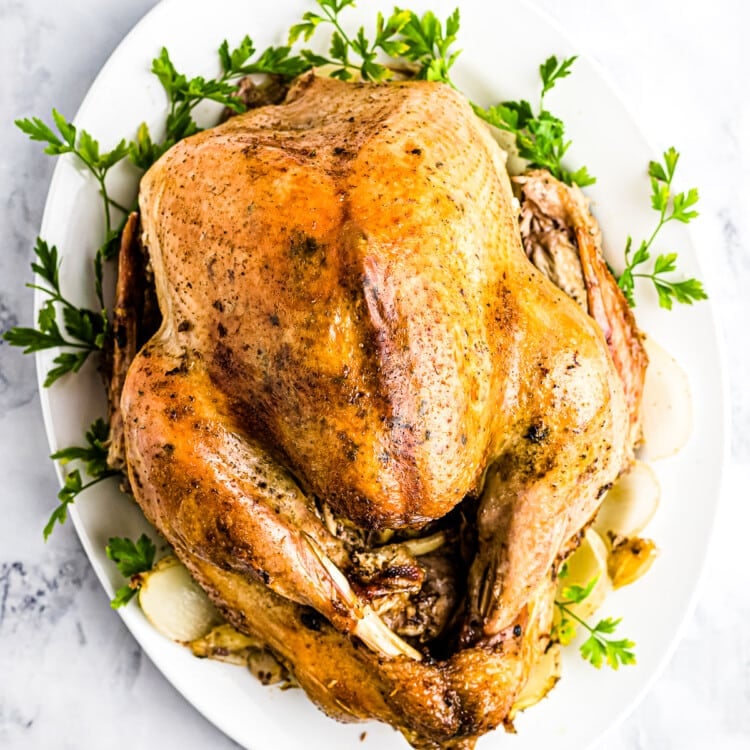
Roast Turkey
Tips and tricks to get the perfectly juicy turkey with seasoned, crisp skin!
Ingredients
- 12 lb whole turkey
- ½ c. olive oil
- ¼ c. butter softened
- 2 Tbsp garlic powder
- 2 tsp dried basil
- 1 tsp ground sage
- 1 tsp paprika
- 1 tsp salt
- ½ tsp black pepper
- 2 c. chicken broth
- 1 yellow onion peeled and quartered
- 1 garlic bulb
Instructions
- Preheat the oven to 325 degrees F. Clean the turkey (discard giblets and organs). Place in a roasting pan with a lid.
- Season the inside of the turkey with black pepper and salt. Place quartered onion and garlic in the cavity of turkey.
- In a small bowl combine olive oil, butter, garlic powder, basil, sage, and paprika.
- Gently lift the skin away from the turkey and rub half of the mixture under the skin. Make sure sure to flip the turkey and do this to the underside of the bird and the drumsticks etc.
- Rub the remaining butter mixture on the outside of the turkey.
- Pour chicken broth in the bottom of the pan. Place cover on pan.
- Bake in the preheated oven for 3 hours. Remove the lid of the pan, baste the turkey and return to the oven uncovered. Cook until turkey is browned and the thickest part of the thigh is 165 degrees F.
- Remove turkey from the oven, tent with aluminum foil and allow to rest for 30 minutes before carving.
Tips
Mine is bigger/smaller than 12 pounds – how long should I roast it?
The rule of thumb is 15 minutes of cooking time (at 325 degrees) for every pound. So, just multiply the weight of your turkey by 15 and then divide by 60. That will give you an estimated cooking time. So, if you have a 10-pound one you would need 150 minutes of cooking time which is 2 and 1/2 hours.
Keep in mind this is an estimate – you should always check the internal temperature. It is fully cooked when the temperature is 165 degrees F at the thickest part of the thigh.
If you bake it at a higher or lower oven temperature you will need to adjust the time, too. My estimate assumes you bake it at 325 degrees.
Should I rinse the turkey first?
This is something people used to do, but it’s not necessary. The problem when you do this is that you risk spreading bacteria around your sink and counters.
Unless the recipe specifies this step (for example, turkeys that are brined) feel free to skip it!
Can I roast a frozen turkey?
Technically, you can but I don’t recommend it because it will take a lot longer! It’s always better to bake a fully thawed one, so if you have a frozen one make sure to allow plenty of time for it to thaw in the refrigerator.
My turkey has one of those red things that pop up when it’s done cooking – can I skip using a thermometer?
Honestly, they are not reliable and it’s better to use a meat thermometer to determine if it’s done. You won’t run the risk of over or under-cooking it!
Why does the it need to rest before you carve it?
Allowing it to rest for 30 minutes lets the juices redistribute back into the meat. If you slice it as soon as it comes out of the oven the juices will run out and the meat will be dryer. For the juiciest turkey always let it rest!
How long does it take to thaw a turkey?
This is a tough question because it depends on your refrigerator and the size of your turkey! My best advice is to give it several days to thaw or longer if you have a big one.
The safest way thaw it is in the refrigerator – don’t thaw it at room temperature!
Nutrition Information
Calories: 589kcal (29%), Carbohydrates: 2g (1%), Protein: 70g (140%), Fat: 32g (49%), Saturated Fat: 9g (56%), Cholesterol: 242mg (81%), Sodium: 736mg (32%), Potassium: 793mg (23%), Fiber: 1g (4%), Sugar: 1g (1%), Vitamin A: 398IU (8%), Vitamin C: 3mg (4%), Calcium: 45mg (5%), Iron: 3mg (17%)
Twila says
What about using a Turkey bag? Or Roaster oven
Julie Evink says
I’ve used a turkey bag and just followed the recipe on the back. It won’t be as flavorful and the skin isn’t crispy, but still super moist and delicious!
Nicole C says
What do you do if you’re roasting pan doesn’t have a lid?
Nicole C says
*your
Julie Evink says
I would put tinfoil over the top of it like a lid!
Katie says
Looks delicious! Can’t wait to try this one.
Julie says
Hope you enjoy it!
Erica Schwarz says
LOVE this blend of seasonings for turkey! The paprika was a little different for me, but I wanted to try and we just loved it. Great tips, the bird was delicious.
Julie says
I’m so glad you loved it!
Julia F says
Such great tips that will set anyone for success. Thanks for taking the guesswork out of it!
Julie says
You’re welcome!
Toni Dash says
I love that perfect crispy skin!! So good and delish!
Julie says
We do too! Glad you enjoyed it!
Jen says
Already trying to prep for all the cooking that day. Thanks for the tip about not relying on the bird pop up “done” button. I’m adding a thermometer to my shopping list. This looks so good!
Julie says
Yes! A thermometer is so important! Hope you enjoy!