Rainbow Jell-O Cups
Leave a Comment
Posted: 02/22/24
This post may contain affiliate links. Please read our disclosure policy.
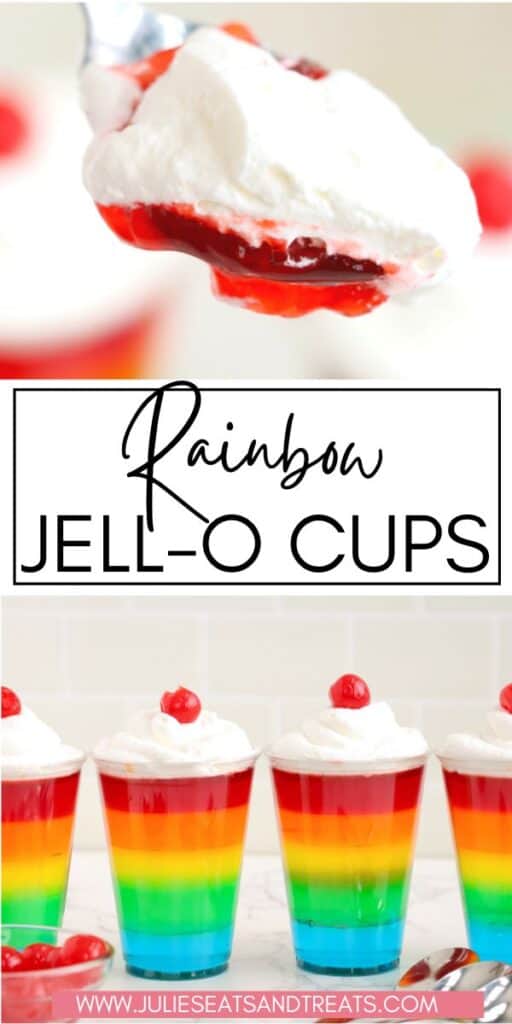
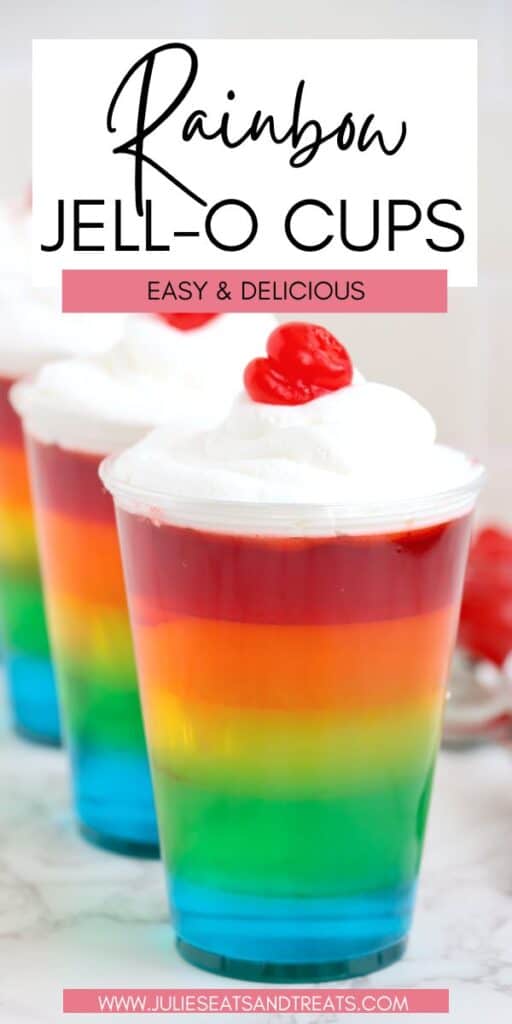
Delicious Rainbow Jell-O Cups are so fun for kids to eat on St. Patrick’s Day, for a rainbow themed party, during the summer or just because! Learn how to make these jello cups with layers for a special treat.
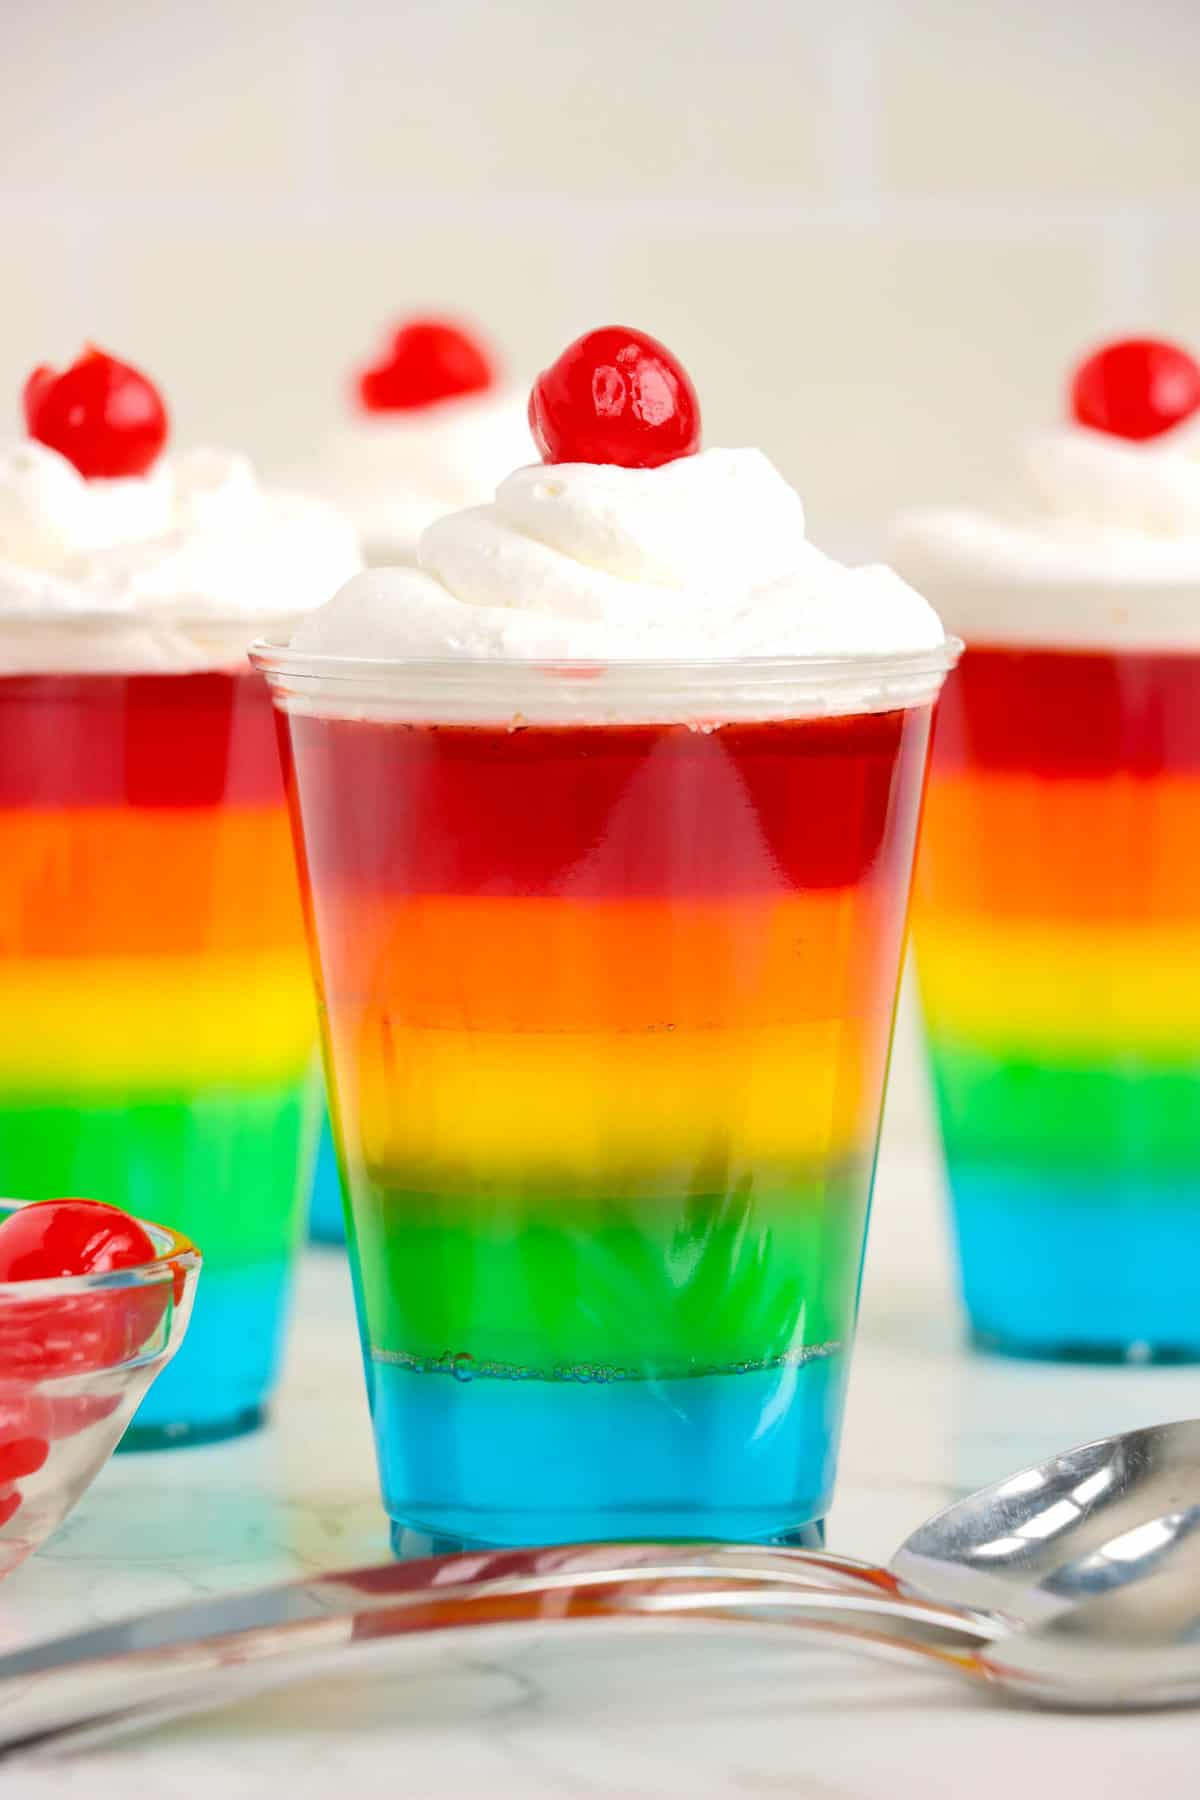
Somewhere over the rainbow jello cups, there’s a kid who’s smiling from ear to ear! Who wouldn’t smile at the most fun jello cup ever?! This fun recipe takes this jiggly sweet treat to the next level by using layers and layers of beautiful colors. It takes a bit of time and patience to make, but it is beyond worth it once you see the end result in person. They’re too cute to resist!
I love jell-o treats. Whether it’s jell-o patriotic parfaits or cottage cheese jello salad, I’m always coming up with creative ways to use this tasty sweet. So that’s why I ventured out to create rainbow jello with cool whip topping and yes, the cherry on top! If you’re looking for a recipe to make for the kids, or with the kids, this is just the thing.
Why You’ll Love Rainbow Jello Cups
- This simple recipe is kid-friendly and so easy to make. I mean, I love it as an adult too because who doesn’t love jello! Especially when it has colorful layers like the rainbow. Perfect for an easy dessert or snack.
- Making homemade jello is more affordable than buying it pre-made at the grocery store. Sure, the premade cups are convenient. But they aren’t layered rainbow fun and definitely not as cheap as making your own!
- You can use these layered jello cups as a themed treat for St. Patrick’s Day, birthday parties and so much more. Use layers of red and green jello for an easy Christmas theme, red, white and blue for the 4th of July or layers of pink and red for Valentine’s Day.
Ingredients for Rainbow Jell-o Cups
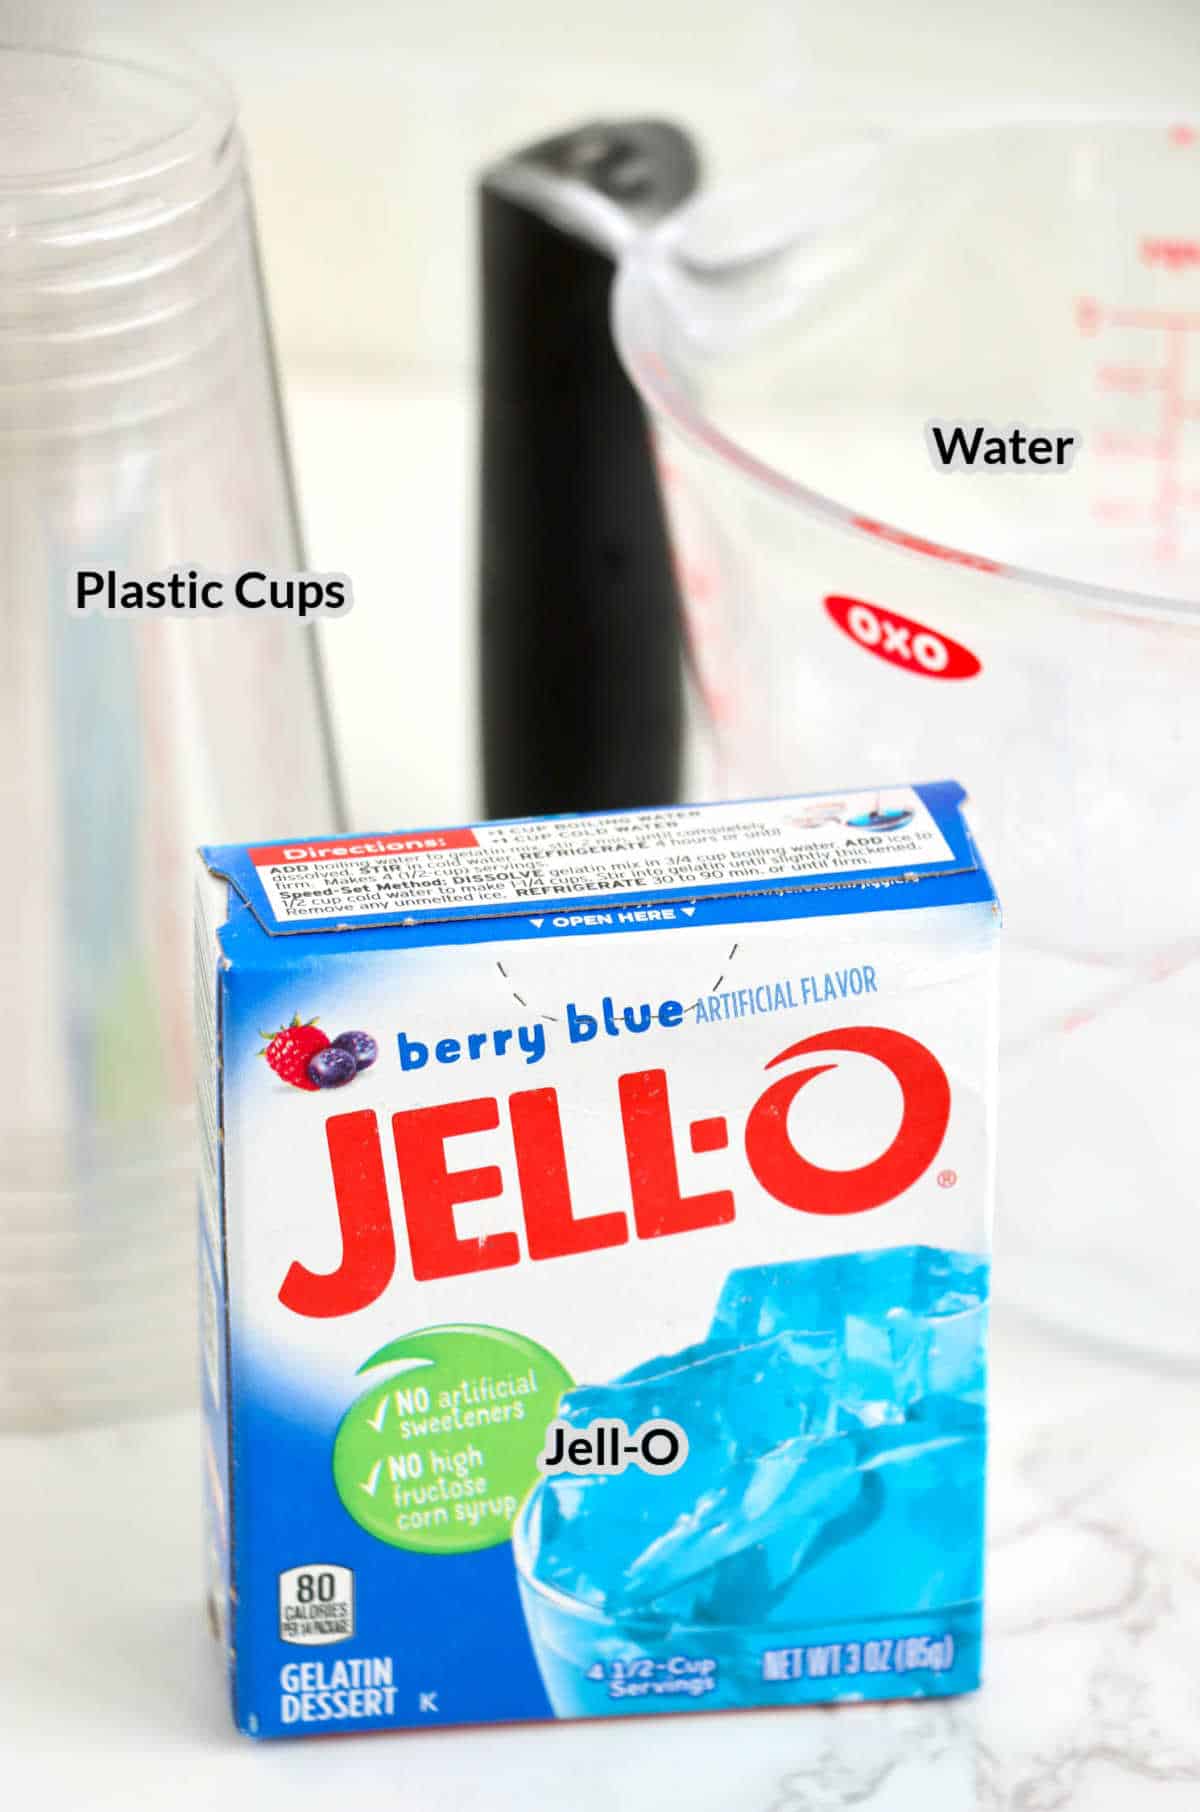
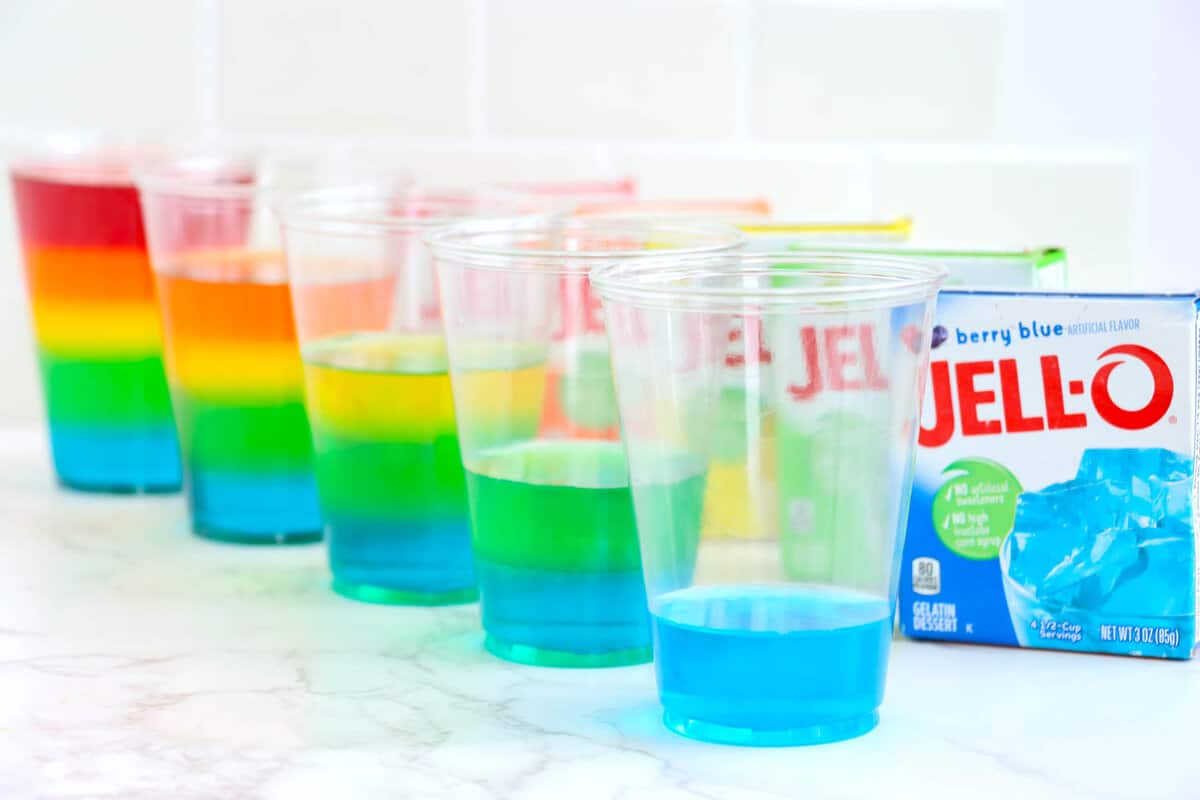
- Jell-O – You’ll need multiple different jello flavors for each layer of color: blue, green, yellow, orange, and red. I love the flavors berry blue, lime, yellow, orange, and strawberry or cherry. You could also use grape, watermelon or any other flavor!
- Water – For the best flavor, use purified or filtered water. Sometimes tap water can have a funny flavor that can affect the taste of the jello. We recommend using cold water to help dissolve the granules of jello.
- Plastic cups – I highly recommend buying thick plastic disposable cups. They are a bit more sturdy but are still disposable so that you don’t have to wash each cup after the treats have been eaten.
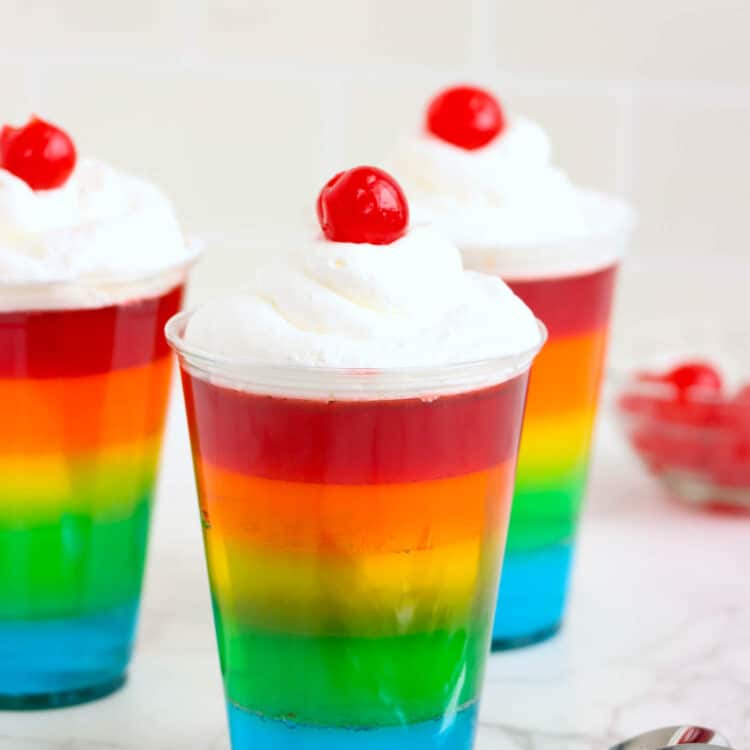
- Whipped cream – Homemade whipped cream is always the best. However, you can use store bought whipped cream or cool whip too!
- Cherries – A jar of maraschino cherries is the perfect finishing touch on this rainbow jello recipe.
Helpful Tools
How to Make Rainbow Jell-o Cups
- Before you start making the jello, it is important to prepare space inside of your fridge for 12 completed jello cups! Clear space and make sure it’s tall enough for the height of the cups. Then, place 12 clear plastic cups on a baking sheet pan and set aside.
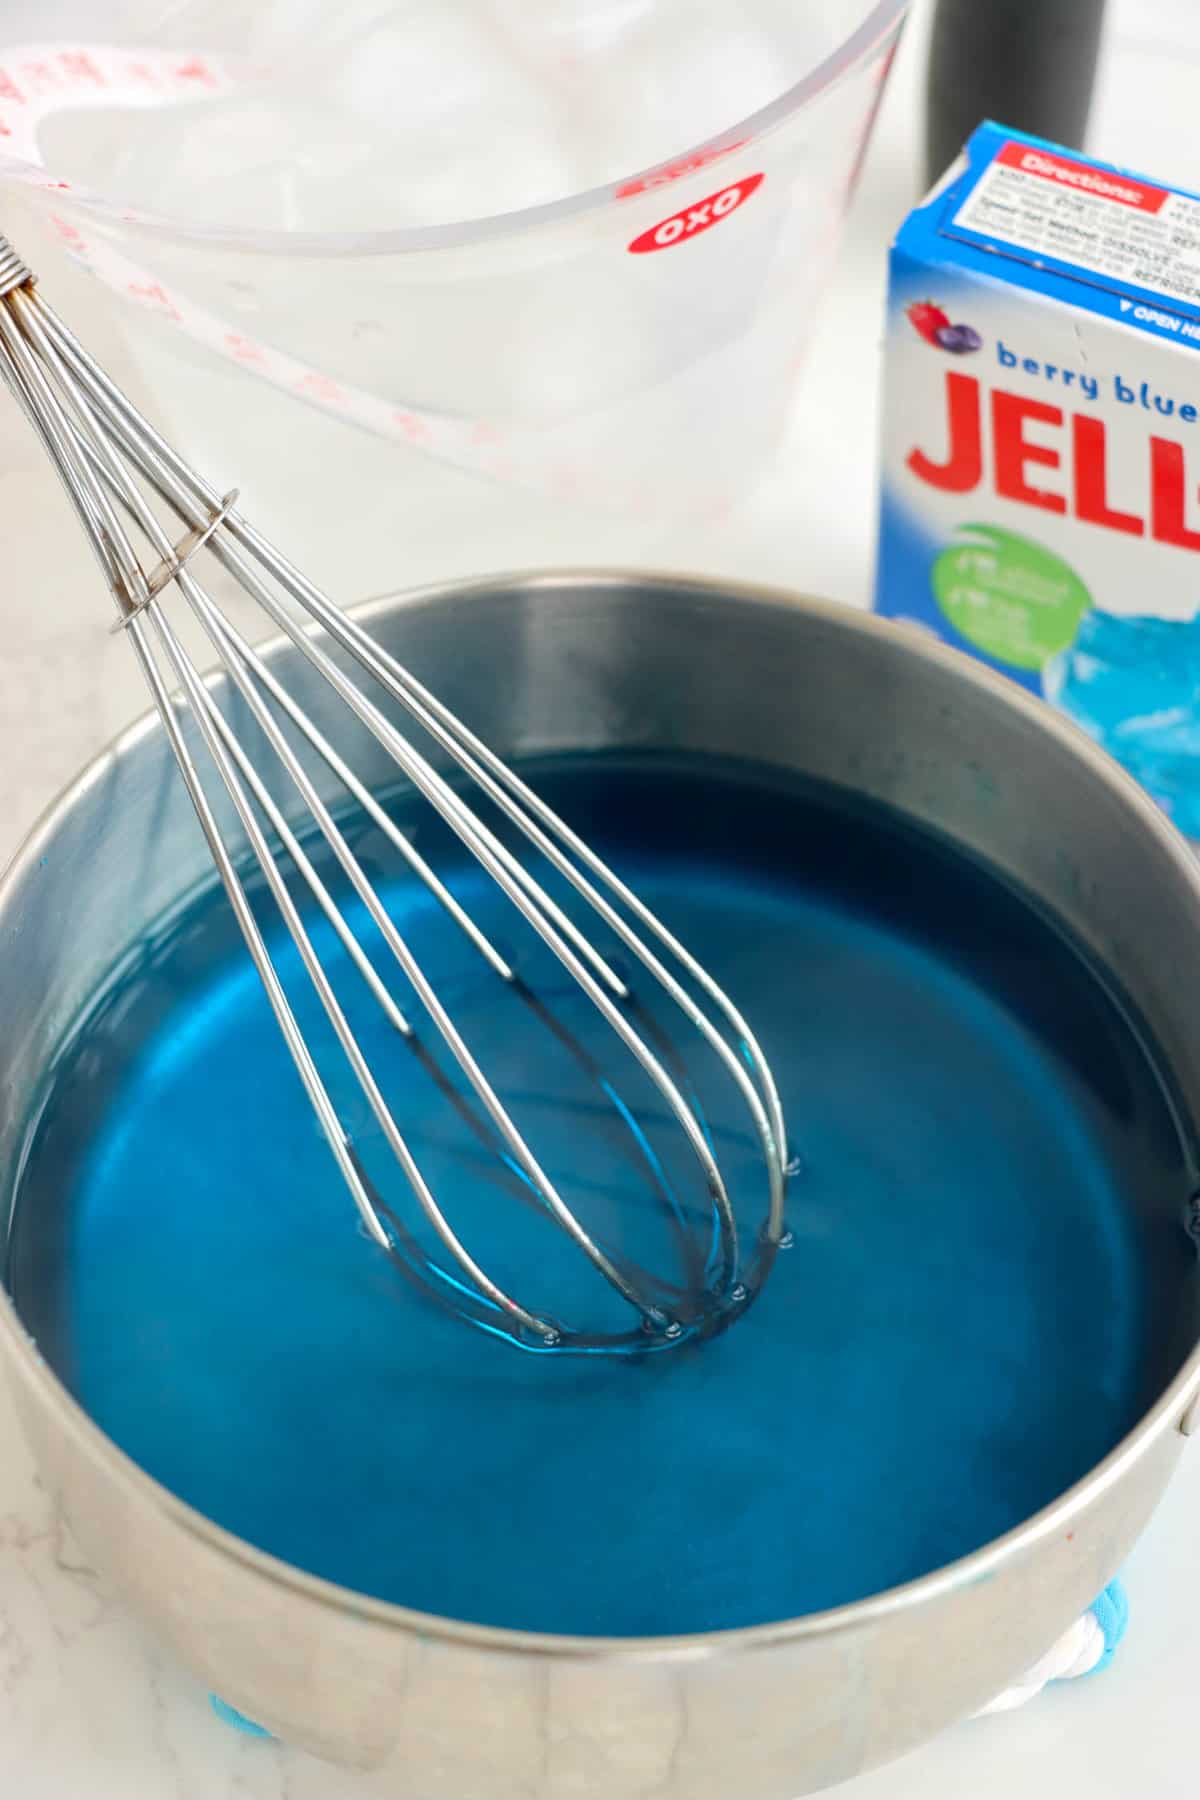
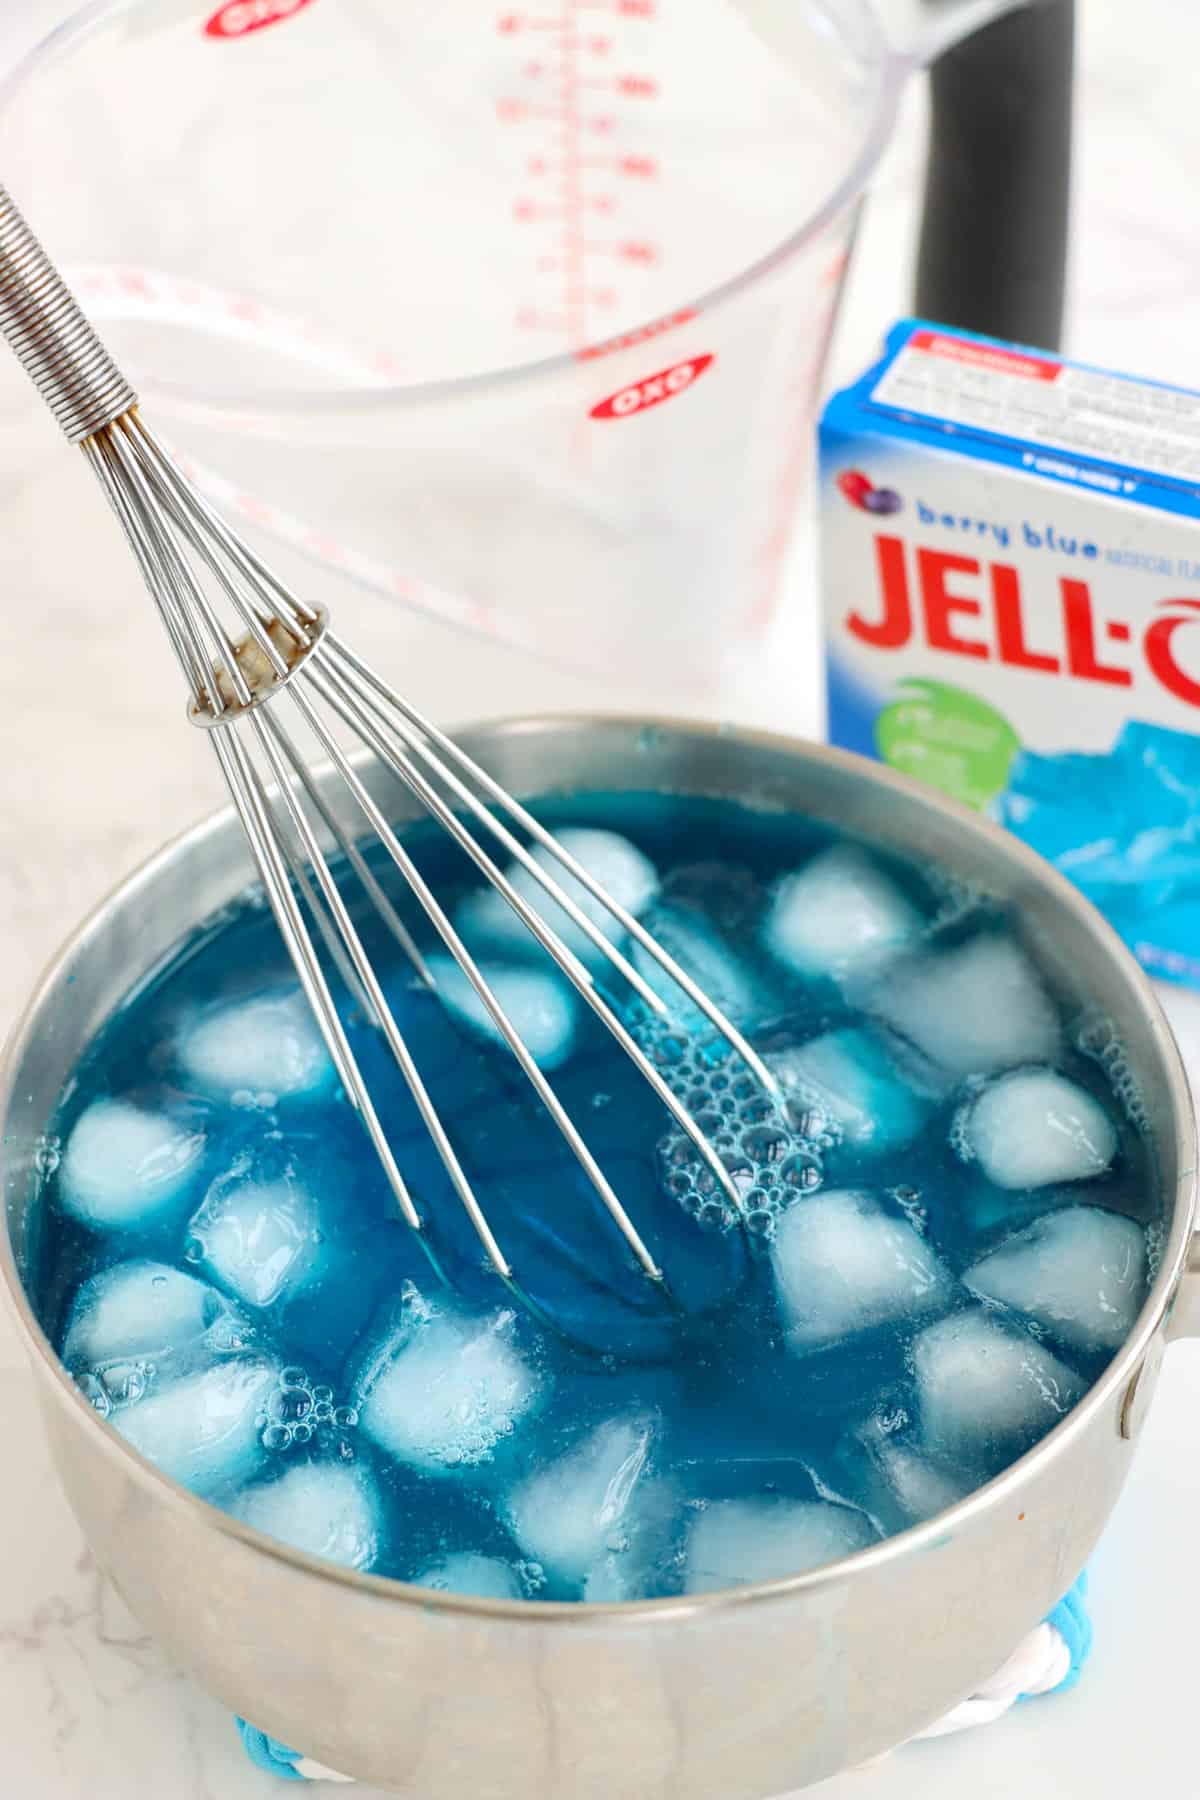
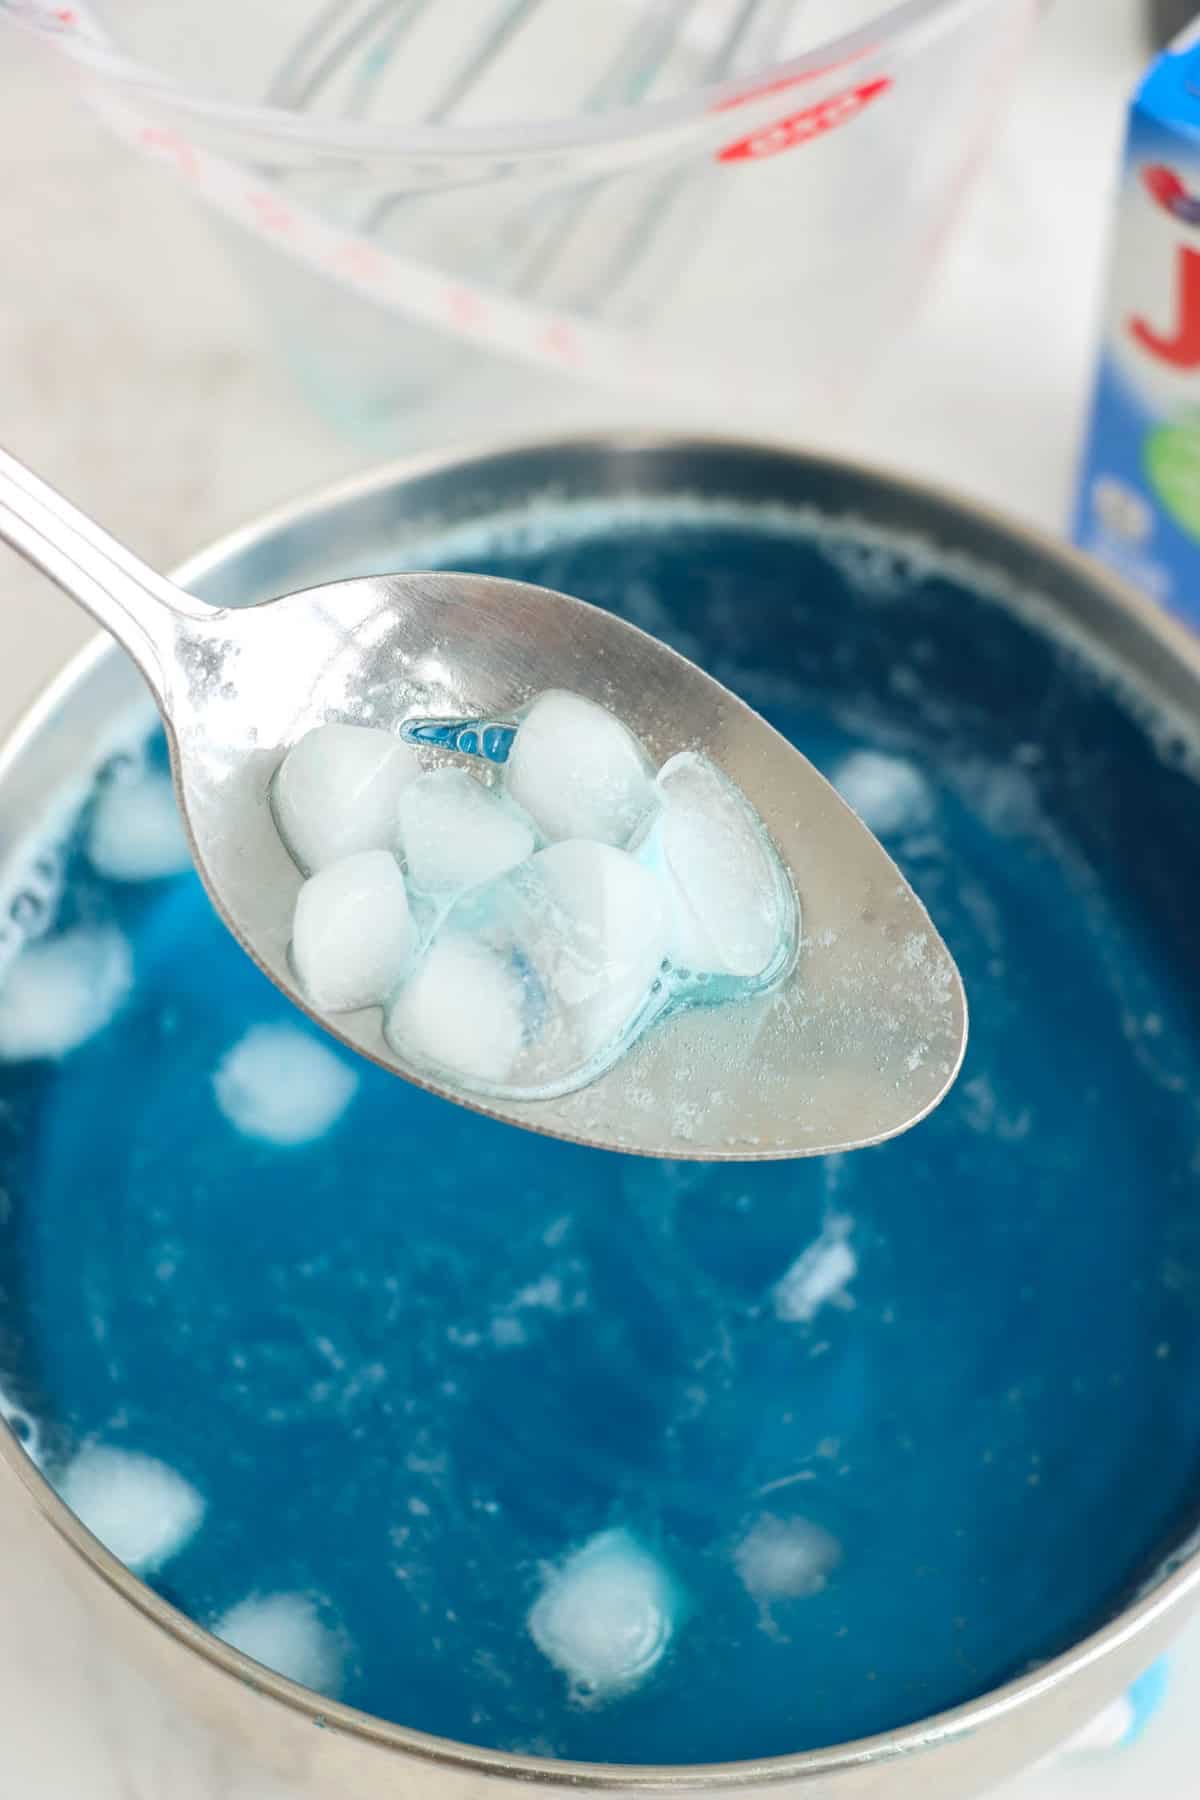
- Prepare the blue berry jello according to the package instructions. At this step, I recommend using the speed-set method with ice cubes. I have found that it works best for this recipe.
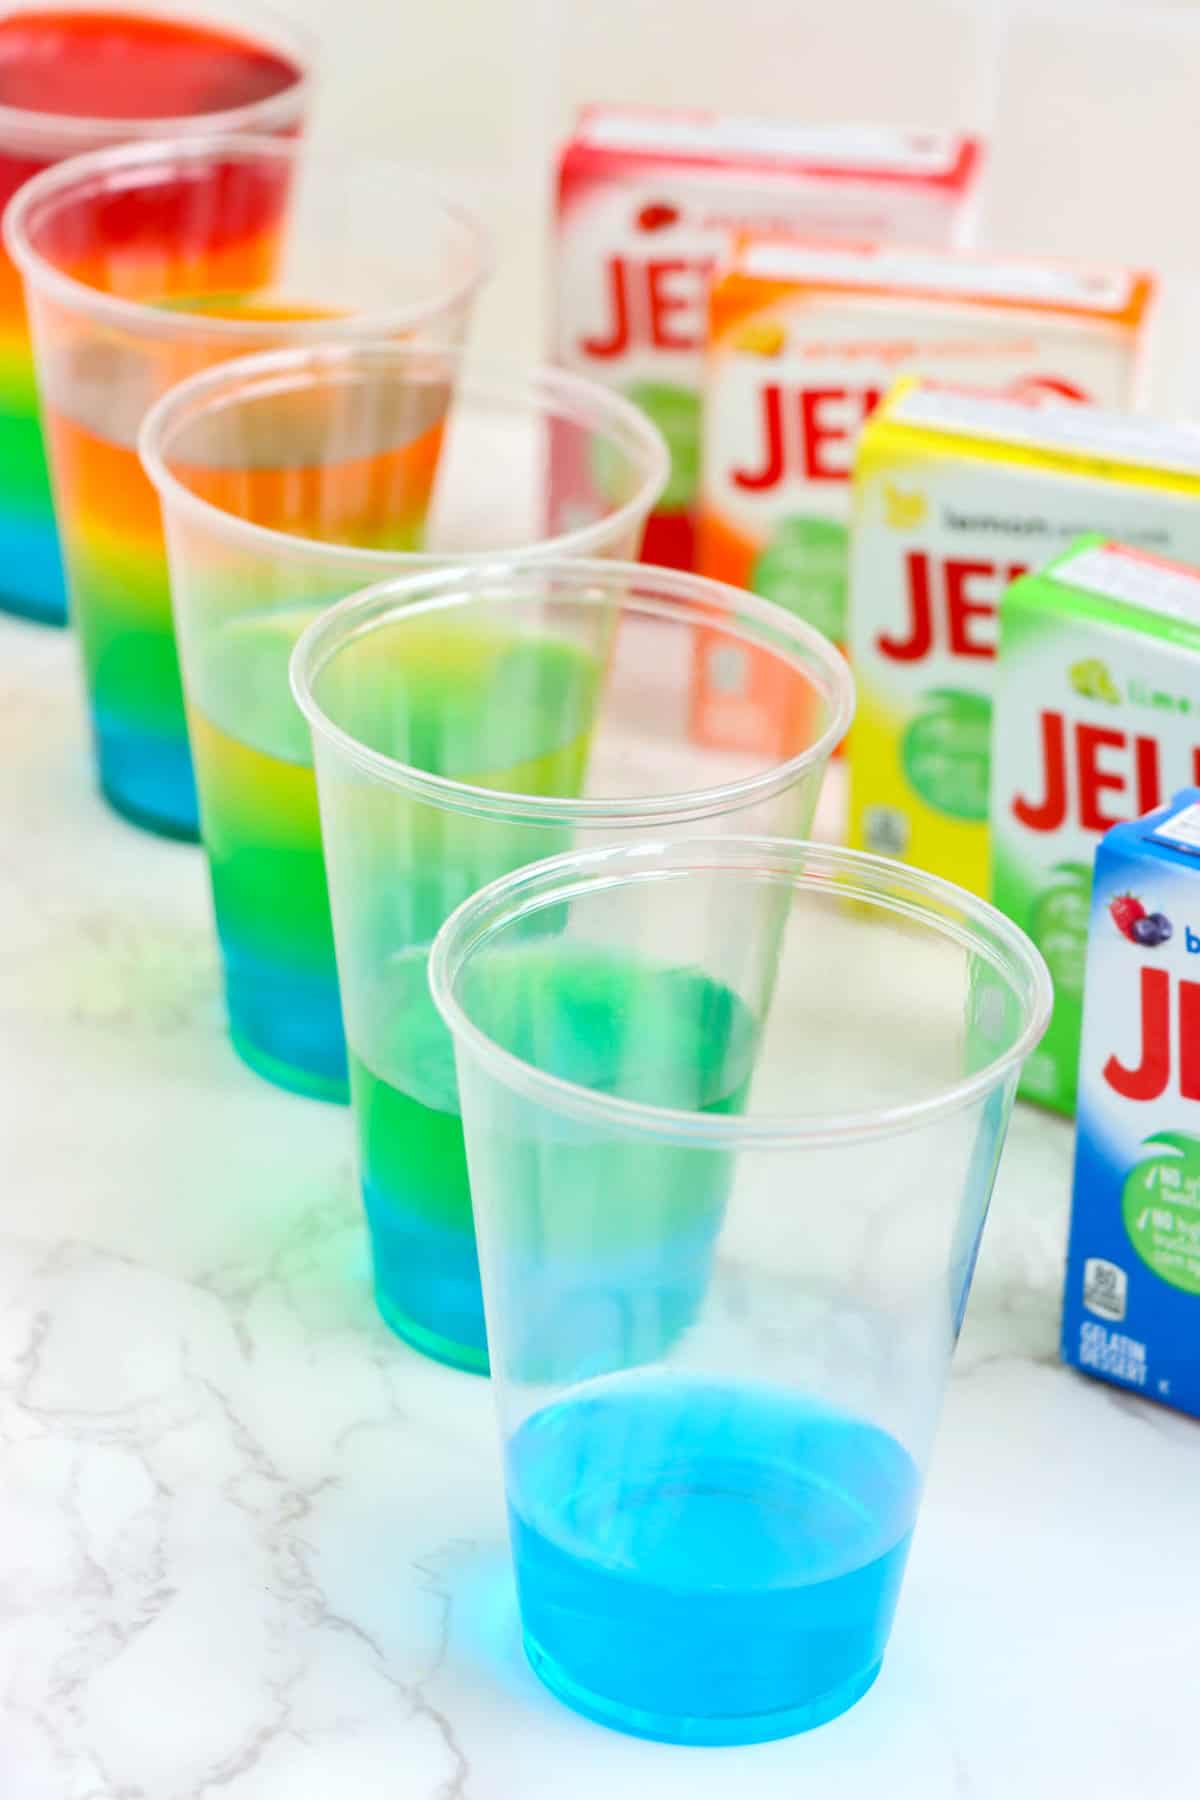
- Using a bowl with a spout or a turkey baster, pour the jello into each of the 12 plastic cups, evenly dividing the mixture among each one.
- Place the cups with blue jello into the refrigerator and let them set for about an hour. Then, continue the exact same process with each of the flavors: lime, lemon, orange, and cherry.
- Once every single rainbow layer is complete and set, top each cup with dollop of whipped cream and a cherry.
- Serve and enjoy!

How to Store Leftover Rainbow Jell-o Cups
The best thing about jello is that it stores really well in the refrigerator! Cover each layered rainbow jello cups tightly with plastic wrap and store in the refrigerator for up to a week. Leave the whipped cream topping and cherries off of the cups if you plan to store them. I do not recommend freezing the jello cups!
Can I put jello in the freezer to make it set more quickly?
If you need to speed up the setting process, you can place the cups in the freezer. However, you need to watch it very closely! Only leave jello in the freezer for 15-20 minutes, then move it back to fridge to let it finish setting if still needs some time to chill. However, for these rainbow jello cups I would only recommend doing this for the first layer. I do not recommend putting set layers of jello into the freezer.
Pro Tips for the Best Rainbow Jell-O Cups Recipe
- For more rainbow pizzaz, use rainbow sprinkles on top of the whipped cream topping!
- Go slow adding each layer of jello on top of the next. The more time you take and the more careful you are, the better the layers will look in the final product.
- Feel free to swap each jello for their sugar-free version. Use sugar free whipped topping too and you’ve got a fun and delicious sugar free treat!
I hope you have the most fun making these exciting layered jello treats!
More Kid Friendly Recipes You’ll Love
- Looking for some fun lunch ideas for the kiddos? These Air Fryer Pizza Bagels are the best! Even the picky eaters will gladly eat this yummy snack.
- Ants on a Log is a classic kid-friendly treat! Great for an after-school snack, a snack during the summer, and even as part of their school lunches.
- Air Fryer Pigs in a Blanket are great for breakfast, snack, lunch and even dinner. A versatile treat that everyone loves!
- We love to make Pancake Bites for breakfast. They’re a really great on-the-go snack and perfect for lunches too!
Did you make this? If you snap a photo, please be sure tag me on Instagram at @julieseatsandtreats or #julieseatsandtreats so I can see your yummy treat!
Rainbow Jell-O Cups
Easy to make Rainbow Jell-O cups are a delicious treat kids love!
cups
Ingredients
- 3 ounces berry blue jello (1 box)
- 3 ounces lime jello (1 box)
- 3 ounces lemon jello (1 box)
- 3 ounces orange jello (1 box)
- 3 ounces cherry jello (1 box)
- water
- OPTIONAL: whipped cream or Cool Whip, sprinkles, cherries
Instructions
- Prepare a place in your refrigerator where 12 cups will fit. Place 12 plastic clear cups on a large baking sheet for easy transportation. Set aside.
- Prepare berry blue jello according to the package directions. I recommend the Speed-Set Method with ice cubes.
- Transfer jello to a cup with a spout or use a turkey baster to distribute jello evenly among the 12 clear plastic cups.
- Then place cups in the refrigerator for 1 hour or until set to the touch.
- Next, continue this process with the lime, lemon, orange, and cherry layers.
- If you choose, top with whipped cream and sprinkles or a cherry.

Nutrition Information
Serving: 1cup, Calories: 135kcal (7%), Carbohydrates: 32g (11%), Protein: 3g (6%), Sodium: 165mg (7%), Potassium: 2mg, Sugar: 30g (33%), Calcium: 1mg, Iron: 0.05mg
Leave a Comment